Completed sao and shamisen (almost)

Hello everyone!

I am super excited because all the wooden parts of the shamisen are done!
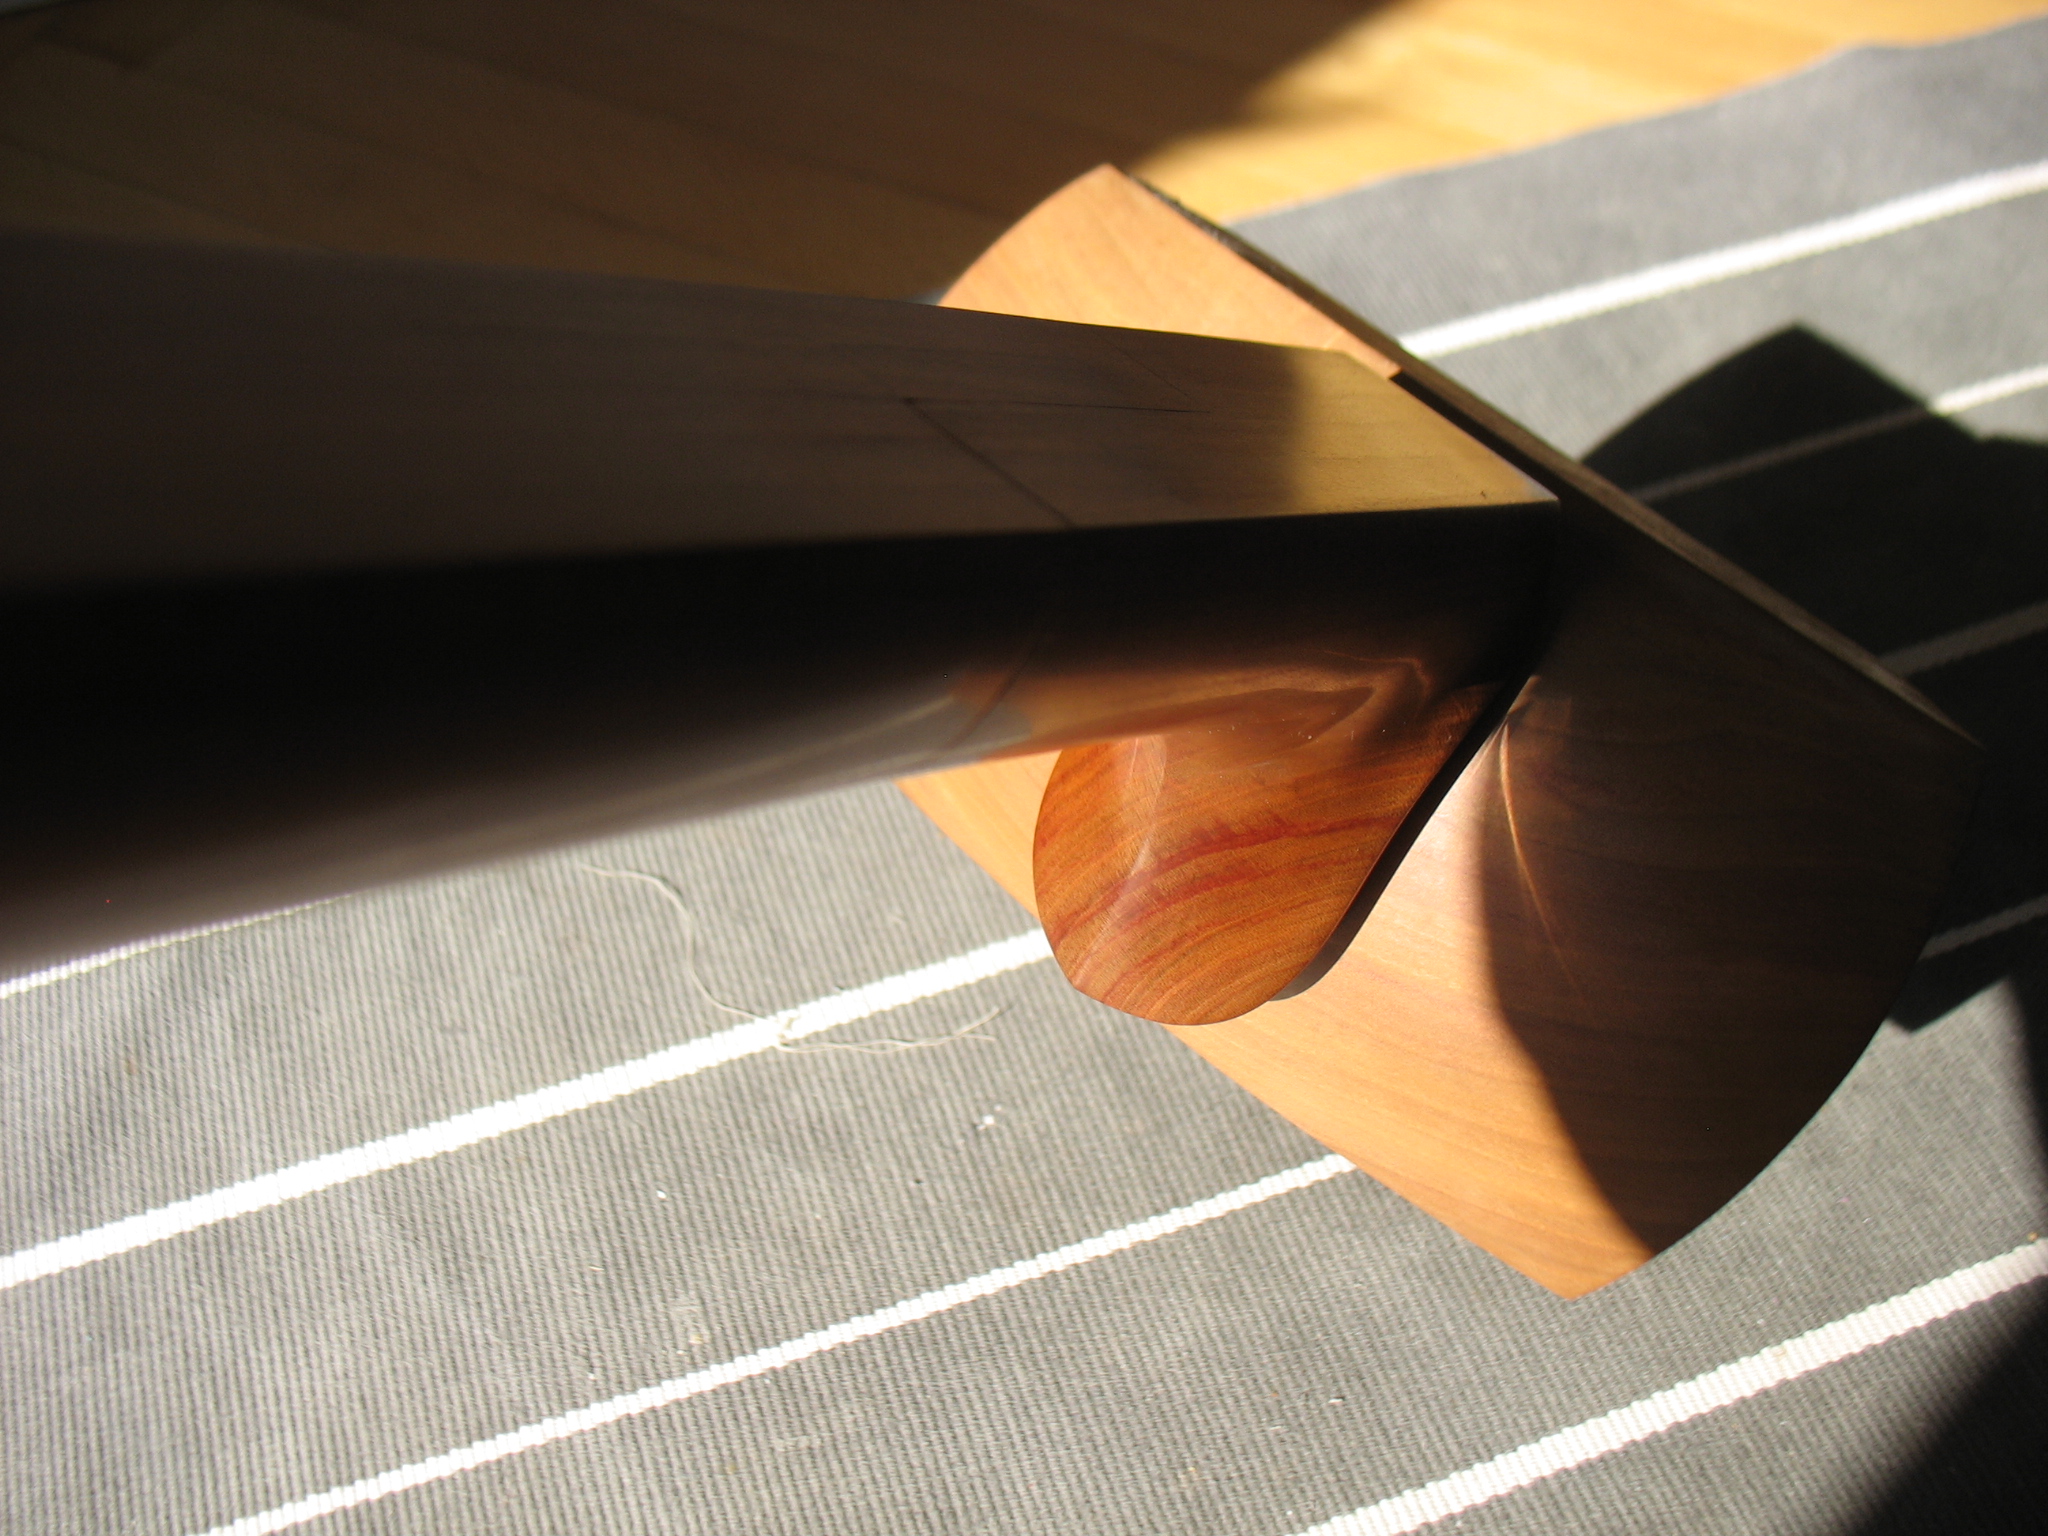
So here is the sao without and with a finish:


The dou here isn´t oiled yet.


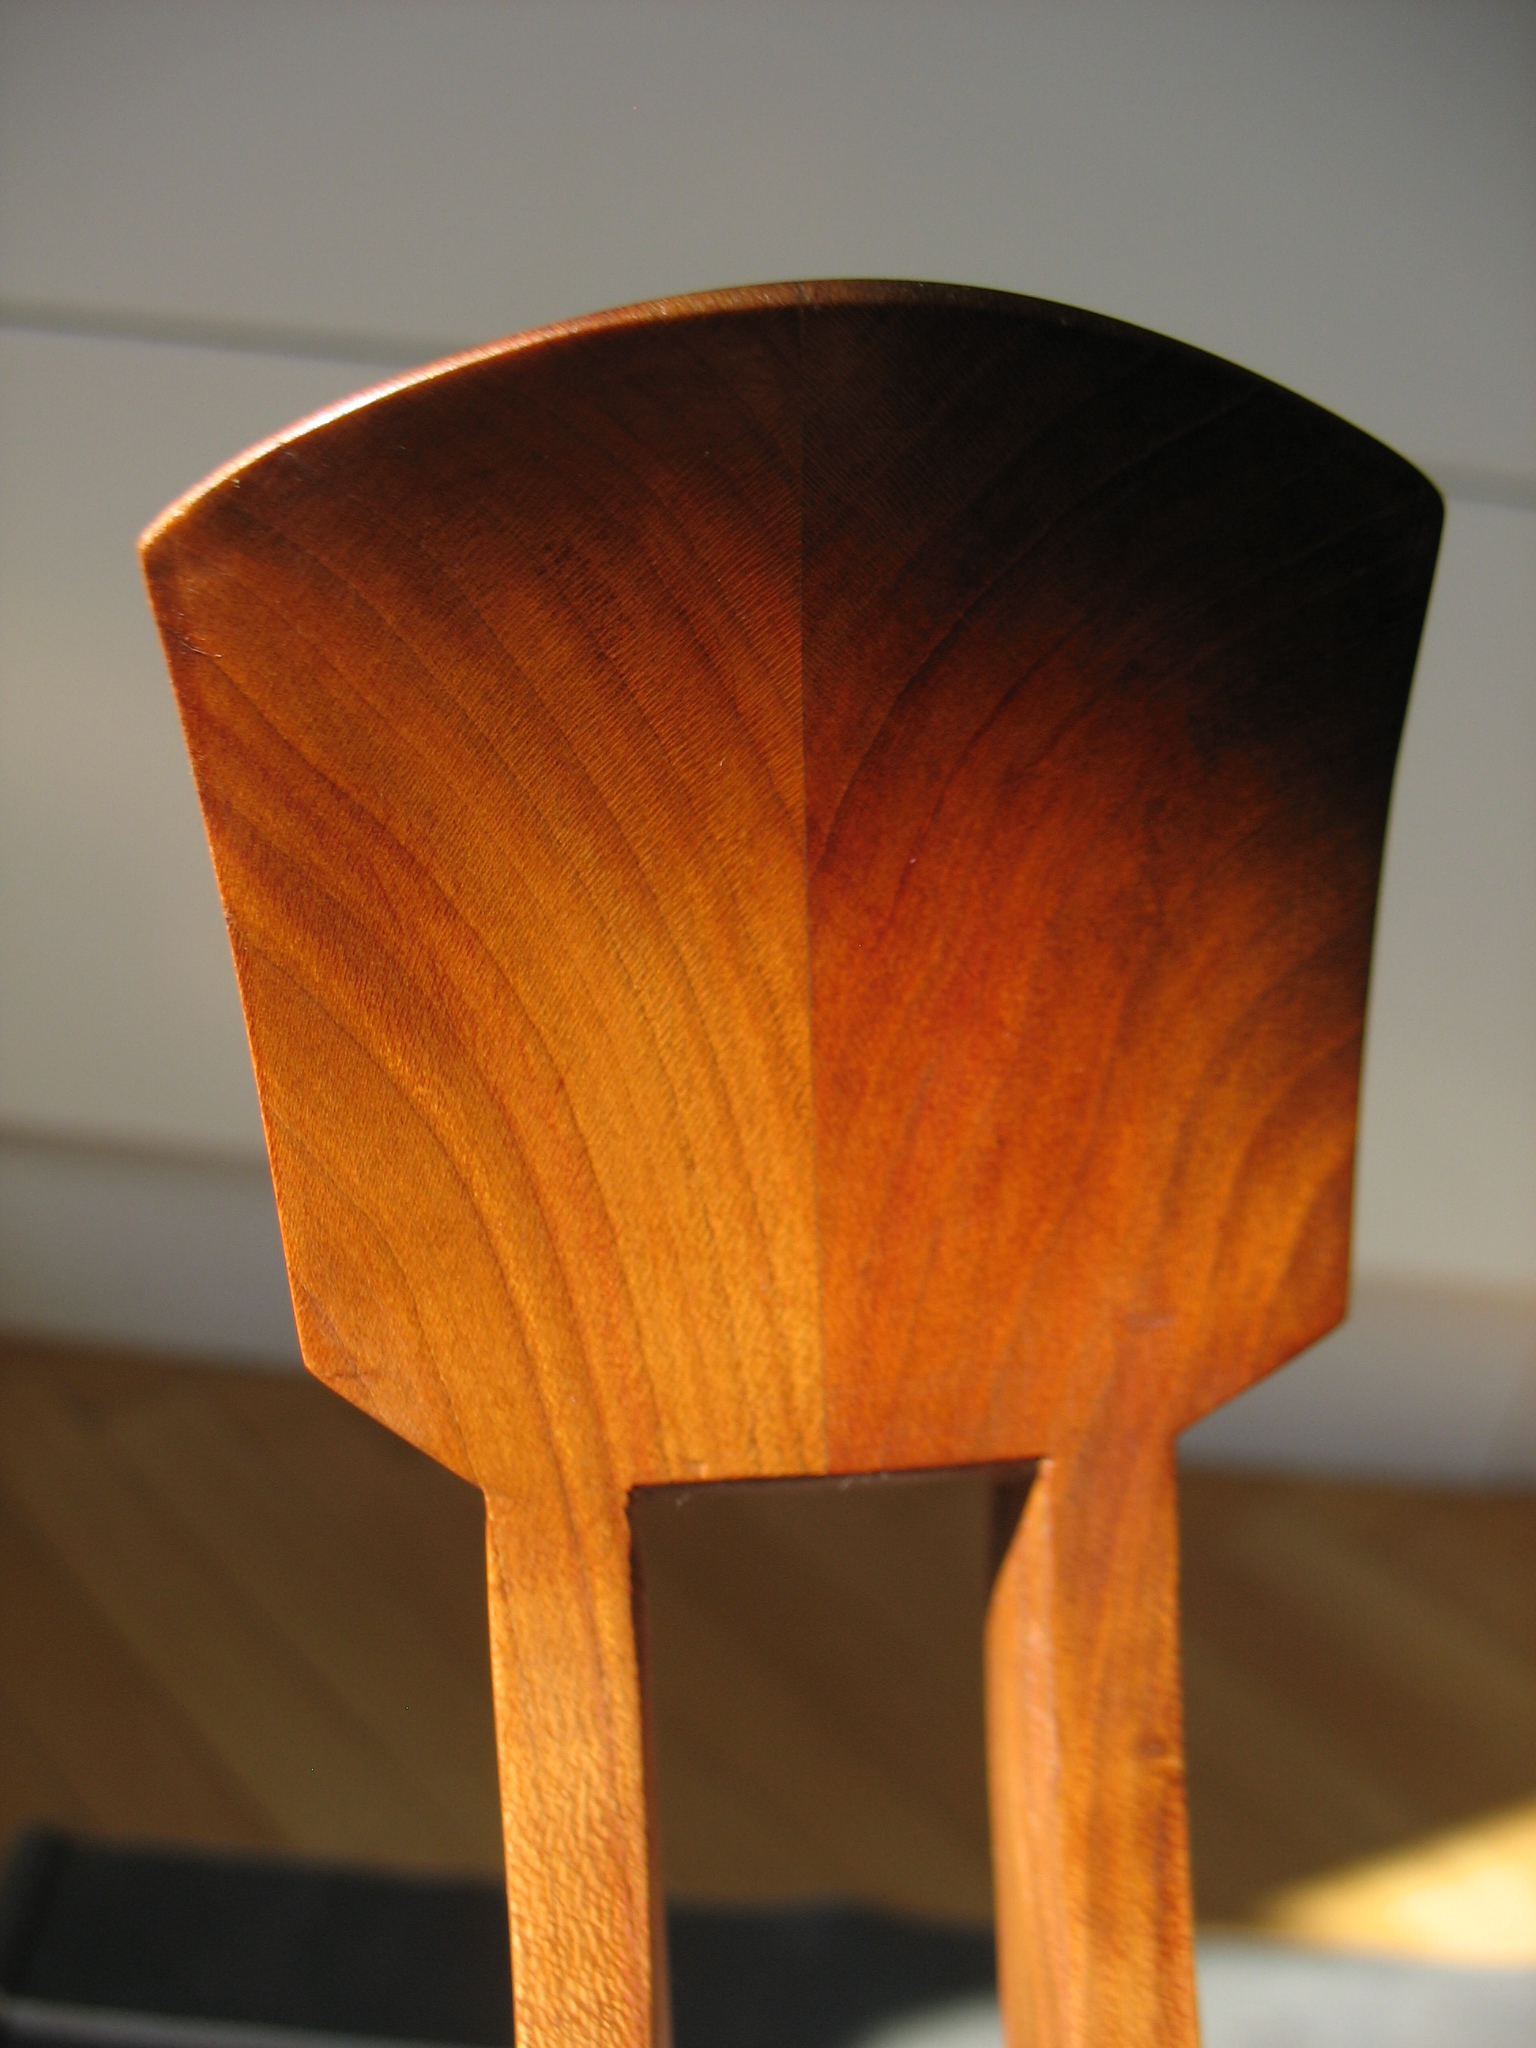
(Ha! Last week, I found out that Gwyn_Harris1 also thought of matching the pattern on the tenjin. :+1:)

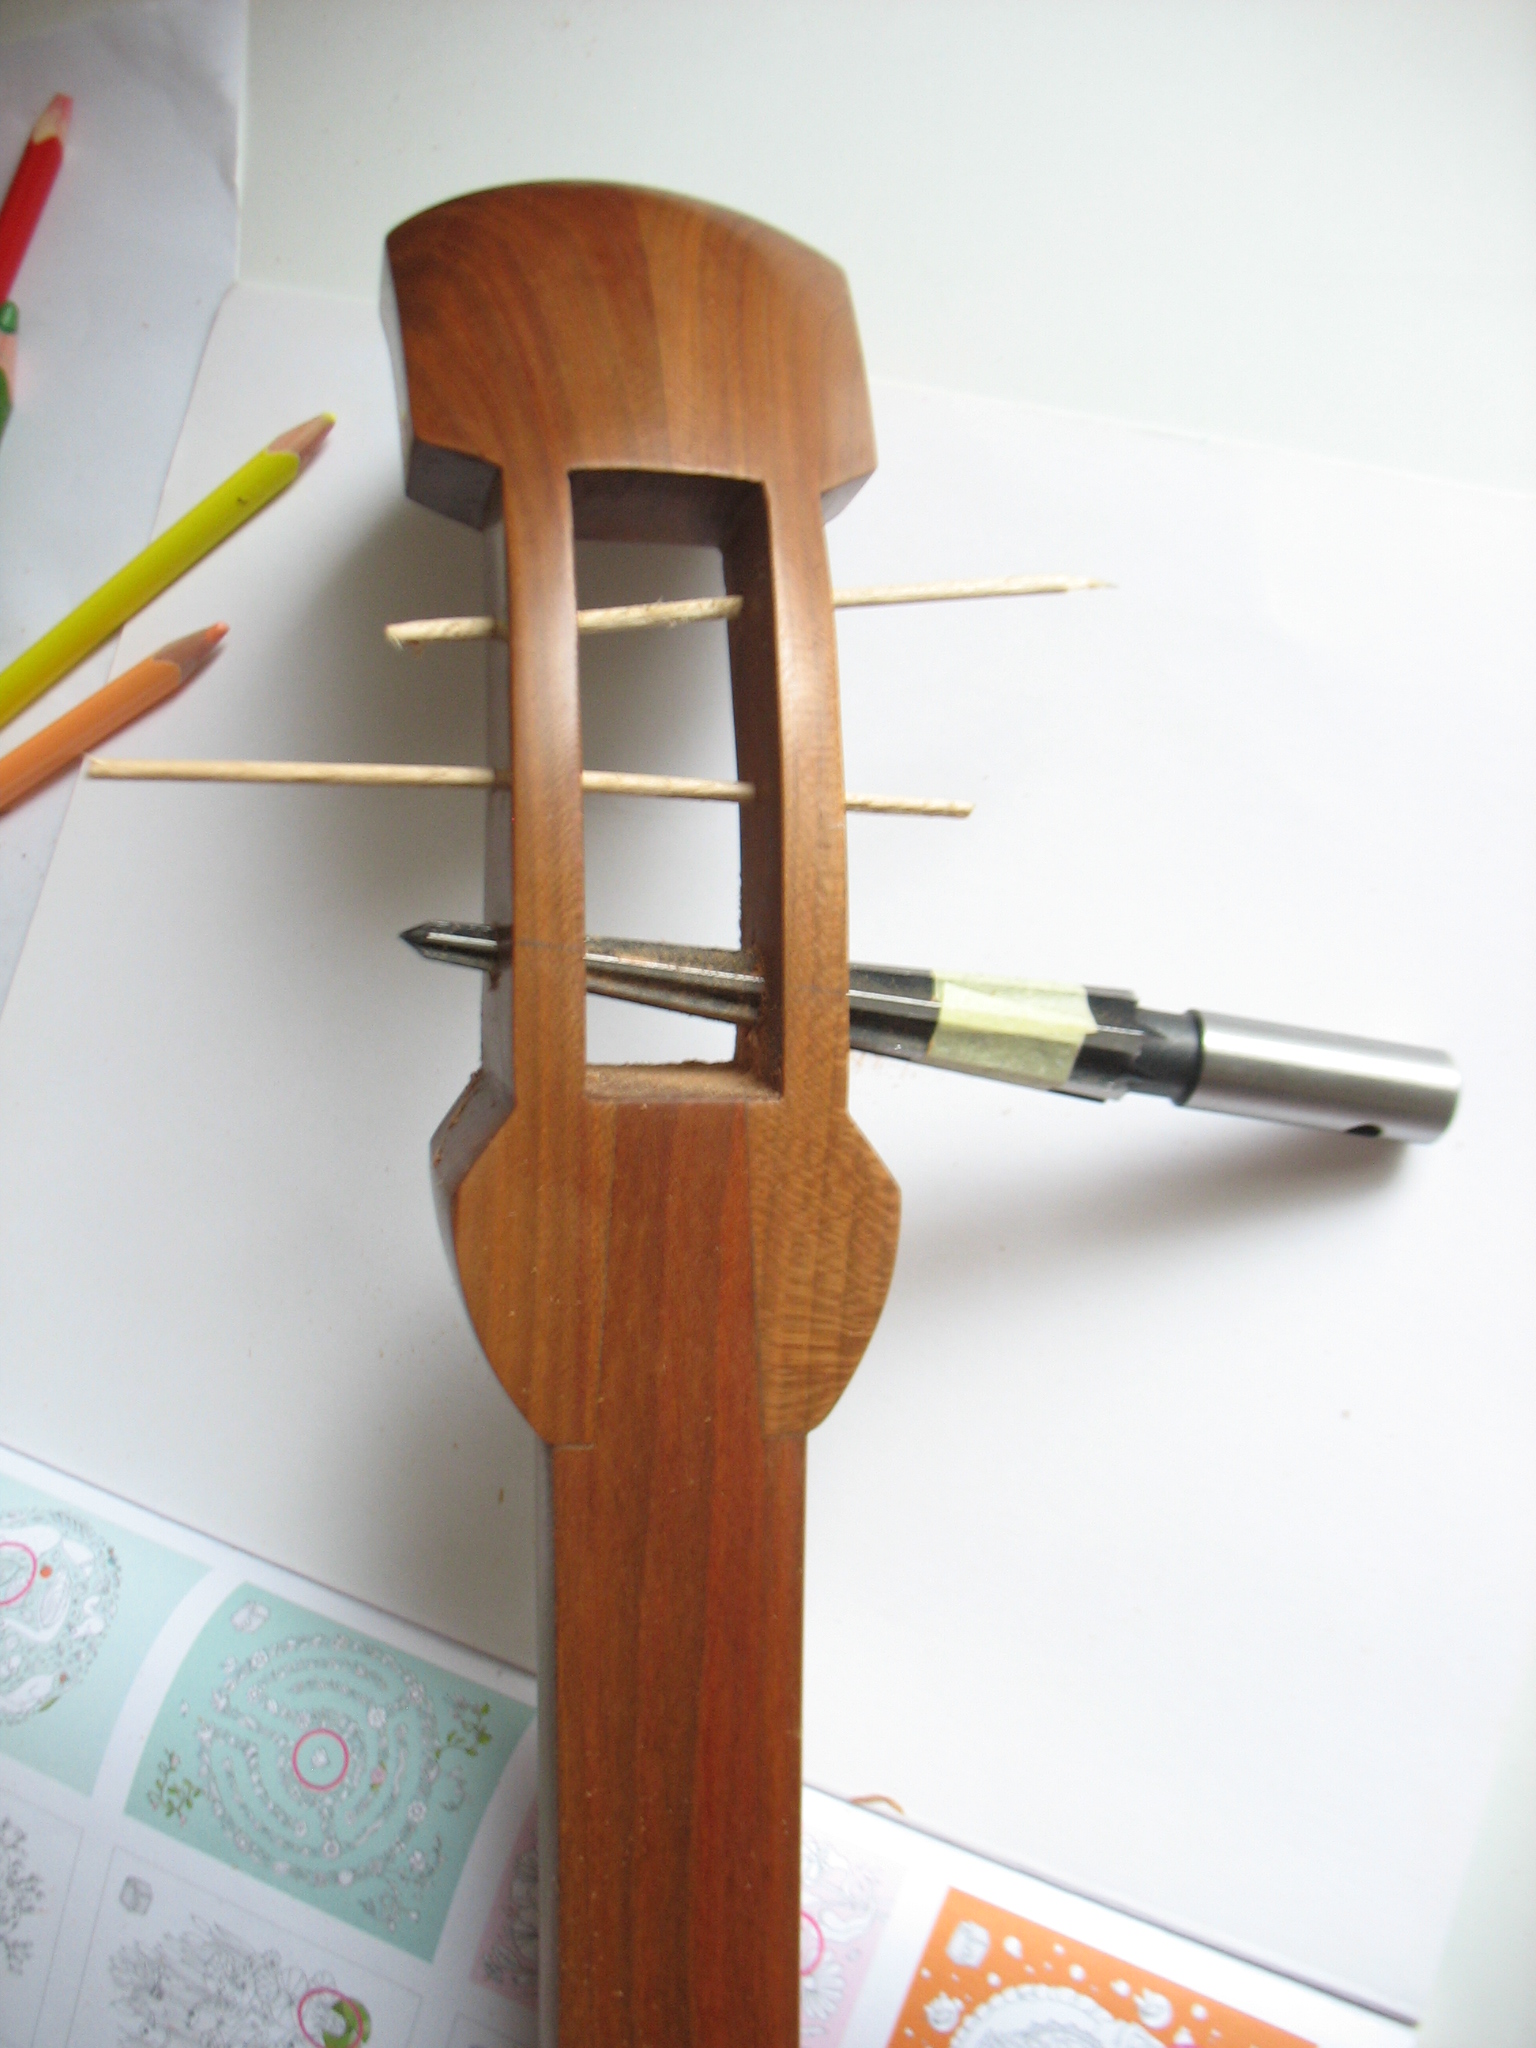
Now the only thing left was to make the nakago and itomaki holes. While the making of itomaki holes went ok, I totally ended up somewhere else with the nakago hole, so it is not tapered at all… Well, can´t have everything! :smiley: I still hope that I will be able to something about it when making the “shiny brass thingies”.

Heavy metal itomaki anyone? :stuck_out_tongue:

The itomaki are from zebra wood. I wonder if there is any way in putting a finish on them while keeping the color of the wood light. Any suggestions are welcome! :slight_smile:

Aaand yes, I was being serious in my previous post about making that doukake while waiting for the reamer to come into my mailbox.

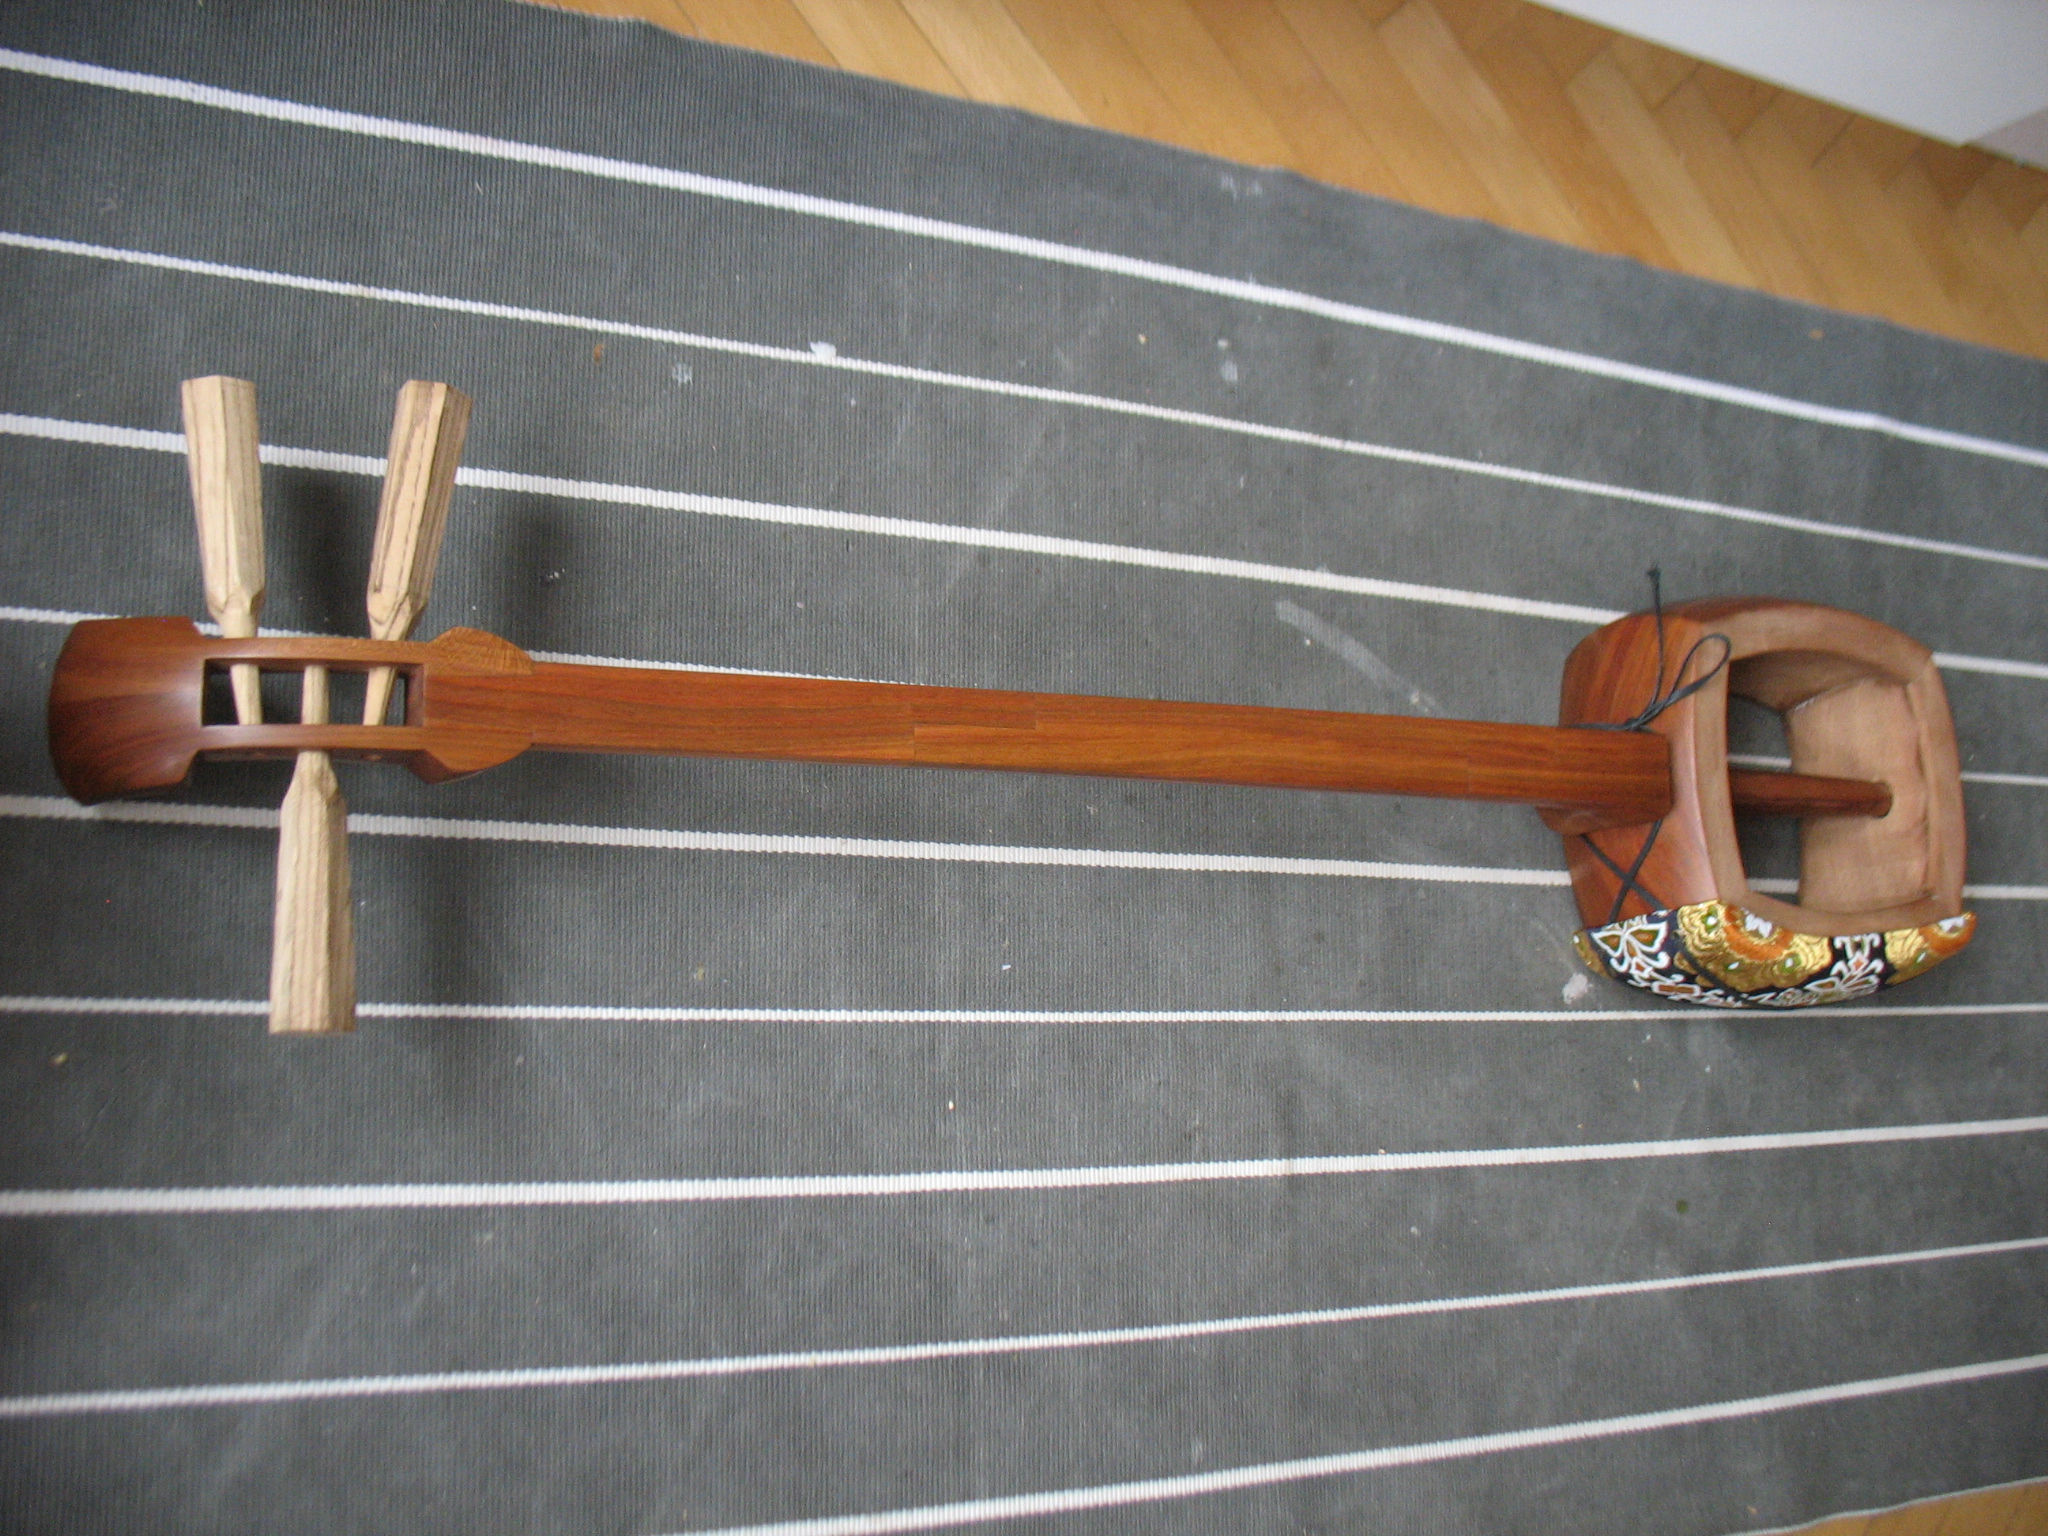
And here the completed wooden part of the shamisen!

Now on to saving money for some brass sheets, silver solder, real strings, skin… :crazy_face: Hmm, yes, I am not done yet. :smile:

Happy building!

Itomaki: zebrawood (or zebrano). Very pretty until you start to taper the ends. :confounded: Now I know what interlocking grain means.
Doukake: following Kyle Abbot´s book. On my first doukake, I diluted the PVA glue with water 1:2 (read it somewhere on a forum about papier mache) and it did not end well. When the papier mache dried, the papers started “flaking” (picture below). Either I did not mix the glue with the water well or it was too diluted. So I used 100% glue on the next one. It was… very sticky.


Textile: japanese brocade, a snatch from ebay :wink:
String on doukake: some sort of flat, waxed cotton string. I would have preferred a leather like string but they are kind of impossible to get here.

4 Likes

Great work yet again! For a very clear finish, you could use bleached shellac. Shellac is very easy to apply, although, not as durable as something like polyurethane. Many violins are finished with shellac and cared for like any instrument, the finish will last. It’s also super easy to touch up!

1 Like

Looks great so far!
I’m still trying to figure out my first build and have never seen a shamisen in person, but it looks to me like you used a wider shorter reamer then I’ve seen elsewhere. Not that it won’t work…I hope it works out great cause it looks really nice.

Hello Karen and welcome to the community!
You are totally right about the reamer! The size was correct for the itomaki but waaay off for the round hole in the body. I had the measurment of the tip of the nakago in mind but forgot that the hole will have to be larger, since the nakago has to get through. For that, I ended up using a round rasp file which I was super lucky to find few days before in a trift store. In the end, the reamer just flew through the finished thing, no use there :smiley:
About the build itself, Kyle Abbot´s book is detailed and, as he himself said, you do have to read through the book several times. I spent a lot of time looking through pictures of shamisens on the internet, just to get a better idea. Then, you´ll ge to see that certain shapes and curves on the shamisen can be a matter of preference. Getting into the build was sometimes scary but I don´t regret taking that dive :slight_smile:

1 Like

Thanks!

What type of wood did you use?

I looked at a price on an all zebrawood shamisen and it was one of the more expensive woods on the website I looked at. Twice the price of purpleheart.

For the itomaki coating I’d consider a polyurethane applied in 2- 3 thin coats with a rag. It may look wet but not too dark or shiny. I’m not sure how that would function for tuning but it would protect it without changing the look much. If you have any scraps left over you could use that as a test piece.

I used sweet cherry (prunus avium, janka hardness 1,150 lbf (5,120 N)) for my shamisen. Exotic lumber is super pricey here. I made a list of local wood I could use and cherry was the first that was available (price/quantity/distance for pick up).

About zebrawood - I got it from a wood carver who was selling small pre-cut pieces. As it was harder and color-wise different than cherry (and pretty!), I bought it for the itomaki.

Beautiful. I love the contrast of the two different woods. What are you planning to skin it with?

1 Like

For the skin, I planned to use kangaroo raw hide buuut… with the whole situation now, I am not sure if I will be able to get one. Plan B is to use goat leather parchement (pergamen, see (It´s working! Yay!)).
Either way, it will take some time before I get to the skinning part. (Need to save up some money! :blush:)

I ordered my thick goat skin from Mideast (same one Kyle recommended) on amazon.