Masamune Shamisen Build - Pushing the Boundaries of Shamisen Design

The fully skinned dou has returned from Kyle! It is a massive relief to get this phase done and the dou safely returned after making a round trip literally across the US. Finally seeing Hibiki in real life, I am even more excited now to finish this up and start playing! I have never owned a shamisen with truly tight or professional grade skin before, so having a skinning job of this caliber is really awesome and a big motivator. (I’d post a picture, but I can’t get one as good as the one already posted above sent from Kyle!)

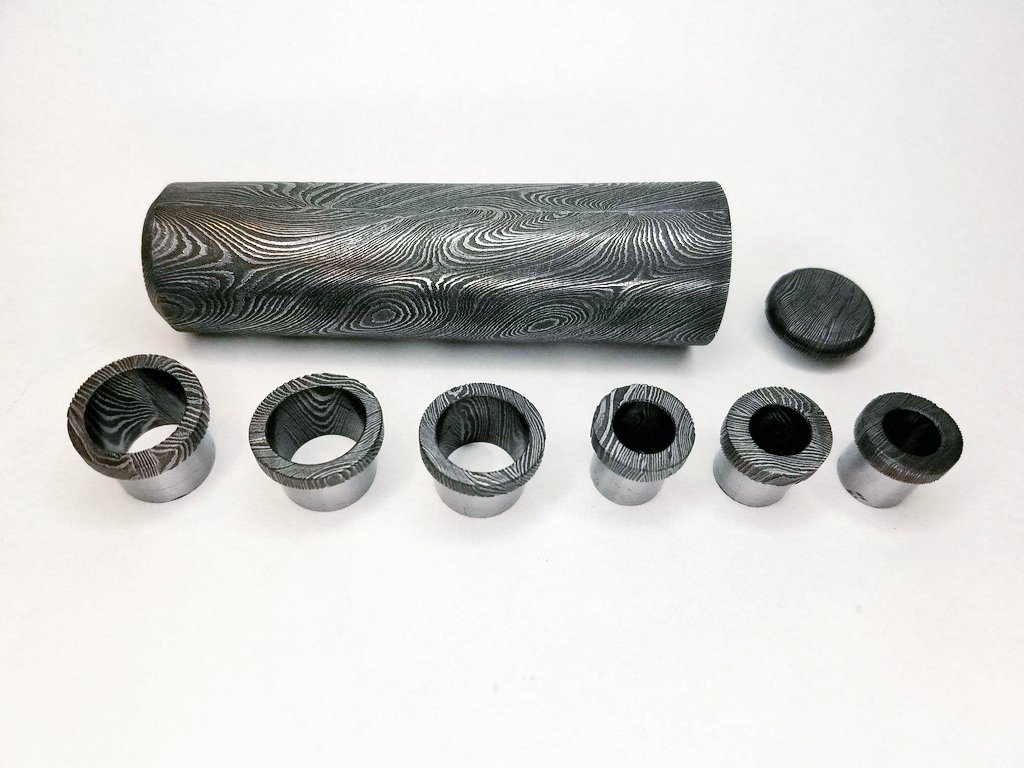
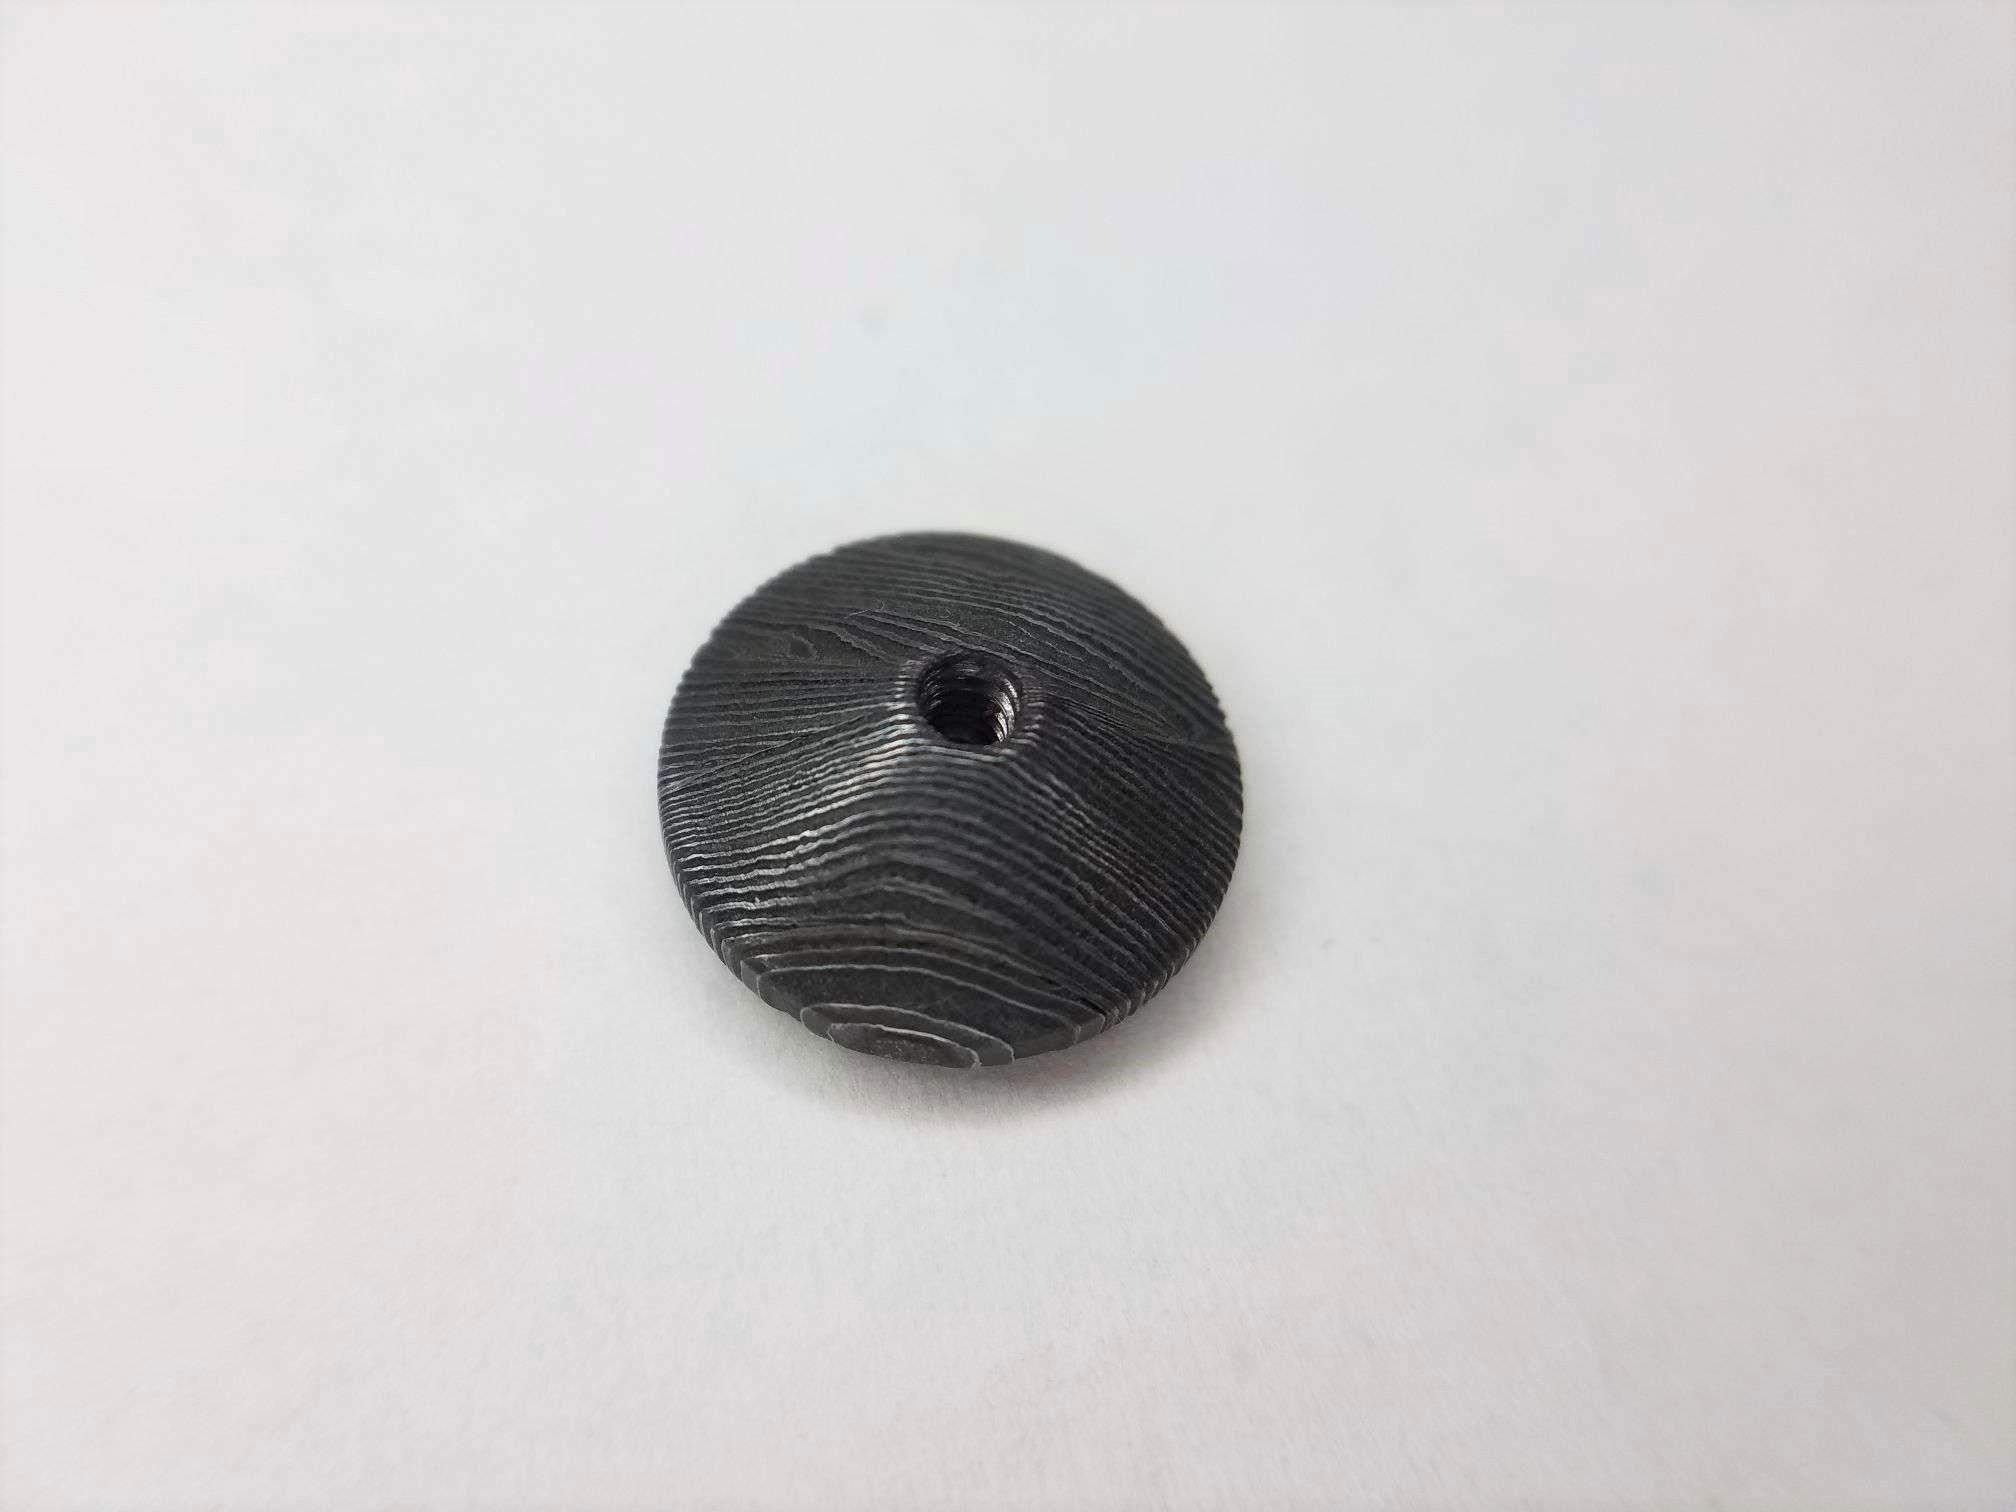
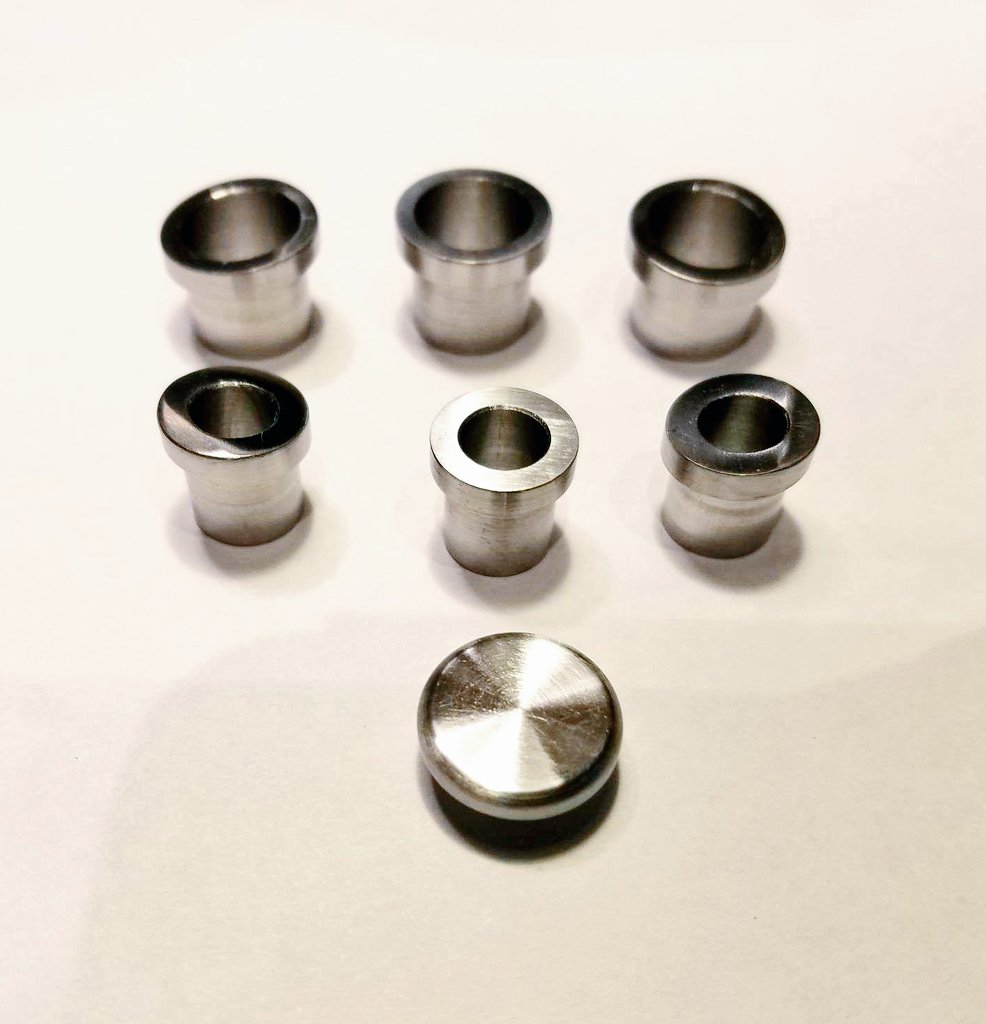
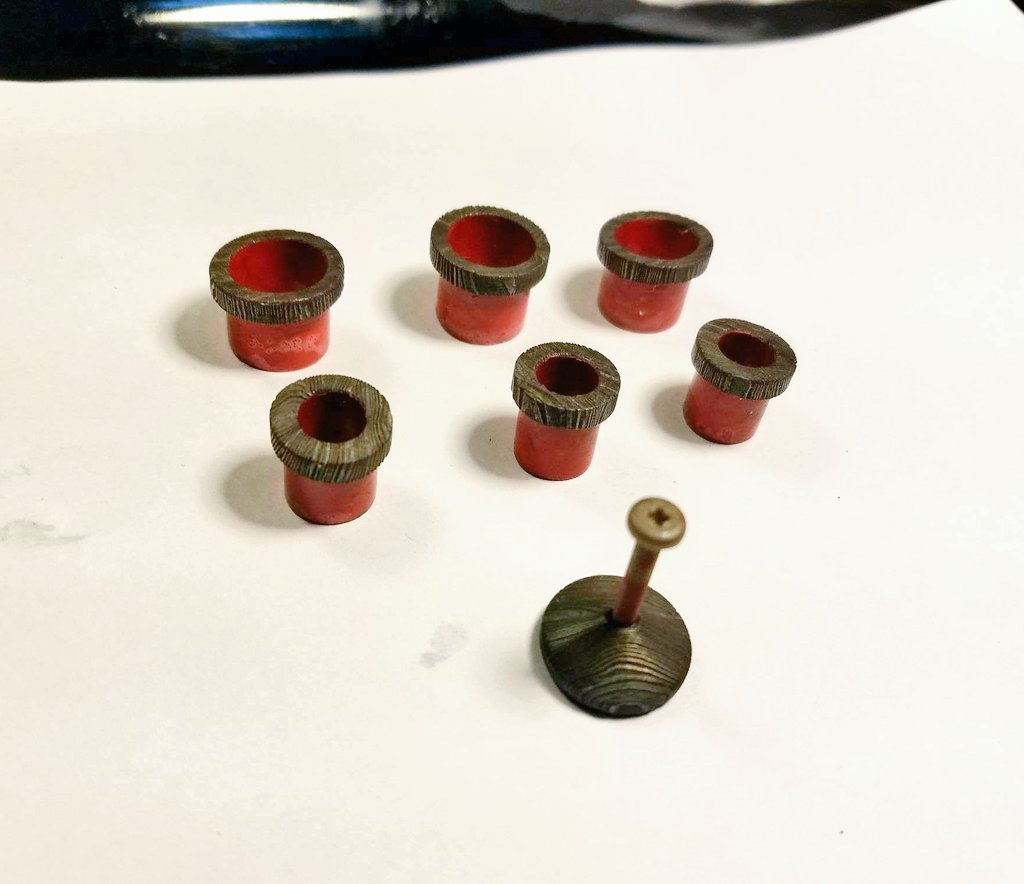
Also, the machinist finished the custom zagane and decorative screw cap a week earlier than expected, with plenty of the metal stock leftover. From the picture he sent, it looks like they came out fantastic. I will pick them up Monday, etch them, and start the fitting process this week.

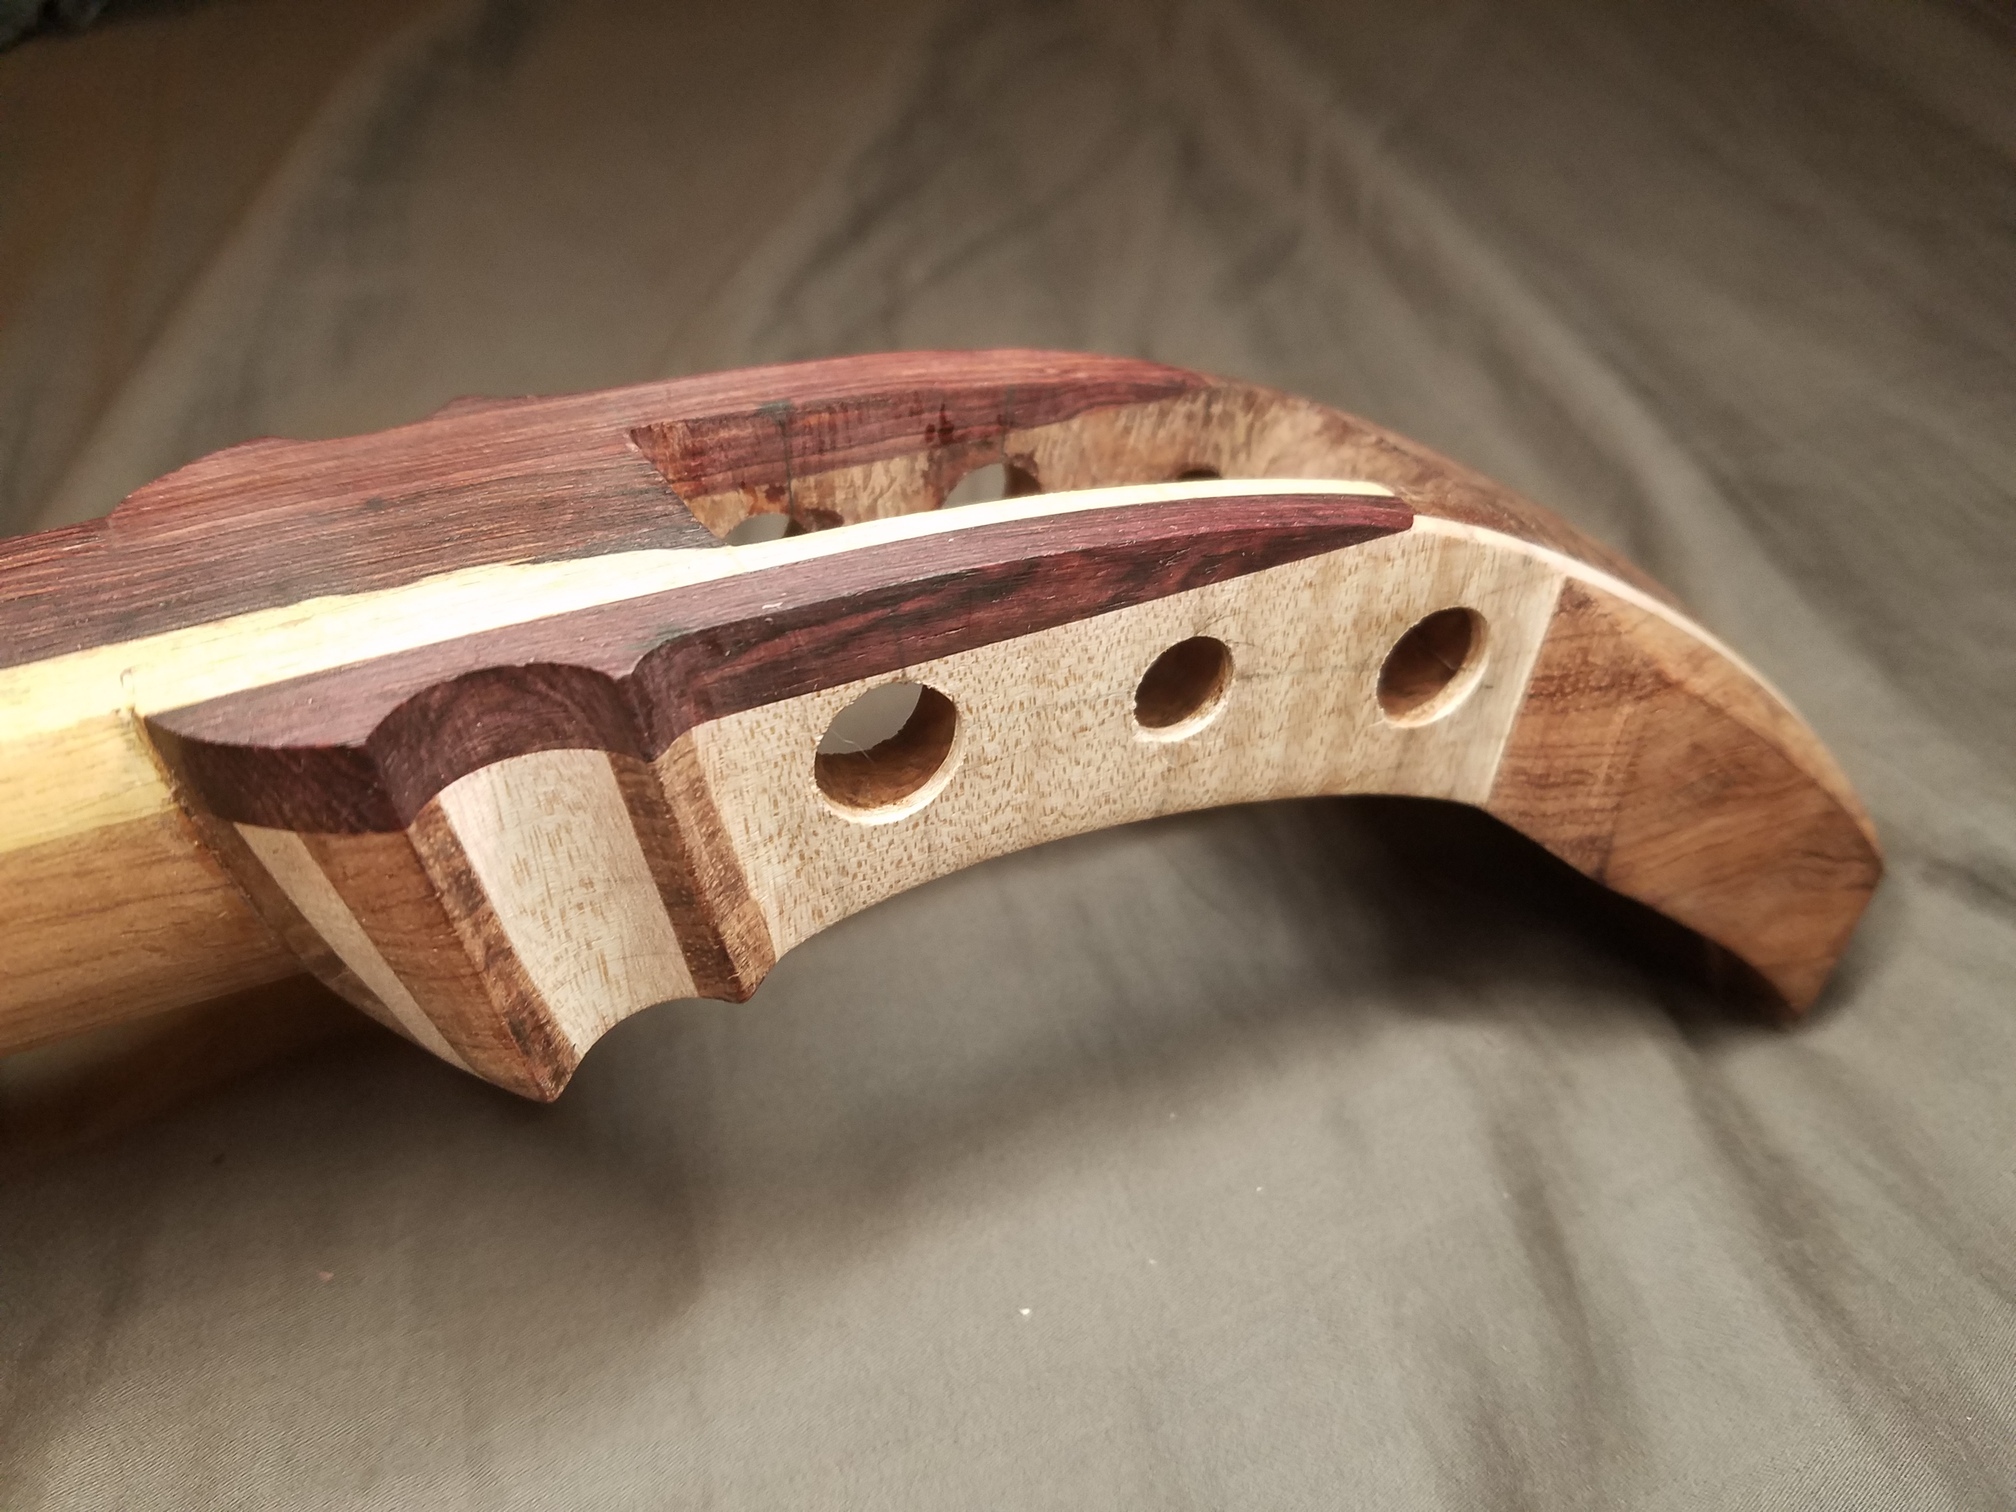
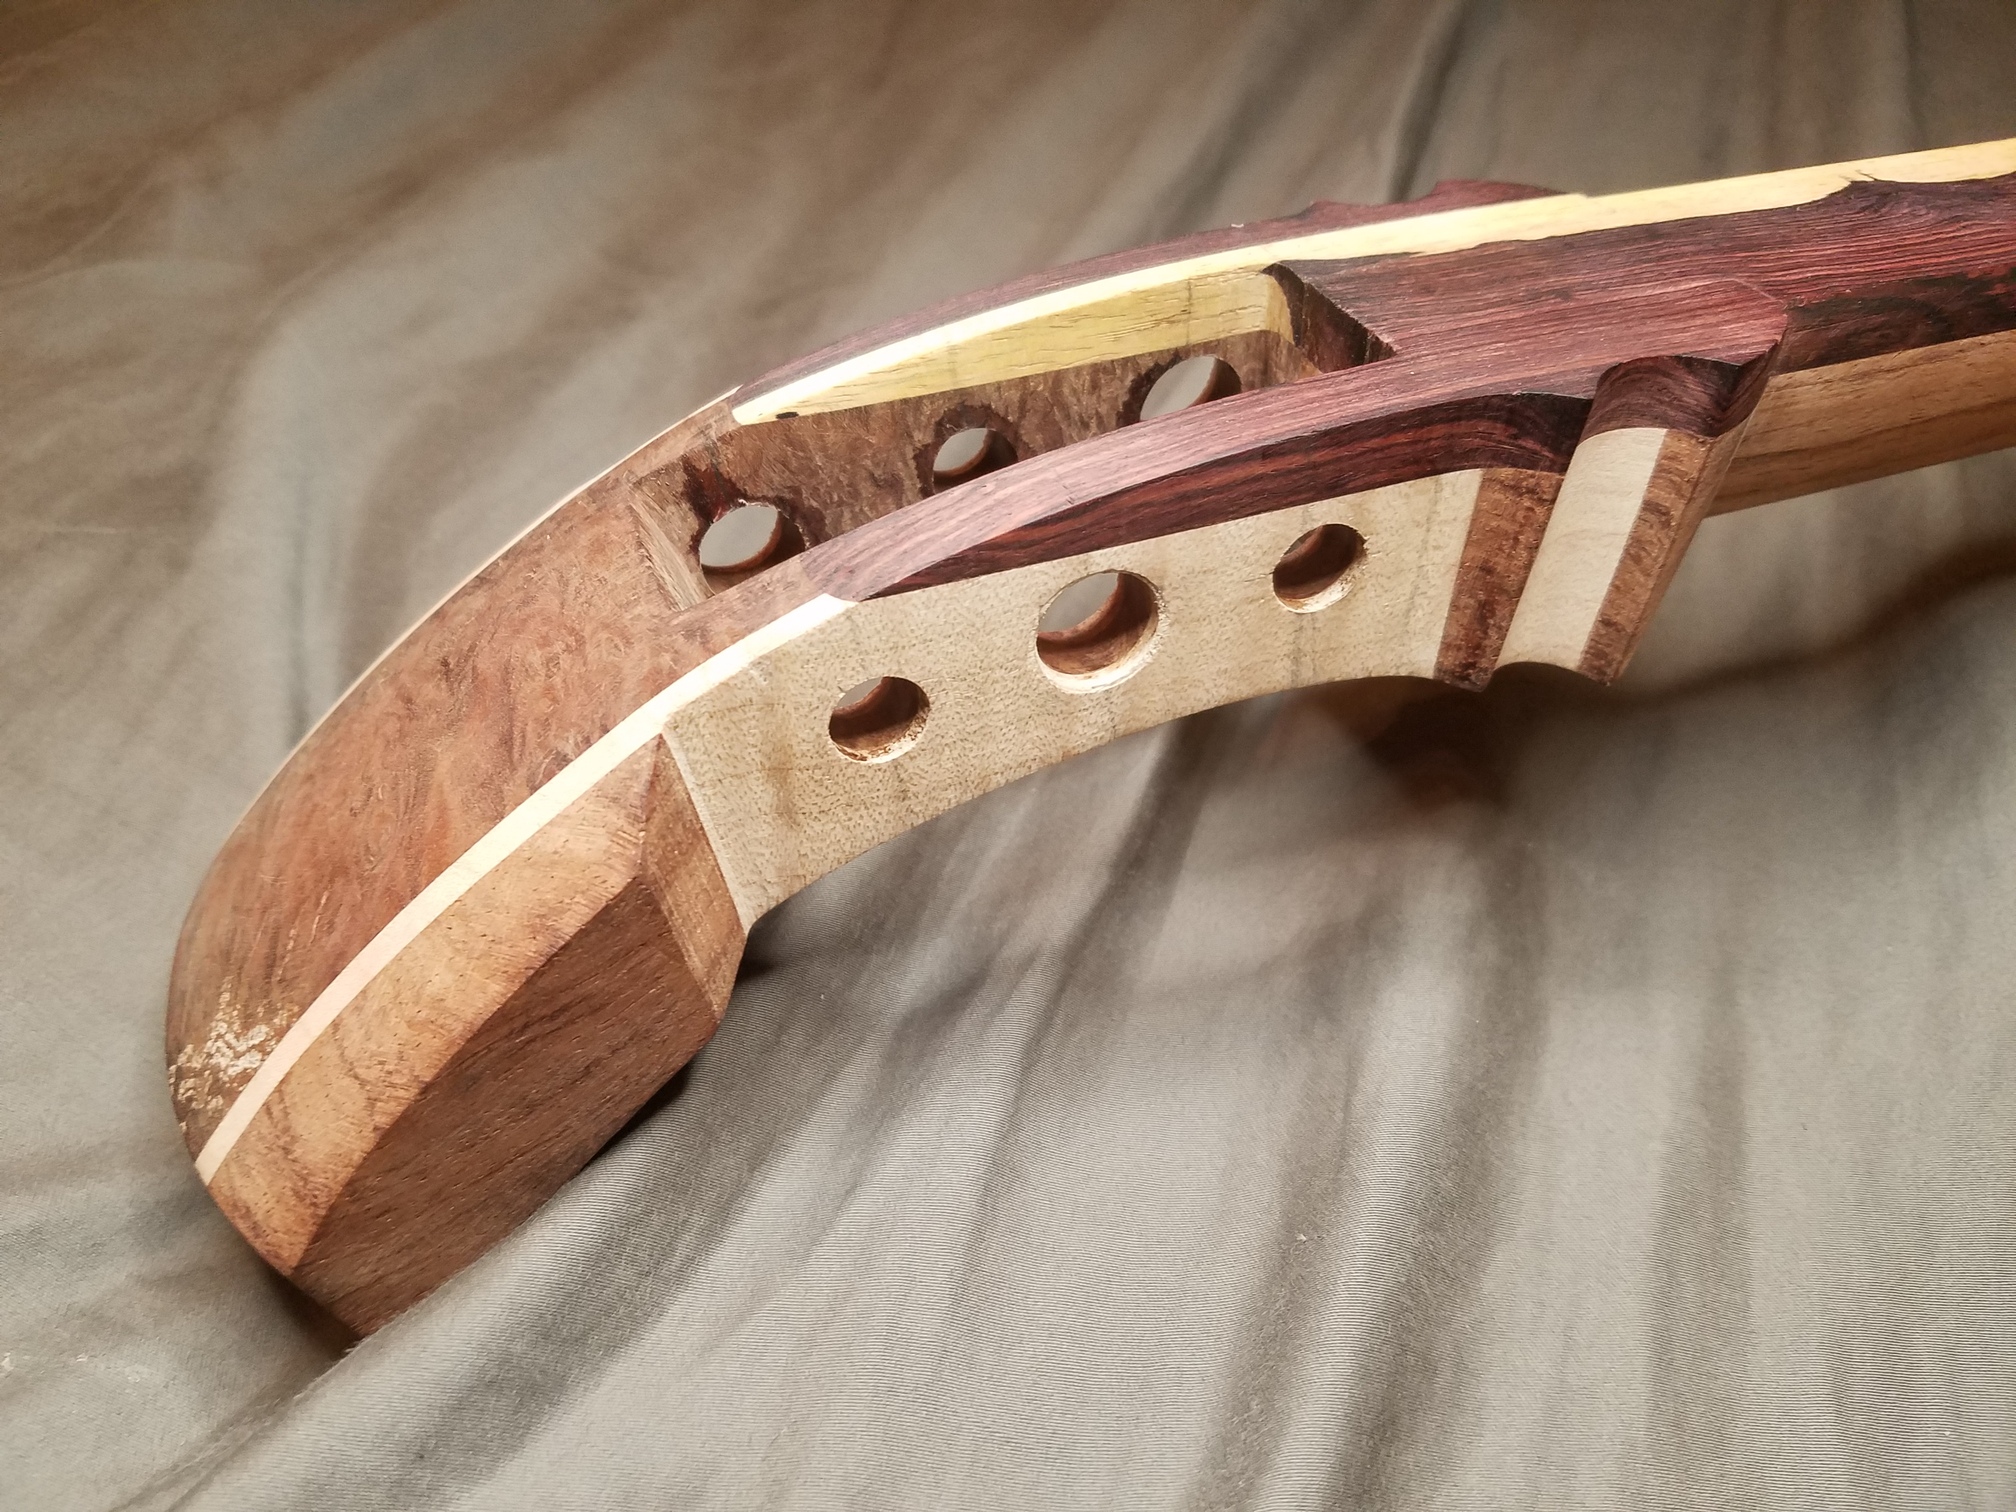
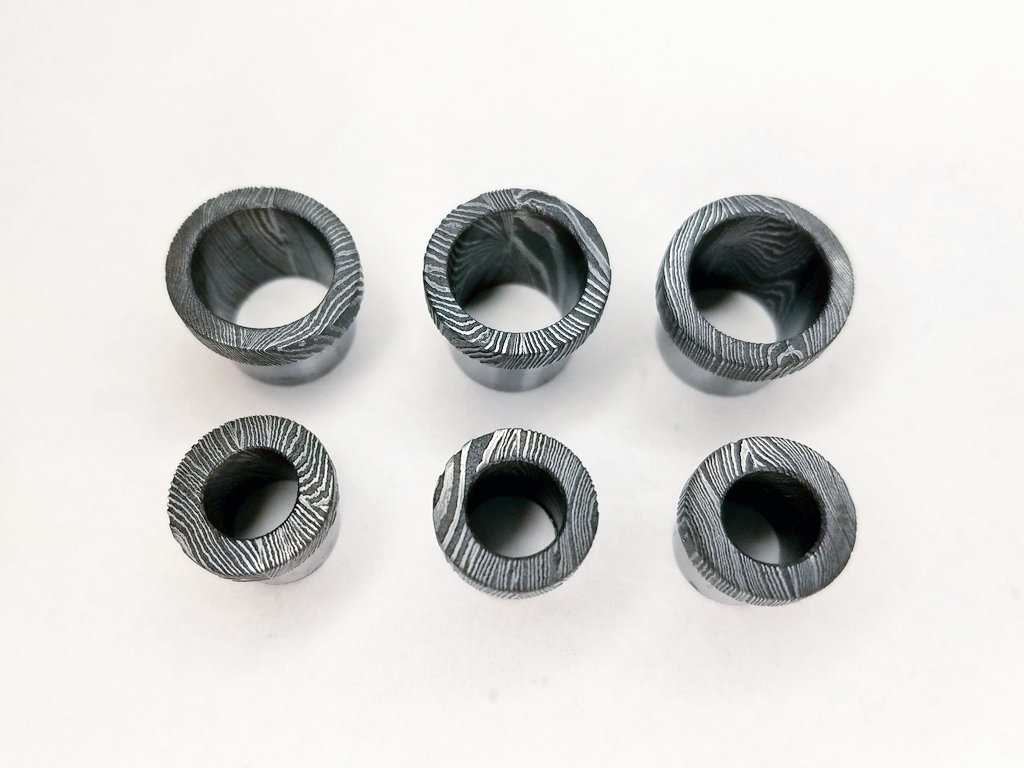
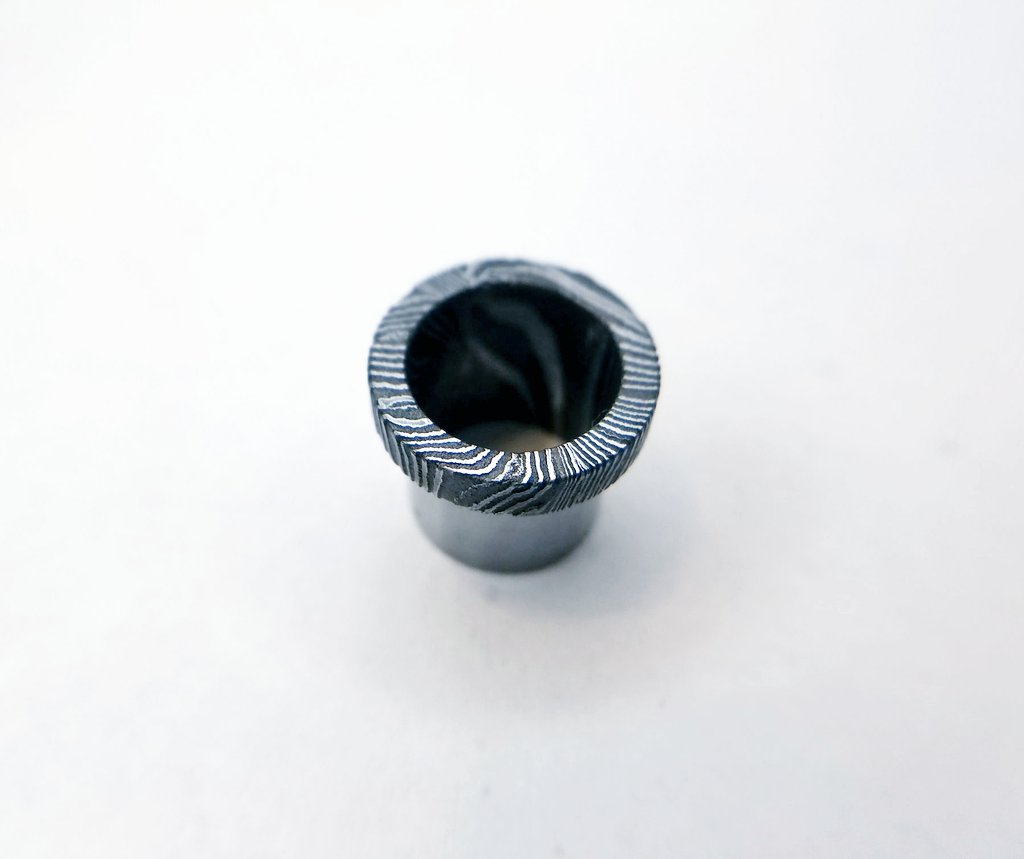
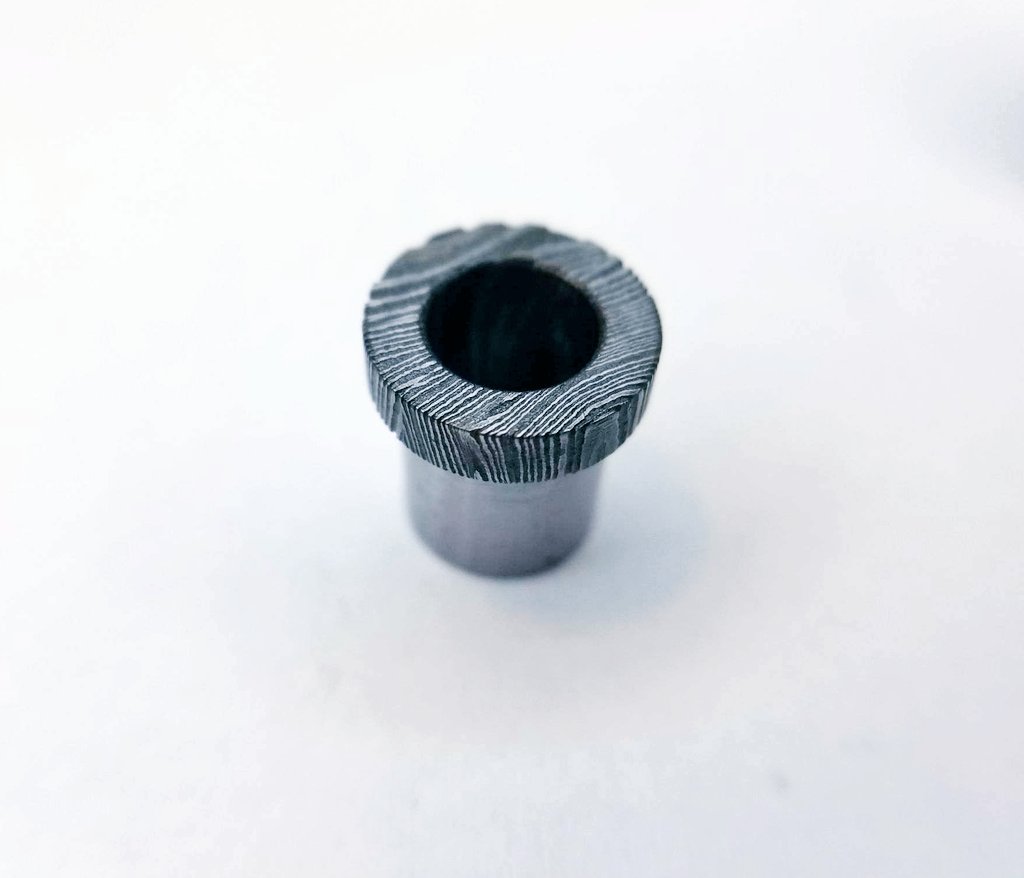
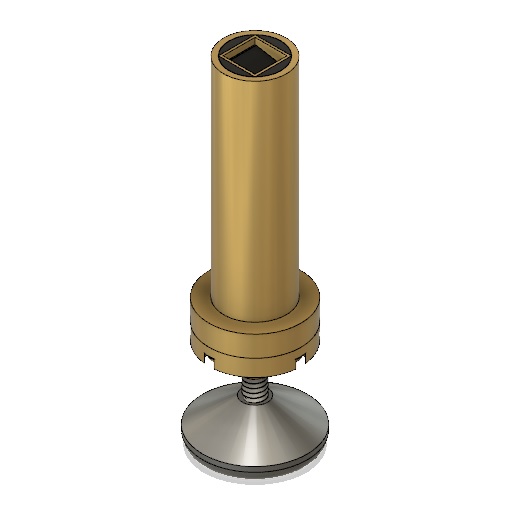
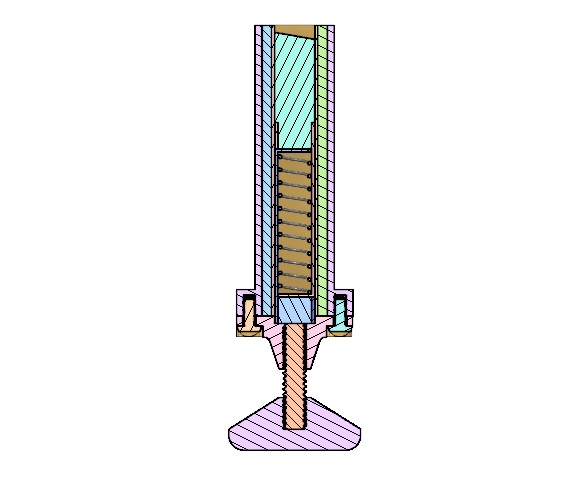
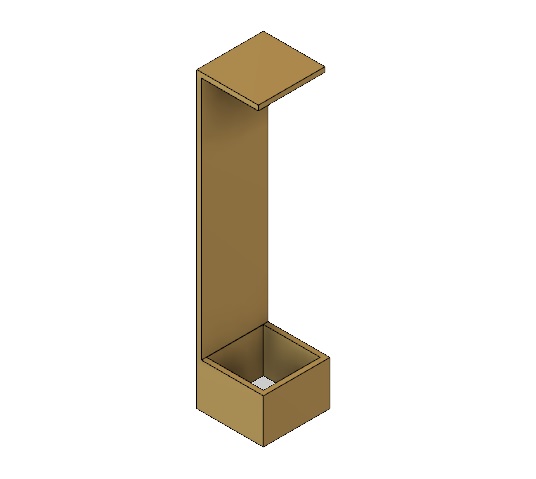
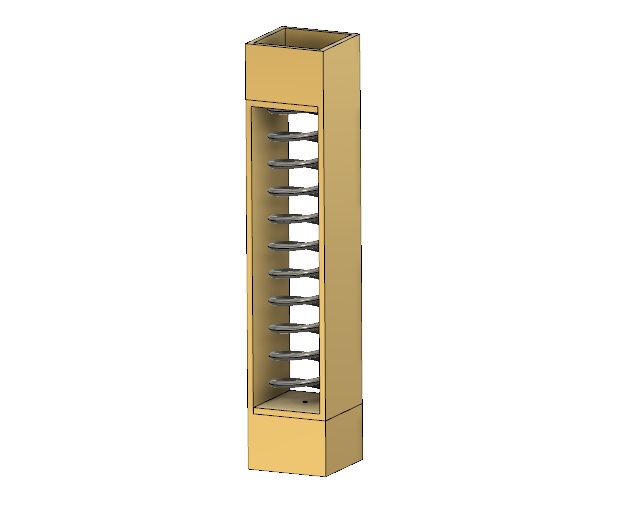
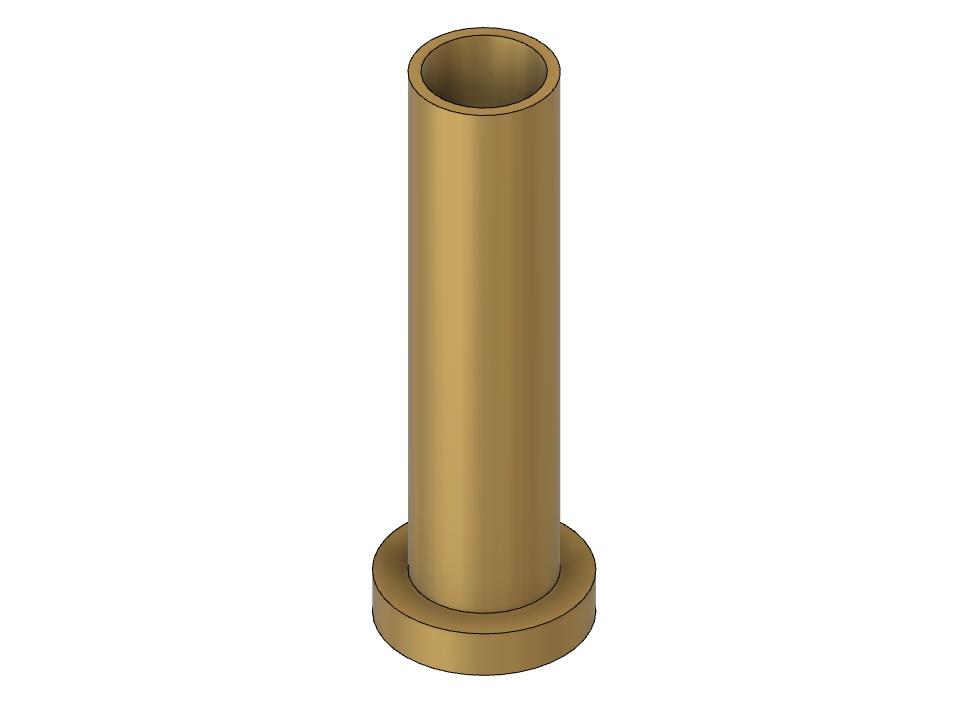
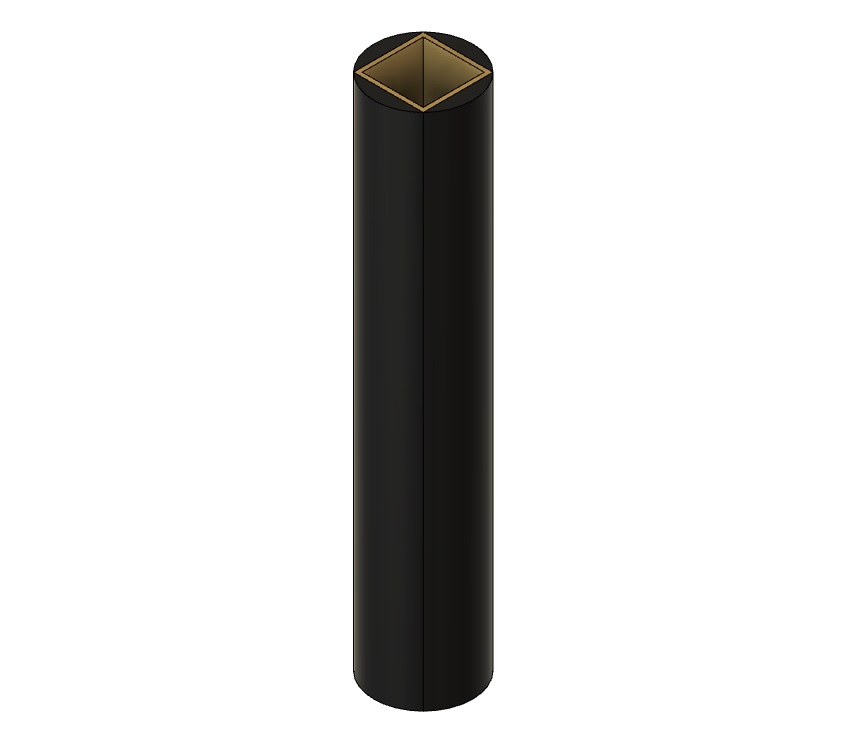
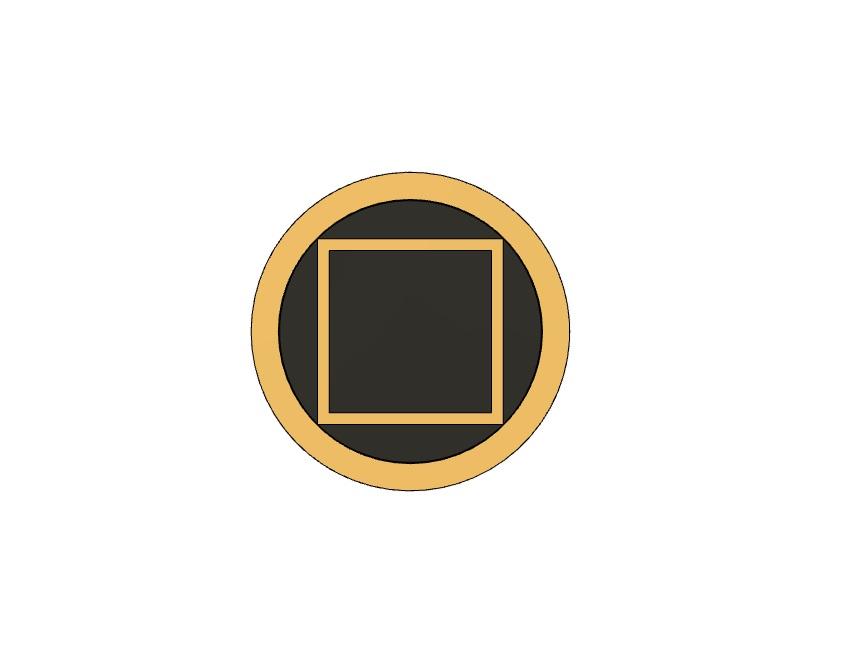
In terms of design, the zagane are made to sit flush to the tenjin. The center itomaki holes are straight through, however the top and bottom ones are designed with an 8 degree angle on the flange. The flange portions also include some angled cuts, and are overall a bit thicker and larger to show off the etched metal pattern. All of the zagane have tapered bores machined into them as well, with matching tapers from the large to small zagane for the itomaki to be fit to.

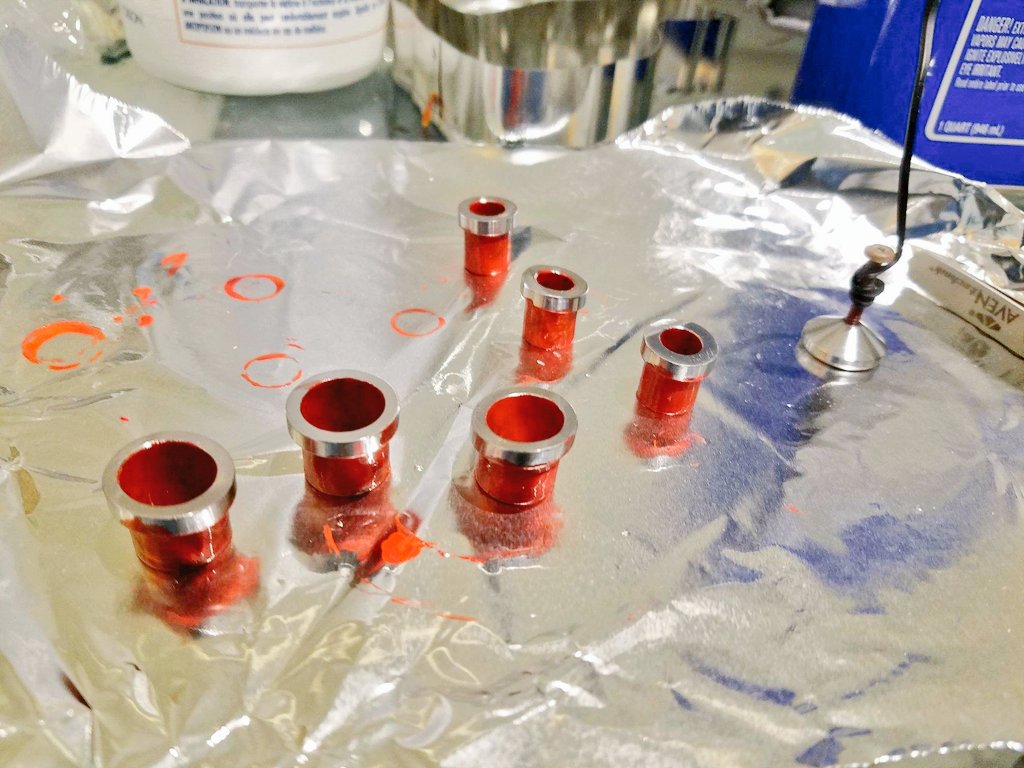
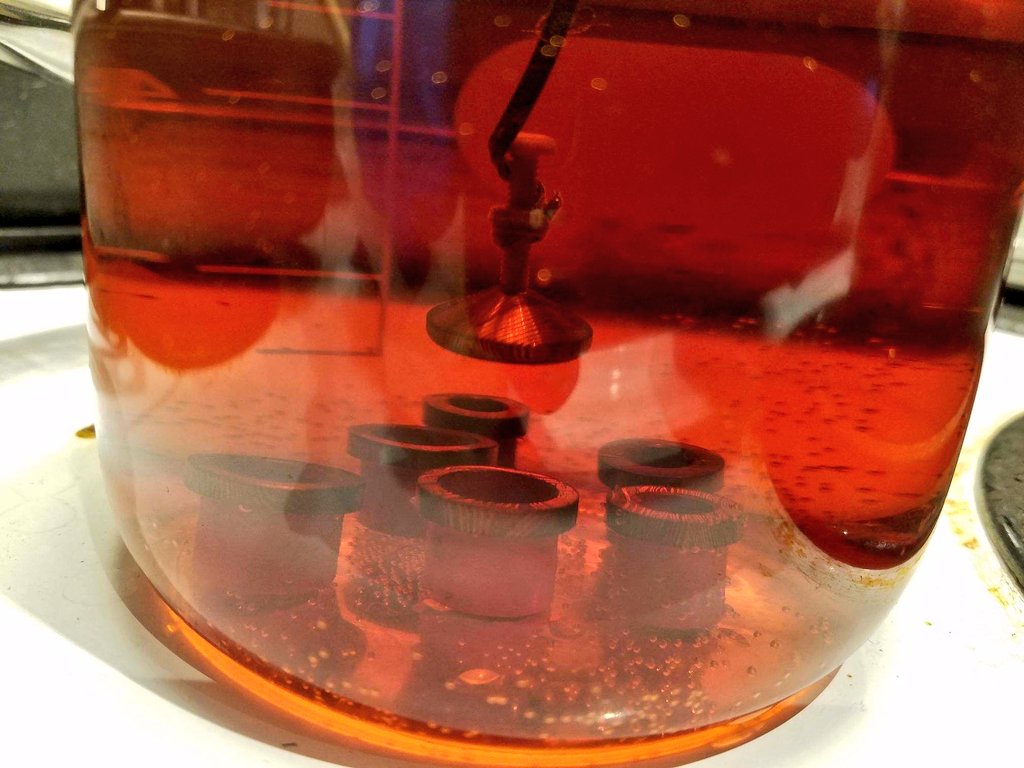
For etching, the parts will be submerged in a ferric chloride bath, then go through a coffee etch (which is a very popular technique in the knife making community) to further bring out the color contrast in the steel.

For gluing, I know Kyle has mentioned that professional grade superglue is the stuff typically used. Epoxy is also another option. However, since these pieces were a bit on the costly side, if I ever wanted to do some refurbishment in the future, I may want to consider making them removable. Researching a bunch of options, apparently fish glue has been used historically as a reversible glue for bonding wood to metal, which works better than hide glue in this case due to fish glue’s ability to deal with the differences in expansion and contraction between the wood and metal. I am going to run a few tests to see how strong the joint is first before gluing. It can be made strong, however the surfaces must be super clean, and the metal should be cleaned, scored, and removed of oxides prior to gluing.

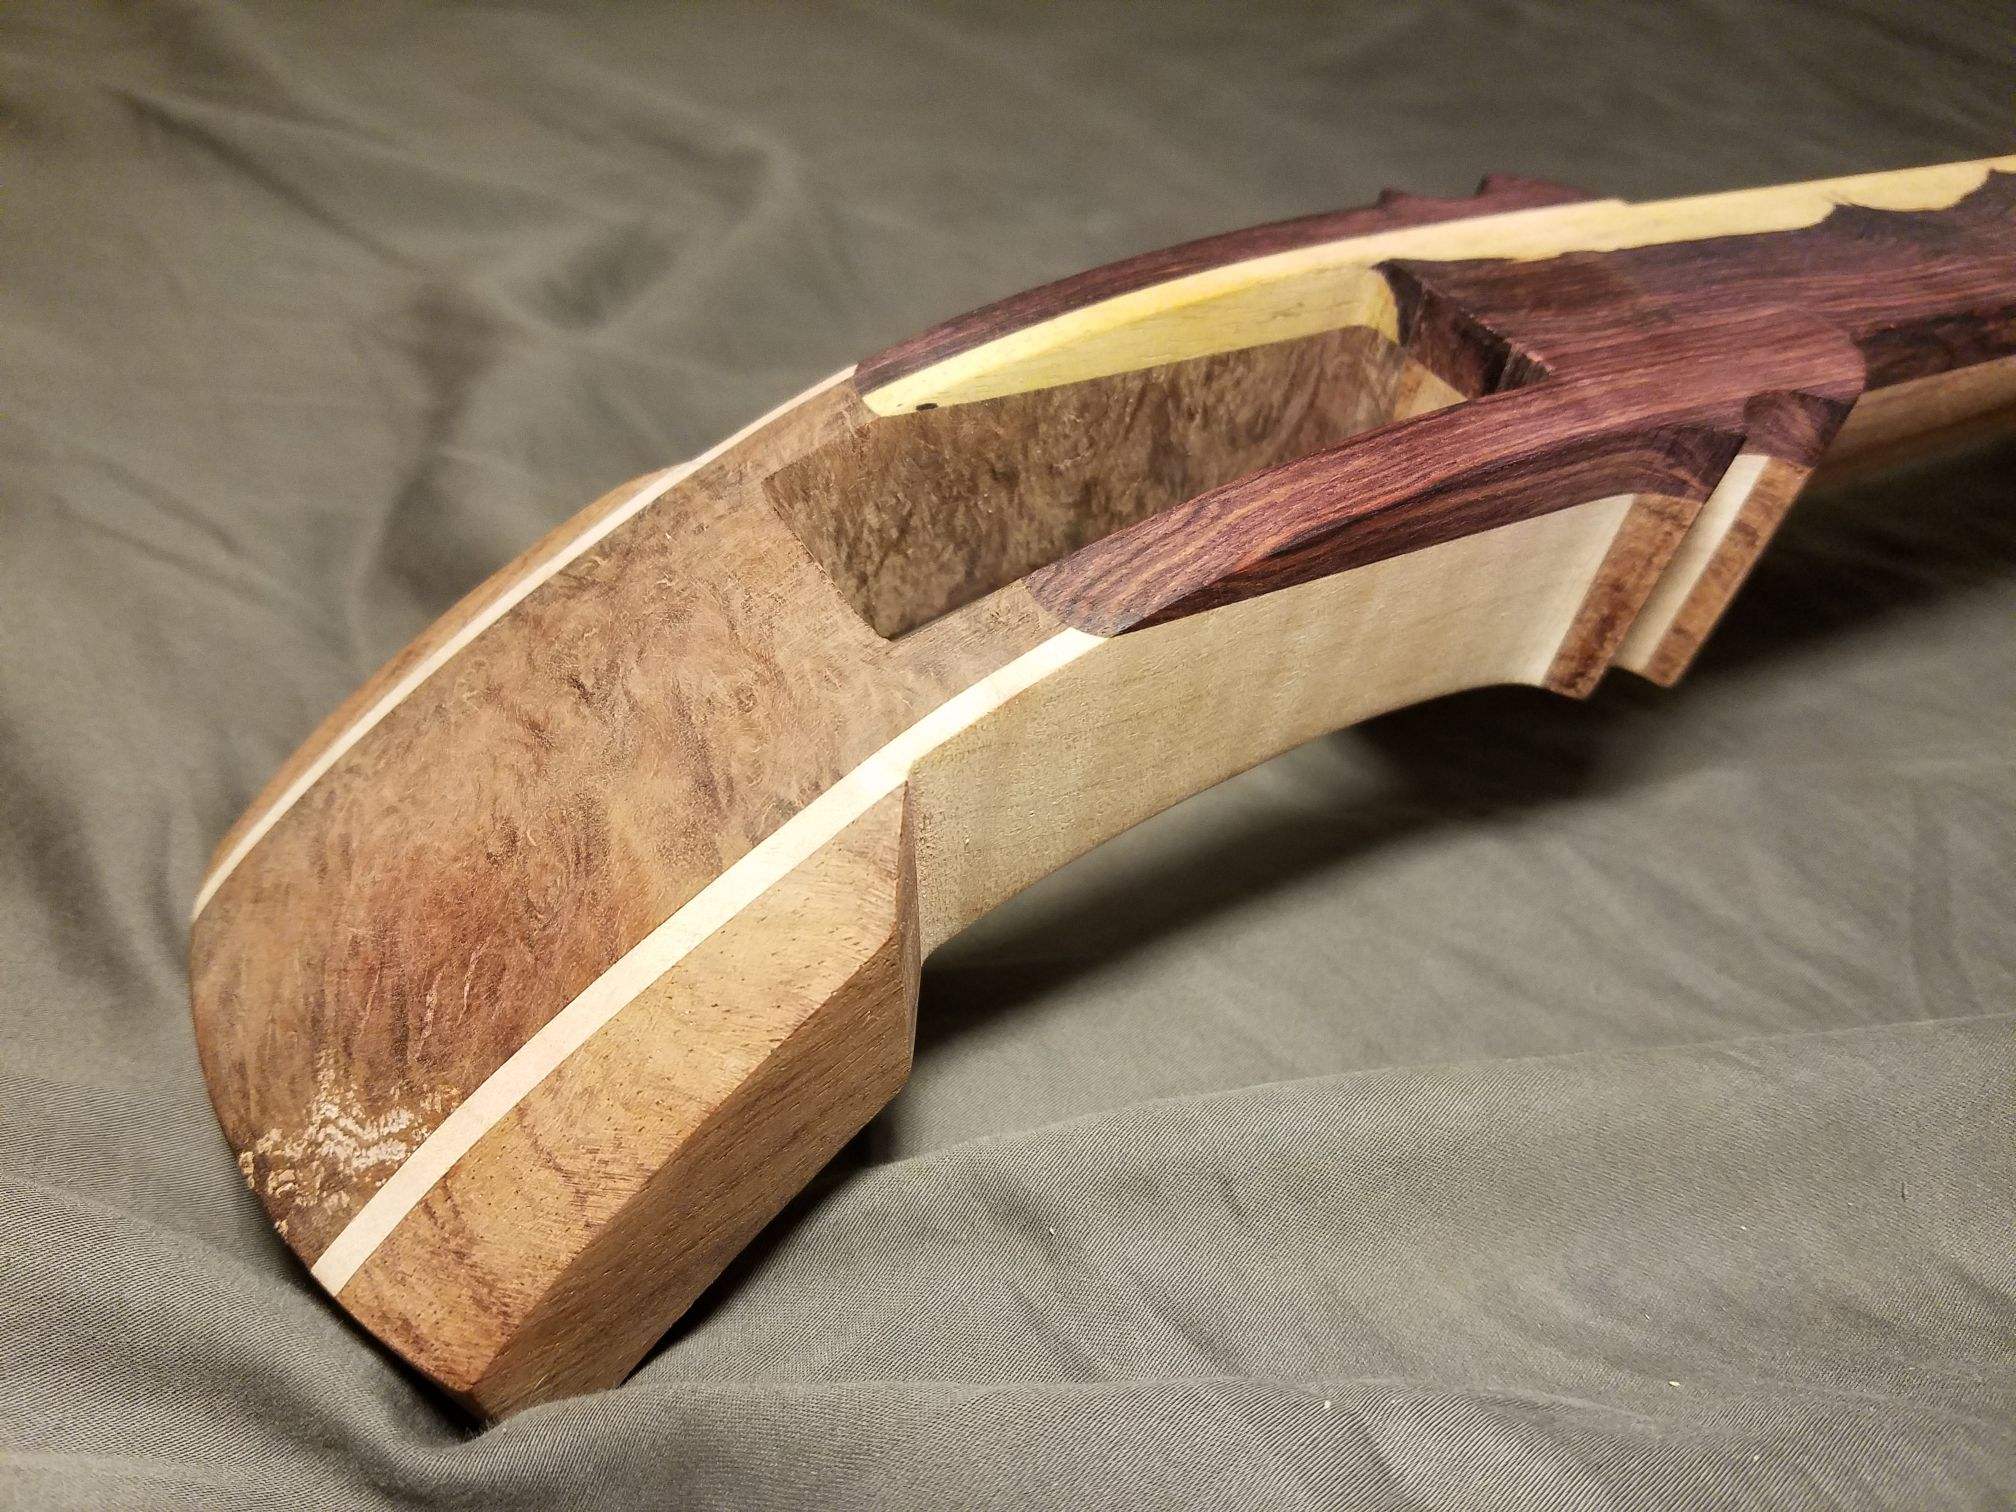
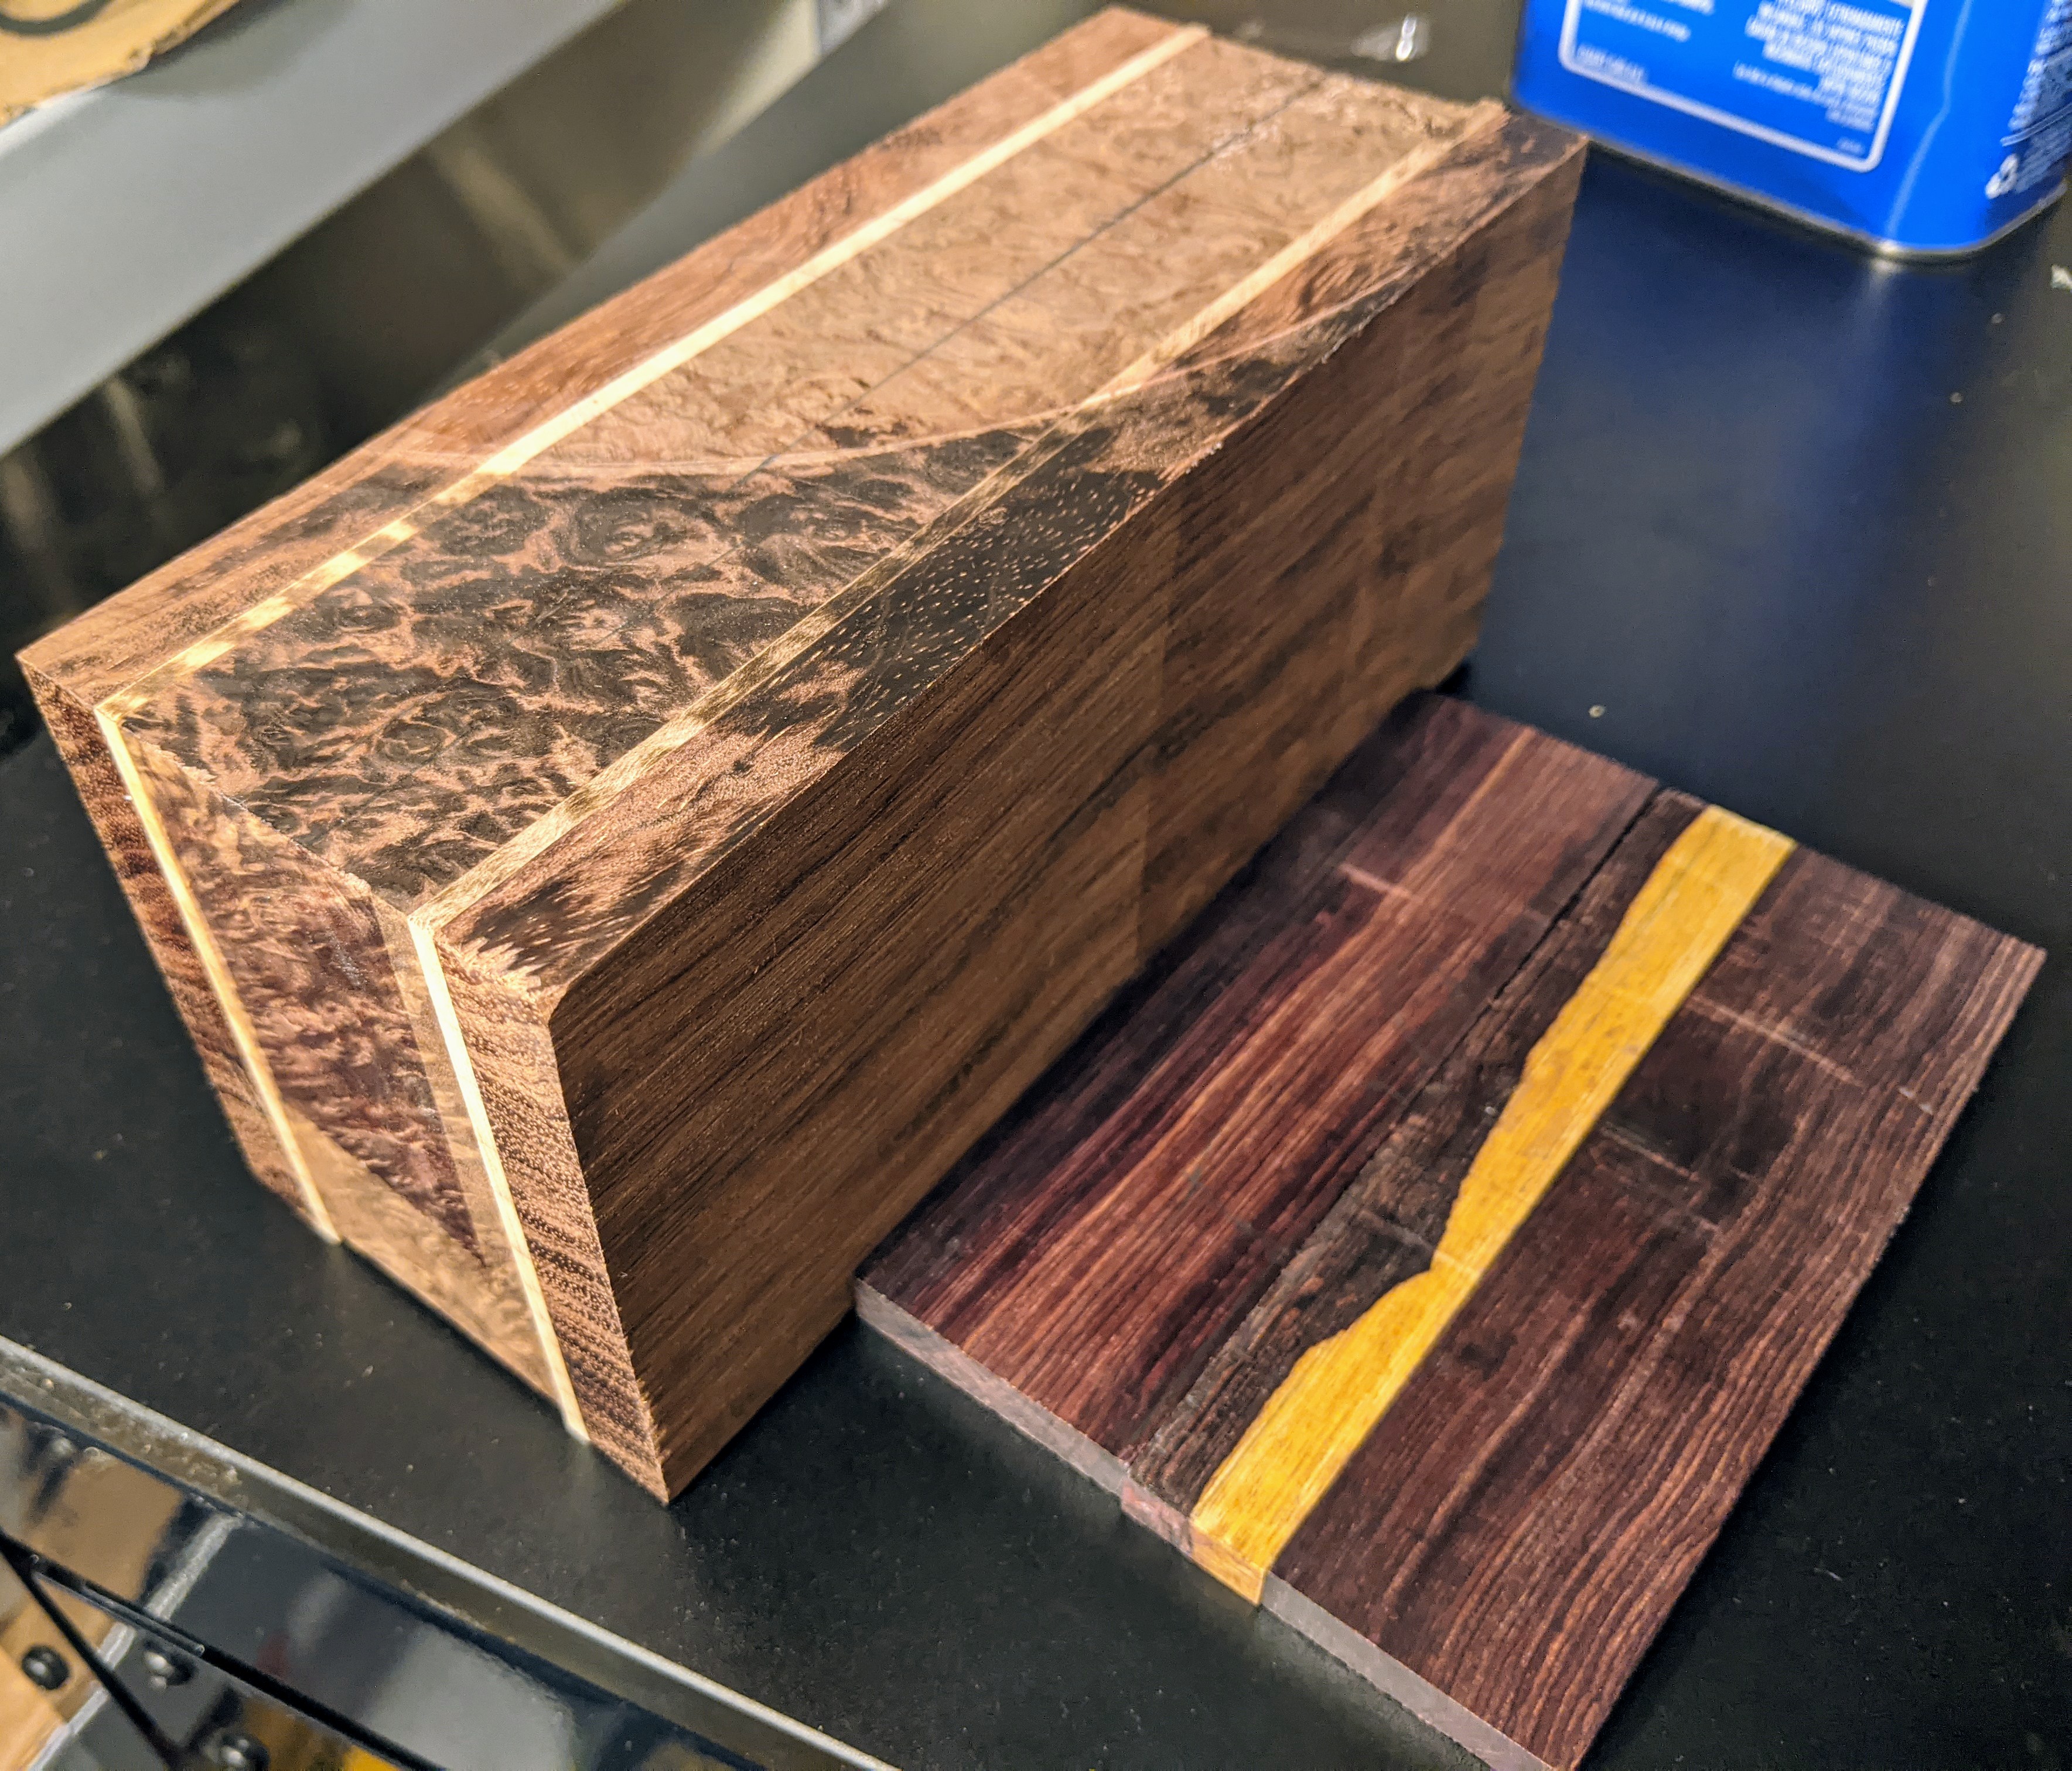
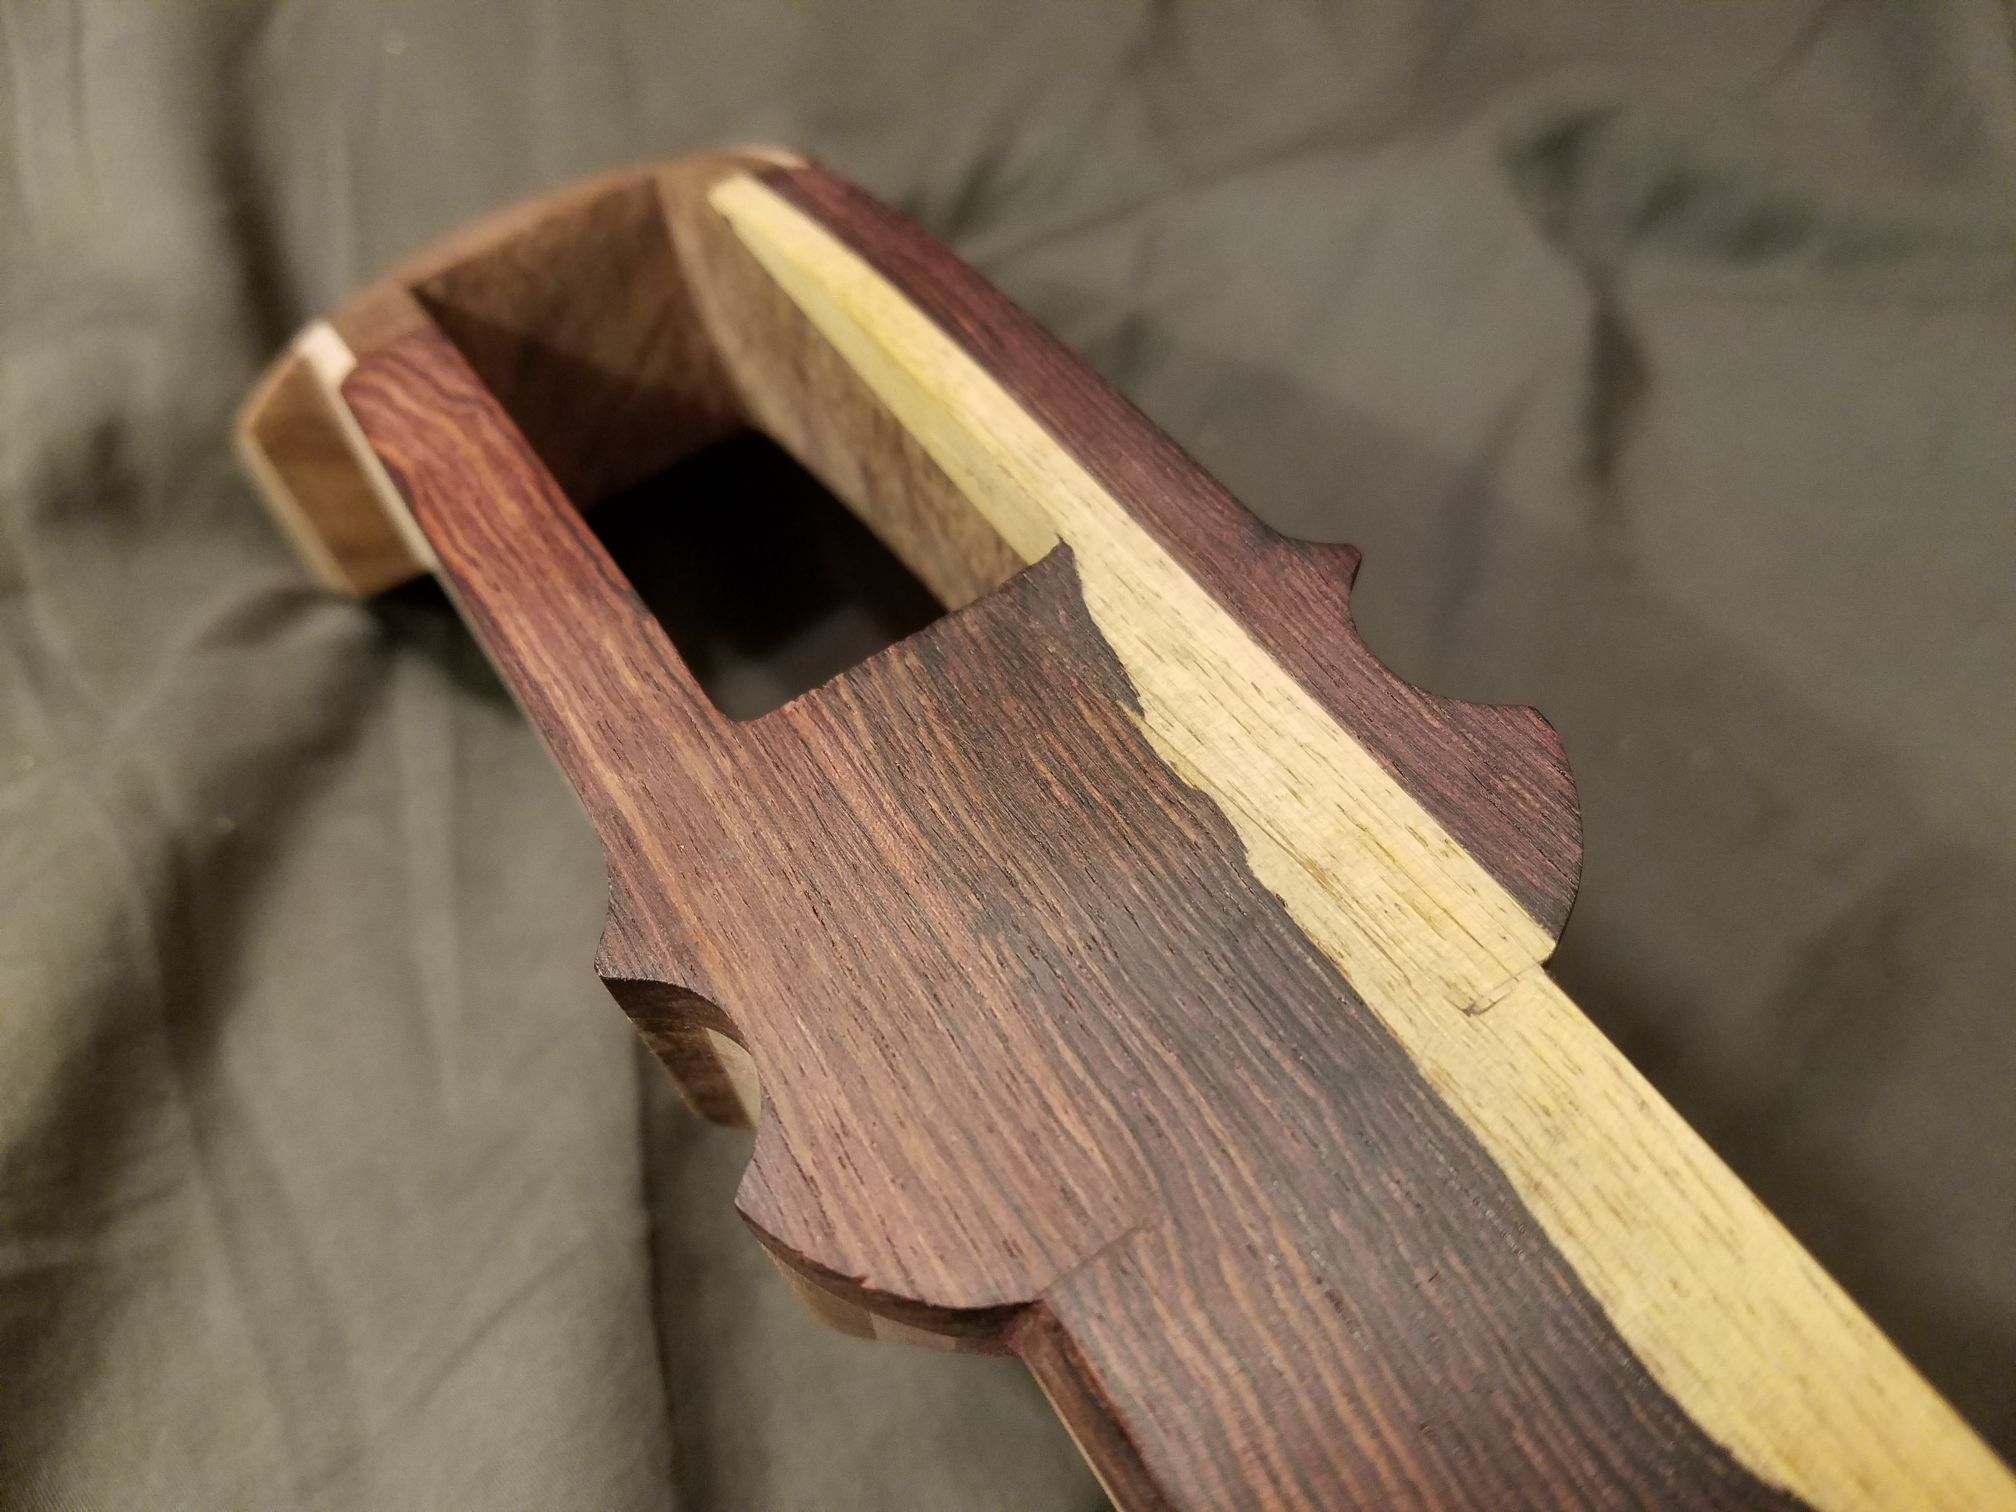
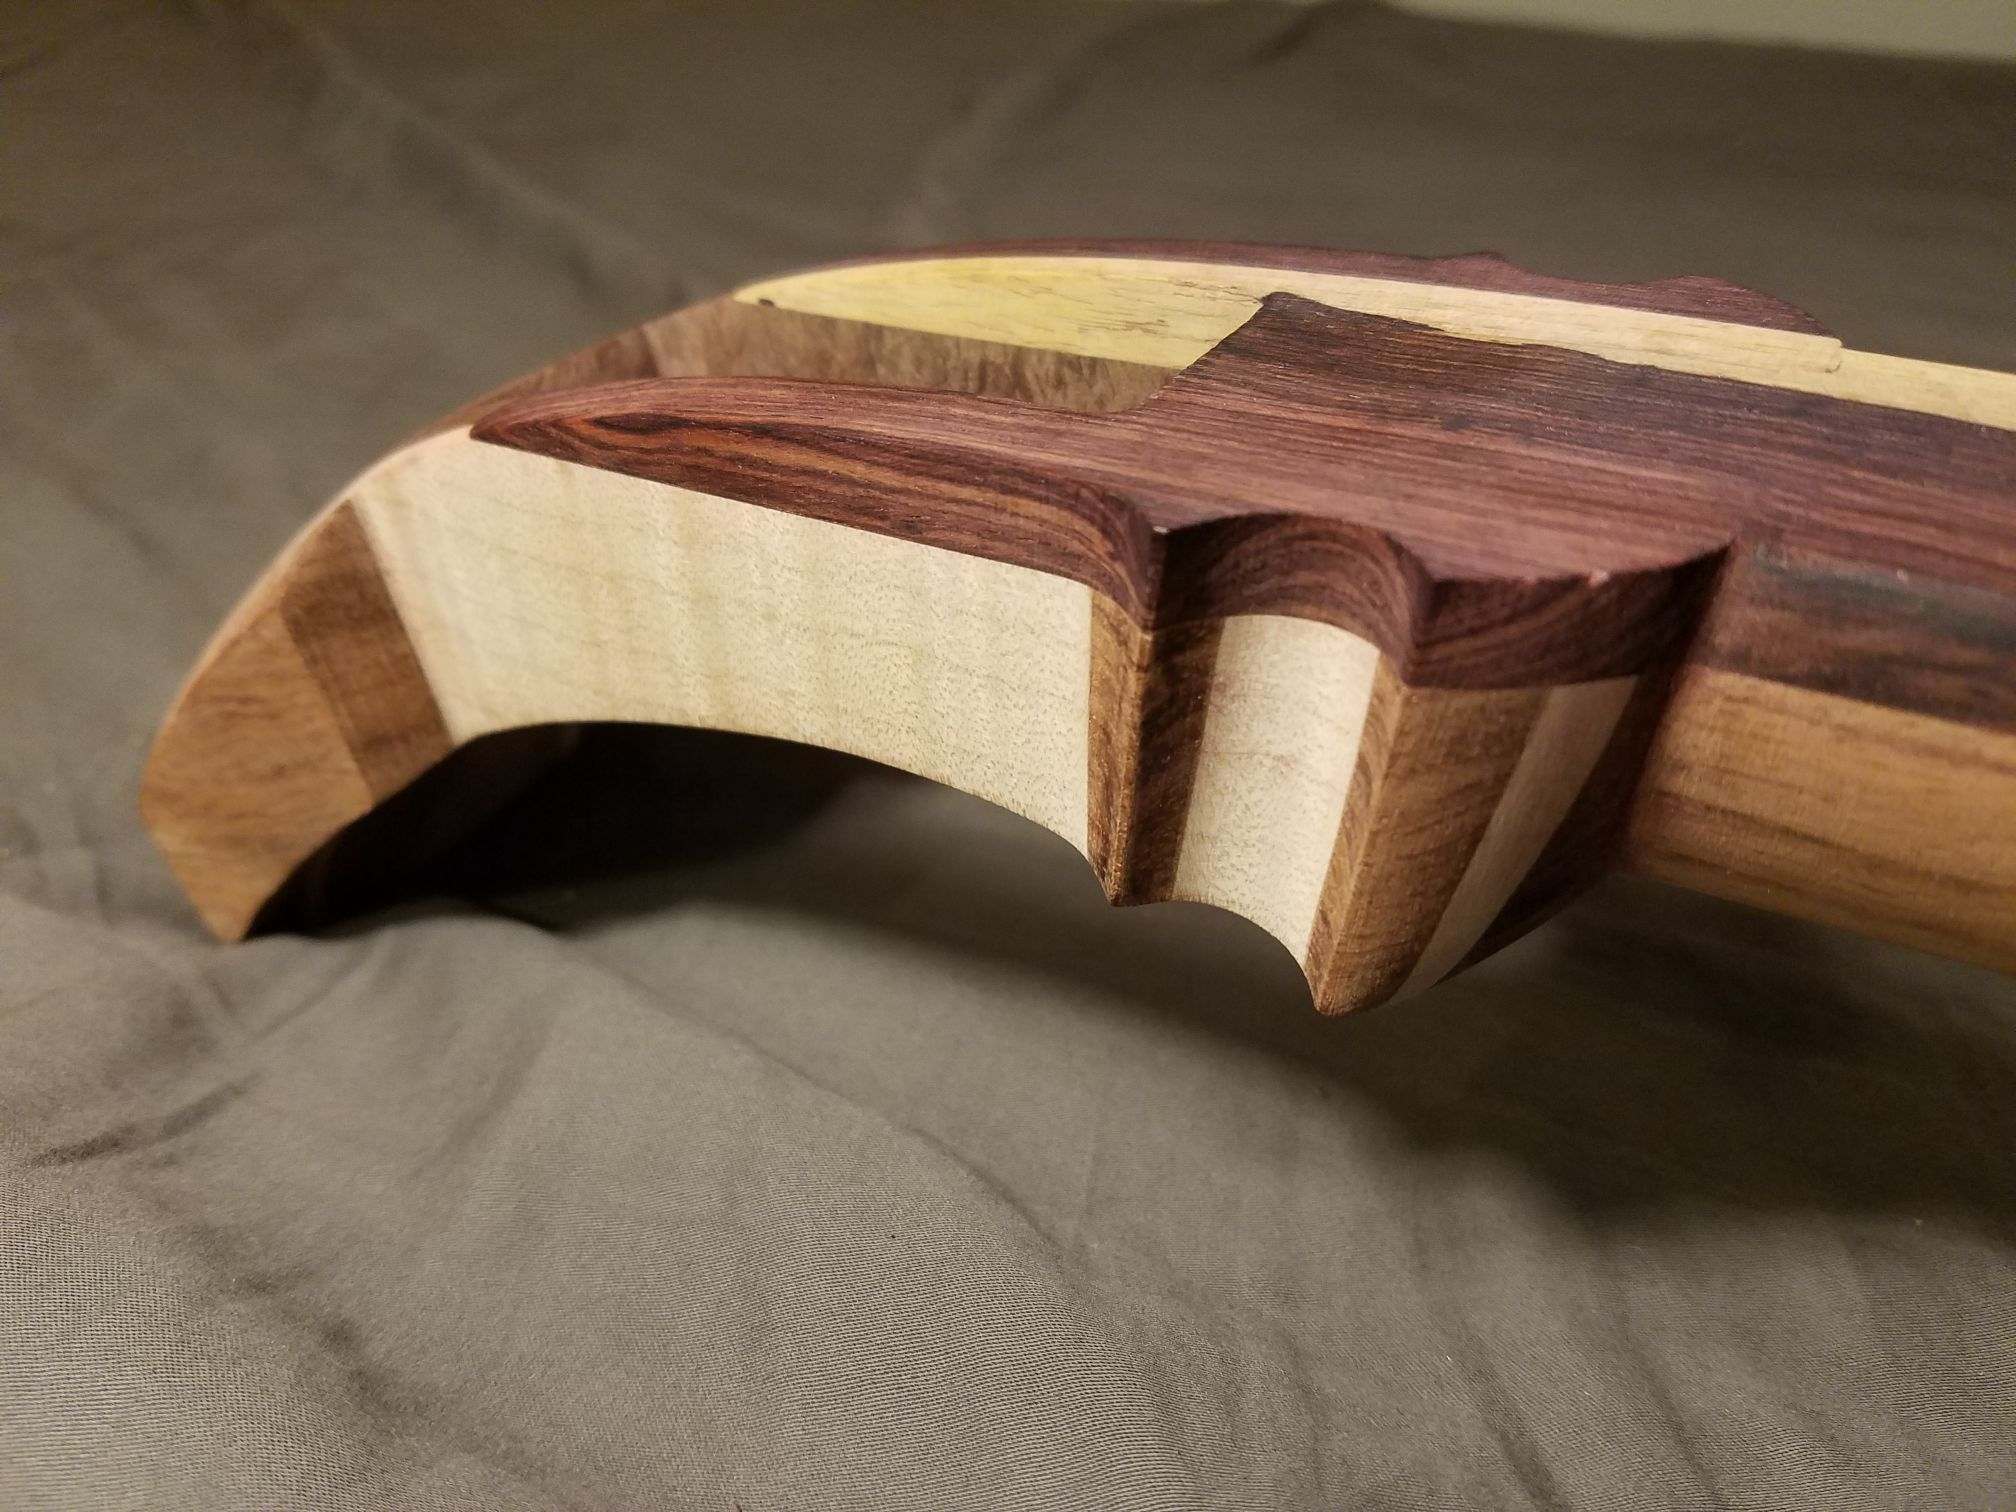
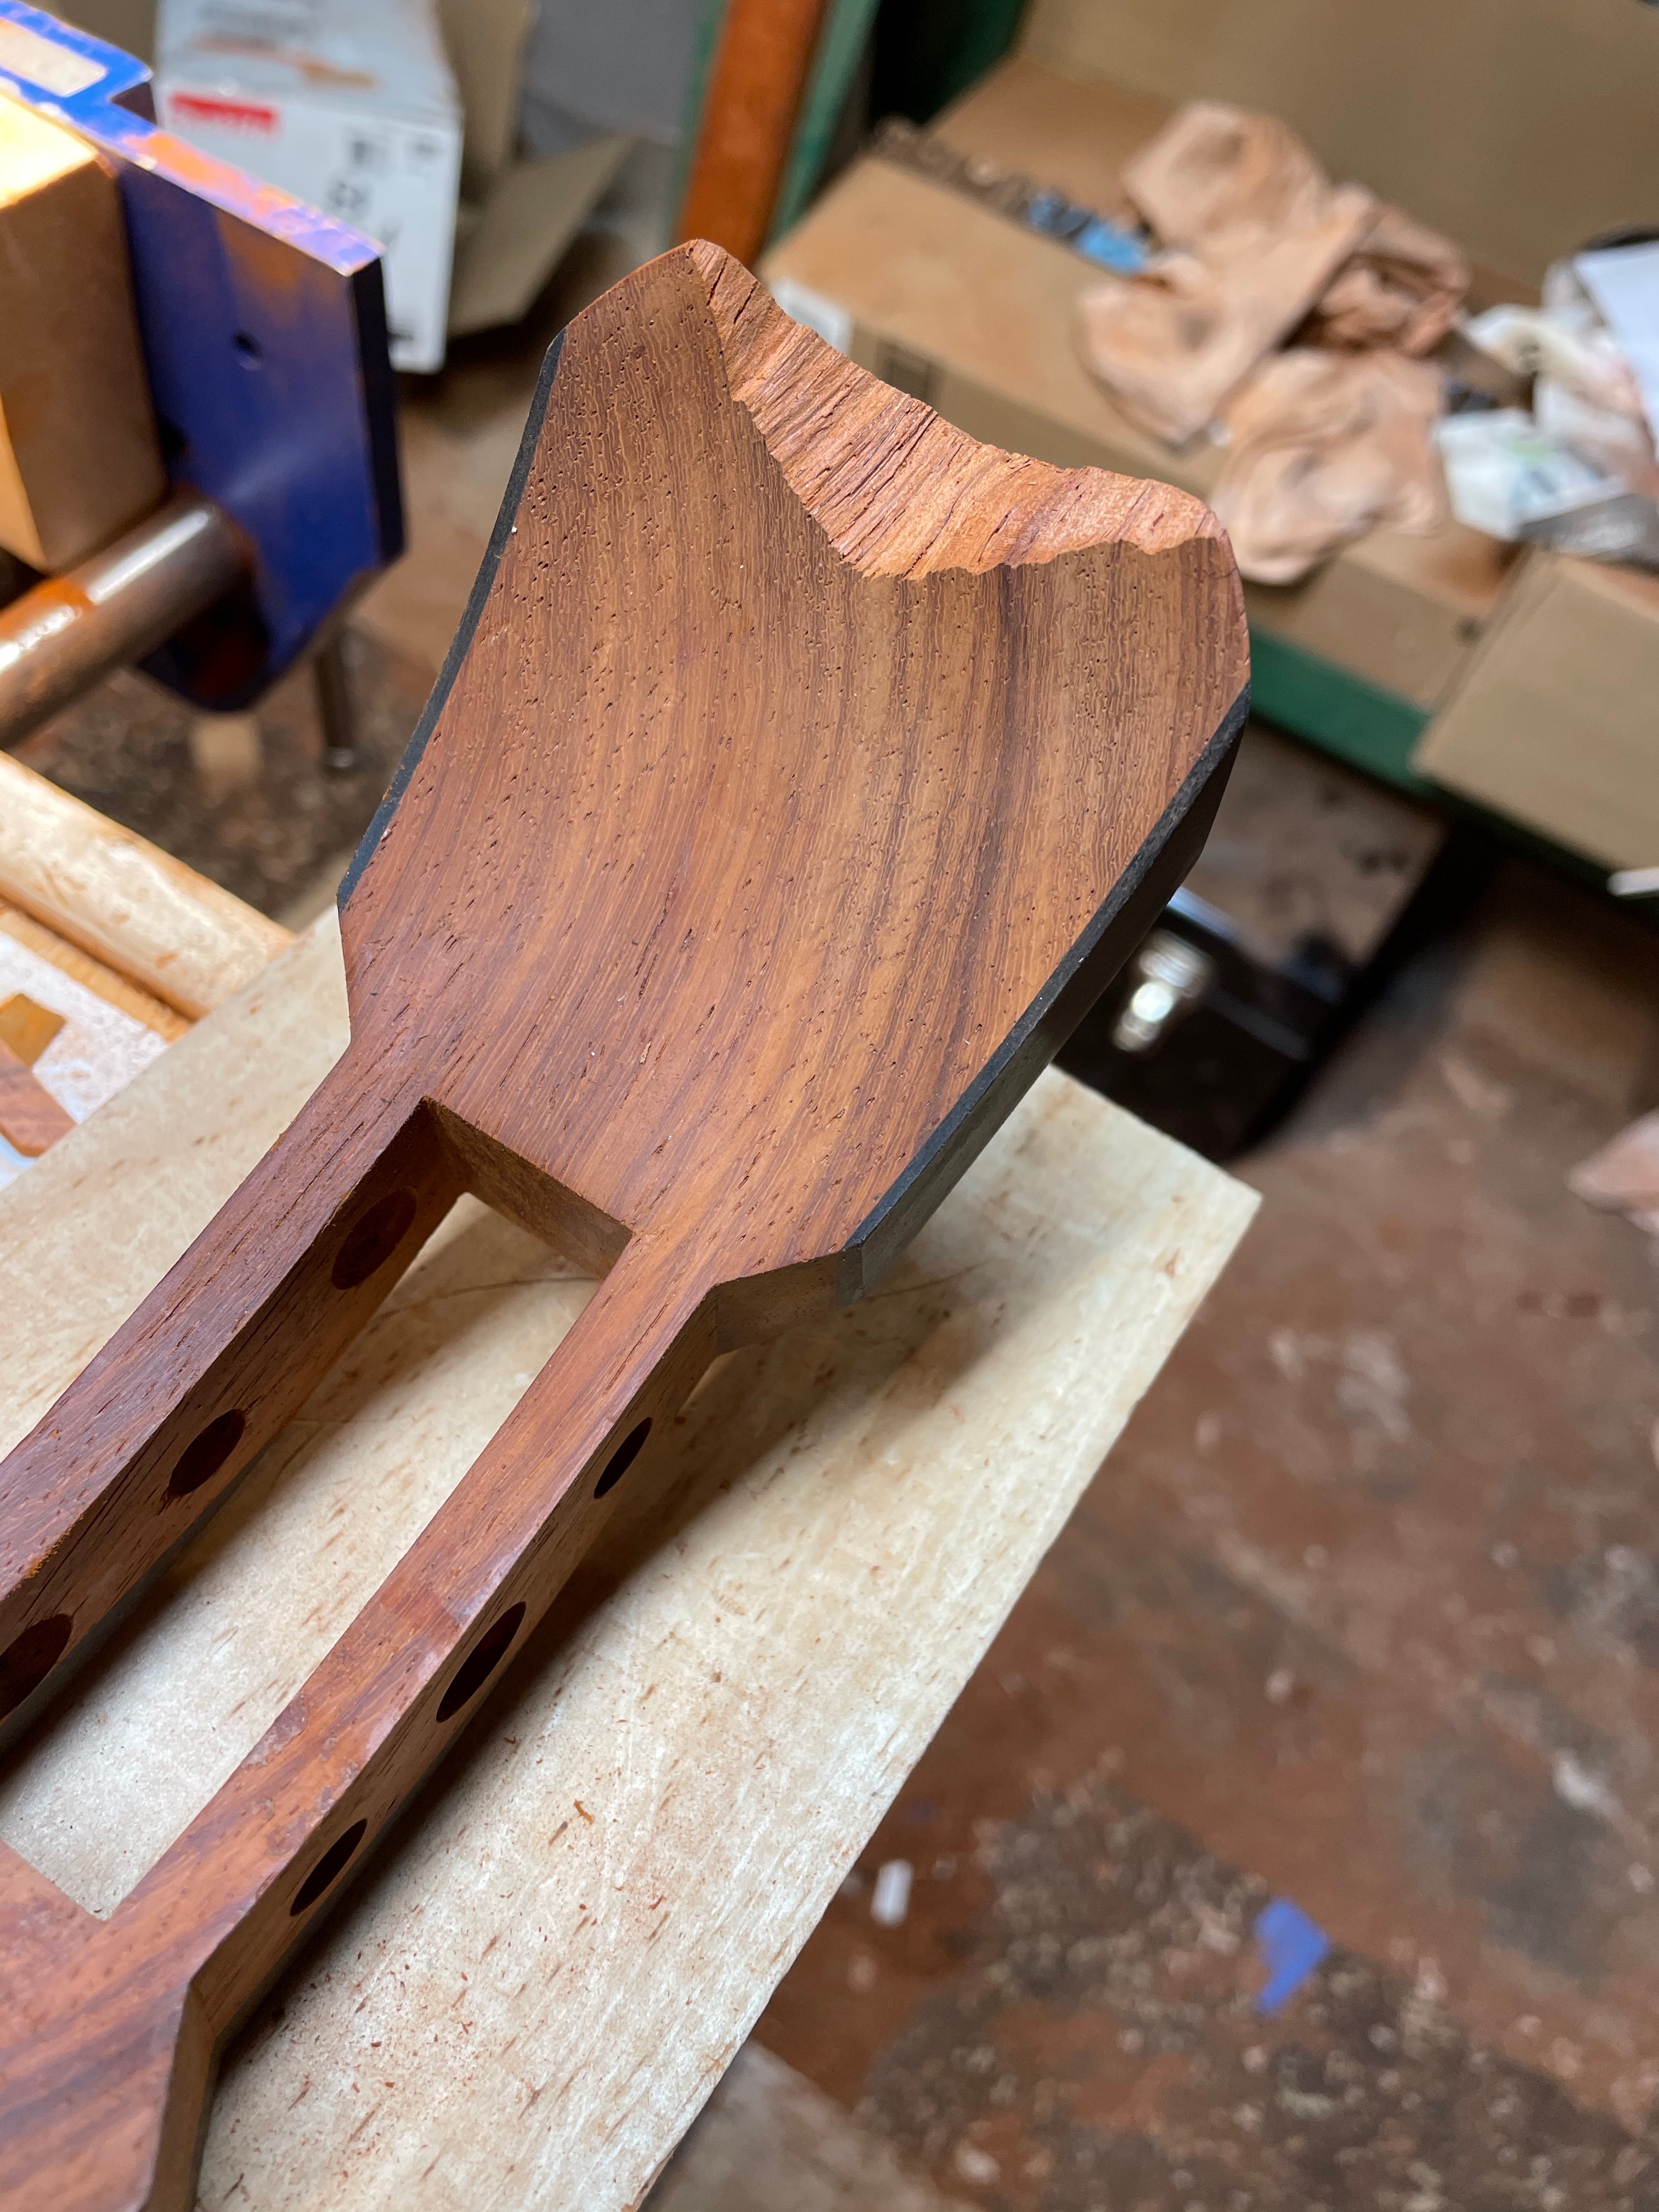
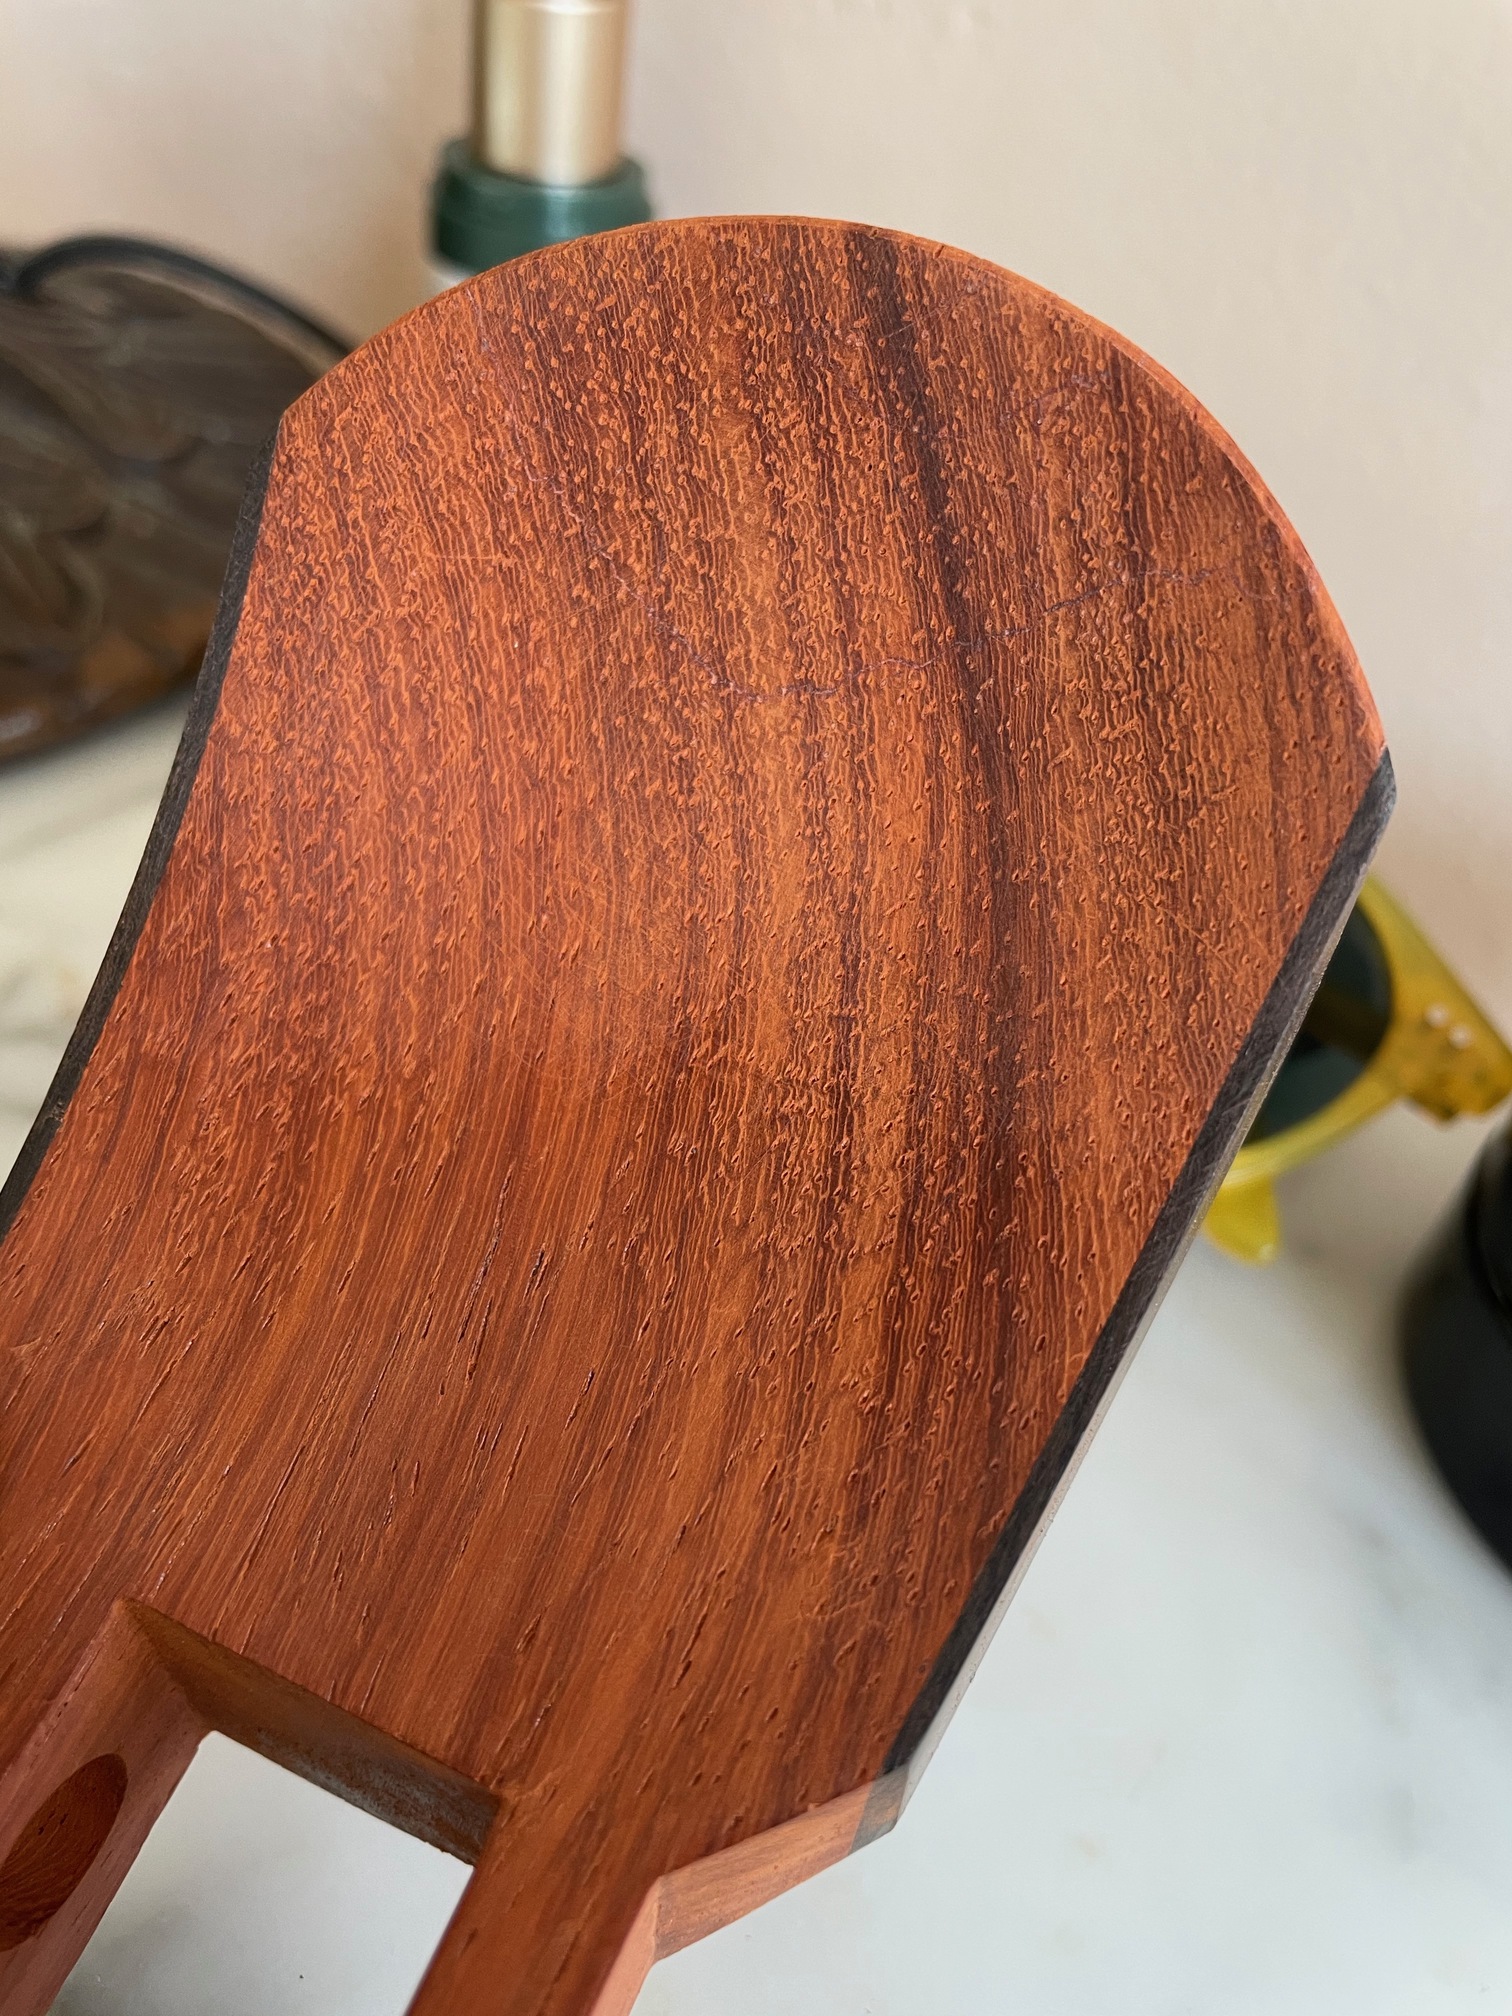
In parallel with fitting the zagane, I will also be working on the custom sawari design. I already got the first pieces ready to begin the build, and will post some pictures through the week of the progress. I will also share some shots of the tenjin as well, which hasn’t been revealed yet.

2 Likes

Finally having the dou back with hibiki got me really curious to see how it sounded. Over the weekend, my impatience got the best of me, and I just had to try and gauge the tone of the dou with Hibiki. The sao and tenjin are not ready for stringing yet, however I ended up taking the neck from a chuzao shamisen I bought years ago but never skinned and put it on the dou to try and test the sound. Despite the fact that the holes in my dou were way bigger than the chuzao nakago, and the nakago just barely made it through for me to attach an old neo I had, and the string tension held it in place well enough or me to at least get a glimpse of the sound. I already had second and third tsugaru shamisen strings with a tsugaru bridge, and substituted the first string with a solid nylon guitar string I had used in the past.

One major thing I have been increasingly worried about going back and forth with Kyle on was how the varnishing on the inside of the dou would affect the tone. Originally, I was going to varnish and gold leaf the inside with 24k leaf, but fortunately Kyle talked me out of that one. From his experience with the Kokoa build with the urushi inside, the tone ended up being too bright and harsh, especially with the sawari effect. I ended up applying two layers of Tru Oil varnish on the inside, but it has been bothering me since.

Varnishing the inside was a gamble, however this first sound test definitely put my mind to ease! While I couldn’t test the full dynamic range, as well as not having the actual neck locked in with a silk first string I don’t know the complete tone for now, but so far I am very happy with it! At least with this initial test it doesn’t sound excessively harsh like I was worried about. The tone is bright and clear tone without too much resonance or sustain despite the varnished inside, which I was worried would lead to overtone ringing in particular. I still have to see how the sawari sounds with a silk first string, but I don’t think I need to be worried anymore about the tone at this point! Getting a first appetizer of the tone now has made me even more determined to finish as fast as possible and begin playing, I want to hear more!

4 Likes

Finally got around to taking some pictures of the full sao to show off the topwood! I have actually documented this build extensively over the years, and probably have a couple hundred pictures of the whole process (the full laminations for everything was extremely involved), and I will have to see about posting the entire build someday. For now though, here is the end result:

The topwood is camatillo, an extremely hard and dense member of the rosewood family. This particular wood has a quite striking purple heartwood with black streaking through the grain. Here you can see the main feature of the topwood - the purple heartwood with a thin waving cream-colored sapwood running along the edge:

Of course like every part of this shamisen there is a backstory. This is actually the second fingerboard I cut for the sao. Initially, I spent a long time browsing different woods I wanted for this feature. Ebonies and typical rosewoods are extremely common for stringed instruments, and I wanted something a bit different that wasn’t commonly used, with unique coloring or features, as well as being very hard and dense. I stumbled across camatillo by chance, and was drawn in by the deep purple tones and streaking. The wood was already offered as fingerboard stock for a bass guitar build, so it was already the perfect thickness as well as being wide enough and long enough for the shamisen sao. The wood that came in had mostly heartwood, with the sapwood streak along one edge.

Originally, I cut the blank to use just the heartwood. I had the sao all prepped and ready for gluing, but decided to pause at the last minute.

Looking at it more, I thought the second unused half, which consisted of the heartwood and sapwood, could make for a more unique and interesting topwood. I had also remembered seeing some amazing bass guitar and ukulele builds that had a stunning mix of padauk sapwood and heartwood in the build, which I always thought was just so cool. After a lot of thought, I decided to switch over to this piece you see here. I ended up really lucking out that the remaining piece I cut was just wide enough for the sao after trimming.

The name for the shamisen, Masamune, was actually born from this feature soon after. Gluing the fingerboard and trimming the edges down to the proper width, the thin and wavy sapwood against the darker purple heartwood immediately reminded me of hamon patterns seen on forged Japanese blades. Goro Masamune, the most famous of all Japanese swordsmiths, crafted exquisite blades that were the stuff of legend, as well as having pioneered numerous new techniques and refining sword-craft to new levels. Starting this project years ago I was a bit overly ambitious, and also wanted this shamisen to be of “legendary” status. Further inspired by the natural feature and the work of the famous craftsman, Masamune shamisen was officially born, setting the course for the custom hardware theme that would eventually follow!

4 Likes

Aaaaah, yes, lovely!!! And now it makes sense, I was wondering what does a swordsmith have in common with this shamisen :slight_smile: Very nice!

1 Like

Some new pictures showing more detail of the tenjin!

Like the dou, the tenjin follows a similar lamination pattern with the figured bubinga on the sides, followed by thin strips of curly maple, and Australian red mallee burl in the center. For the tenjin, I wanted to show off more of the mallee burl, so I inverted the proportions between the bubinga and burl for a larger central piece.

The tenjin itself is made up of 8 pieces - 5 for the main tenjin block in the laminated pattern of the dou, and 3 pieces of camatillo to continue the sao fingerboard pattern.

As a major feature of the sao design, I wanted to have the sapwood continue up from the sao through the tenjin. This was a bit tricky positioning the cuts of camatillo at the joint between the sao and tenjin to achieve this effect. The chibukuro is also neither standard cut nor obi cut, and like the saruo, ended up slightly different from my initial design, evolving on its own as I carved it into the tenjin.

Originally on the sides at the outside of the kuro aze I was just going to cut the wood back to the mallee burl, but working more at it I decided to stop at the curly maple as it has very nice chatoyancy to it when polished, provides a bit of a bright contrast to the darker woods around it, and and adds some contrast for the darker-etched steel zagane to stand out against. The extra lamination also adds a bit of extra support for the burl wood to help prevent it from cracking, as burl can be fragile under mechanical stress. Particularly at the chibukuro, the lamination of woods creates a patterned striping effect as the layers are filed back, which matches up with the maple strip running along the kuro aze.

Finally, a look at the back of the tenjin. Overall the tenjin is a bit thicker than standard, for both the custom zagane as well as a slightly heavier feel (personal preference in design).

4 Likes

Hi Michael! I have been following your amazing build from day 1 that you posted. Actually, I commented on Facebook when Kyle shared your Dou. This is incredible man. I really applaud your originality as well. It is very inspiring. I can’t wait to see your finished Shamisen! I am building a couple of them myself. I am not a very experienced wood worker so the journey has been very challenging but mostly rewarding. I wouldn’t call mine original though, especially after seeing yours! Bravo Michael!

1 Like

Pol, thanks for the compliments, I really appreciate it! I just saw and commented on your post now for your shamisen build. Wow - I absolutely love the macassar ebony on the padauk, that is a really beautiful shamisen! I don’t think I have seen that combination on a shamisen before, and the fact that you are creating your own in your own style absolutely makes it original! I am definitely looking forward to seeing your other builds now, especially the bocote body one!

Making a shamisen has definitely been very challenging and frustrating for myself as well, but it is 100% worth it in the end. As nice as the professional made ones like Akatsuki and Eclipse are, for me I just don’t think it would feel right unless I am playing on one that I put every part of myself into. It definitely isn’t perfect and has plenty of flaws, but I think taking the journey to make it yourself if you can makes it all that more special when you play it.

Happy birthday x2! he… I couldn’t agree more with your second paragraph. I am not intending at the moment to dedicate myself to becoming a serious Shamisen player. I am already playing/learning too many instruments! So I don’t feel deserving or worthy of investing in something like the Akatsuki, as gorgeous as it is. At the end, building turned out to be the very best move I could take. I did end up finding a very beautiful instrument on eBay and got it! It was too good a deal to not take. It is made of Kouki (a bit of a tiger pattern to it in fact), in excellent condition except for a cracked sao joint (that was not disclosed!, so I got a 15% refund). The craftsmanship is flawless! A real eye opener reminding me of where I stand on building. It’s a particular one because it has an Azuma Sawari, with other features that point to a Tsugaru Shamisen, but it has a thinner sao/tenjin/itomaki. So it’s almost a mix between a Tsugaru and a Nagauta. I clearly don’t know enough about these instruments…

1 Like

Pol, thanks for the birthday wishes! I have also bounced around between numerous instruments over the years myself, never really committing to one and mostly just dabbling, but shamisen has always been my favorite, and this time with Masamune I really want to commit to getting decent at it. I don’t think I will ever be a great player, but I would definitely like to try!

It is always amazing what you can find floating around eBay! I also bought a couple of shamisen off eBay in decent shape years ago - a hosozao and a chuzao, though never really did much with them. I think they are entry level models, but even so I can definitely see the craftsmanship in them regardless. Especially the neck joints and how perfectly and seamlessly they fit together. Its just crazy, no way could I see myself getting that level of precision!

It is also interesting to see that while there are more standard features between major shamisen classes, you can still come across ones that combine a little bit from different styles. I think at least it is nice that you can have the flexibility, especially when building it yourself. There are general dimensions and features to follow, but that doesn’t need to be set in stone. Who says something like a tsugaru body can’t have a thinner neck if it is what you want in an instrument!

Last night I finally got through another major milestone in the build - drilling the itomaki holes! This was a massively nerve-wracking experience, and took way longer than I was anticipating. Even with access to a very good drill press and plenty of fixturing, the process was brutal - many, many hours of slowly incrementing the holes, checking alignment and angles, fixturing, and making small adjustments to make sure everything was as aligned as best as possible. I had to be especially careful because the burl is very prone to cracking if I drilled too fast or stepped up too large in size at once. Using very thin super glue to seal where the holes would be, as well as using a very hard sacrificial wood backing tightly clamped was crucial to prevent cracking and tear-out in the burl (as well as getting brand new steep-angled brad point bits and stepping up in size very slowly.)

The holes were drilled just slightly undersized so that I could do the final sanding fit for the custom zagane. The zagane are already etched and ready to go, but I was just waiting to finish drilling the holes in the tenjin before posting pictures of them here. I also placed an order for machining the final pieces of the custom sawari, which should hopefully arrive in a few weeks. The build is almost done - all that is left is to finish the sawari build and install it when the final parts arrive, then I can move on to final sanding and polishing! More updates to come soon!

1 Like

This looks awesome Michael! It is obvious by just looking at your pictures that you are not taking any shortcuts. The spacing between the holes looks perfect which can be a bit tricky, especially between the holes that are closer together. At this stage I have drilled holes on 3 Tenjin as well as done 3 tenjin/sao joints (I am making a little statue out of a second Tenjin I made for my Padauk). The second joint went better than the first and the third went better than the second! So practice does play a big part in joinery I guess. Still, yours looks amazing. It looks as seamless as it gets from the top. The transition of the sap wood between sao/tenjin is basically flawless and the same goes with the left side. This build is really something man! We are basically in neighboring states you and I. I will have to come see this instrument in person at some point!

1 Like

Thanks! Since the chances are very, very slim that I will ever make another shamisen again, I figure it’s best to take my time and not rush through this one. Having practice and experience beforehand though would have definitely been a major help, especially on some of the features. At least for me, by far the worst parts have been the joints - joining the whole dou together and lining up all the woods, fitting the sao to the dou (still not perfect but it is good enough at this point) and then the tenjin joint. Actually, a big reason why this project took so long is because of the joints - I siked myself out so much worrying about making it perfect that I ended up not touching it for long periods of time. But it will never get done if you don’t try!

One thing I have definitely learned from prior instrument builds though is that starting with more wood at the joint then shaping/sanding back in definitely helps it look more seamless. Actually on the tenjin joint on the surface of the sapwood side, I ended up having a quite large 0.5mm gap right between where the sao and tenjin butt up against each other (from how I cut and filed it). I originally filled it with wood glue and sawdust, but sanding back it looked noticeably bad, as I used Titebond III which is darker, which stood out too much against the sapwood. I ended up digging out the glue in the gap, then carefully shaping a wedged splinter from some leftover camatillo sapwood (never throw away pieces of fine wood, no matter how small, you never know when it will come in handy!), glued it in place with transparent Titebond, and hammered the wedge in. Sanding it back further (as I still have some work for the lengthwise curve), the gap has essentially disappeared and blended in, though you can see evidence of it very slightly if you look closely. I also had some very minor gaps at the surface between the sao and tenjin around the side and bottom which I filled with the same color wood dust and wood glue, and filing it back again it blends in seamlessly. A bit of careful filler can be quite useful!

Last night I just finished the final sanding fit of all the zagane. They fit super tight, and I am really happy with how it looks. I also ended up drilling all my angles pretty much dead on, and the machinist got them to 8 degress on the dot, so everything looks like it lines up, and the angles on the zagane flange sit flush with tenjin surface. Since the fit is so good already, when it comes time to final gluing I will press them in and use thin CA glue to wick into the joint to secure them.

Really awesome you are in this region! If you don’t mind me asking, what state are you located in? I’m in Upstate NY near Albany. I’d definitely love to see your shamisen builds in real life too at some point, and would be awesome to actually meet someone who is interested in building and playing tsugaru shamisen as well!

What a great response Michael. Thanks for sharing some of these details. I’ll try to keep mine brief since this is your thread for your build.

Yes, taking the time when working is so key with a build like this. Keep checking closely from all sides and angles with templates, etc. while working… KEY. I understand your hesitation on tackling these joints, etc… I went through the same thing. Literal fear to mess everything up. I am very much a perfectionist as well and my goal is to get as close to Kyle’s level of builds having access to so many of his pictures on FB and YT vids.

So, the “all around” seamless Tenjin joint is one of my obsessions with the build, and it is very hard for the inexperienced worker. I had noticed that small shim at the base of the Sao/Tenjin on the sap side of yours. You did a great job though and I had to look closely and magnify the picture that shows it best. You even aligned the grain on it with the Tenjin. I did the same plugging one of the itomaki holes to re-drill it due to not being satisfied with the spacing between all holes. I made a plug so the grain would align and ended up making a rookie mistake not taking into consideration that wood glue expands wood, so when leaving just a tiny bit of wood to deal with at the end of the plug to make it flush to the Tenjin, after putting glue both in the hole and on the plug, the plug didn’t go all the way through and ended up about 0.5 mm shy of the Tenjin surface. It sealed the deal on having to make zagane to hide it which I always considered skipping. I’m glad I did it though. Machining the zagane is definitely the pro way to get it done though and I can’t wait to see how yours will look! They are so unique. I love working with wood but never considered getting into working with metal (oh man, I am all over the place here. I could go on for days! I’m sure you could as well). I have had to use shims on all Sao/Tenjin joints, but never considered using one on the base and always went with the side of the tenon instead. This can also work very well. Dealing with the dou was a total nightmare. Went from “very good” coming out of the table saw, to “absolutely messed it up” trying to make it better, to… “good enough with the right epoxy”. Working on the 2nd dou right now and being extra careful to not make the same mistake. Very tricky. I’ll leave it at that… for now. :zipper_mouth_face:

I’m in Providence, RI. We should definitely get together at some point when things are a bit more normal and when we are done with our builds!

Take care and enjoy the build! I think you are done with the hardest or at least the scariest parts!? Excited to see what you’ll do for itomaki too!

1 Like

Thanks for sharing some of the details of your build as well! One of the biggest things I have learned with this build in particular (and going back and forth with Kyle a lot) is at the end of the day, even though the imperfections can be very frustrating, after a while your focus fades on them, and stepping back and seeing the whole instrument really makes those small details that only you notice become overshadowed by the greater satisfaction and enjoyment of what you accomplished through the journey. Instruments are challenging things to make, but having one that you made yourself that you can enjoy and play is well worth it. And if that extra plug or shim makes the difference from an ok to great instrument, then there is no shame in adding it as needed!

I definitely think that the zagane are worth the extra effort. I can’t do any metal machining myself, I have had to outsource the parts (though I have custom designed each part, as I use CAD extensively for my day job and other major hobby), which has unfortunately added a huge extra cost to the project. The raw metal stock was super cheap, but machining each part really added up fast (much more than I was expecting when I first started.) But looking back it was worth it for sure on this build.

Drilling the itomaki holes was definitely the last really major part of the build. However, I still have one final and very crucial part - the hole for the sawari. Because of the way I had to design it and the overall dimensions, I have almost no margin of error for drilling and installing it. In some sense drilling the hole for the sawari (which will be a uniquely modified en sawari style) is more scary than the tenjin holes because it is the final feature of the build, and there is still a very real possibility of serious messing it up.

Awesome to hear you are in Providence RI! Actually my parents live in MA about 30-40 minutes from Providence, and is a pretty easy drive to get there. Now that my wife and I along with both my parents are fully vaccinated, we will be starting to visit them more regularly again after over a year of waiting, so I definitely think we could very easily meet up at some point! I still got a couple of months to go (mostly waiting for hardware to arrive and curing of the finish before the final buff), but it’s in the home stretch!

1 Like

Oh man! I could not have said what you say on the 1st paragraph better myself. For me, about half of this project has been about fixing mistakes and finding ways to make features out of them. In the end a lot of them end up as imperfections but in the end, what stands out is the satisfaction of overcoming the challenge. It has also taught me or reassured that there are many solutions to every problem, the main thing is to not give up, don’t panic, think well before acting, and most importantly, to take careful and hopeful action.

Like I mentioned, I am making a little statue out of a second Tenjin I made for my Padauk (trying to make one “cooler” than the first one after learning how to make the curve at the top more efficiently). I worked very hard on it and in the end ended up going with the first one (classic). Well, I decided to make a nice little statue out of it and one time, as I put it in the vice incorrectly, the whole thing flew out of the vice and landed on the floor. I immediately feared the worse. I was not wrong. A huge chunk of the tip of the ebio (?) broke off… The floor of my small shop was already full of chunks of this wood so I knew finding the pieces (the other question was, how many pieces?) was going to be tough! When my wife arrived home and came down to say hi, she saw what happened and was surprisingly freaking out more than I was. I got upset when it happened, yelling out F@#$K loudly while the thing was still in the air. I immediately laughed because I was wearing a heavy duty dust mask and it sounded all muffled. Anyways, I was looking for the pieces and I was calm and feeling optimistic. About 2 hours later I had found the 4 broken pieces. I worked out what the best and easiest way of gluing/clamping them would be and went for it. I glued 2 pieces at a time. It didn’t come out perfect, but not bad either! I will share a couple of pics., but please do tell me if you mind having these long conversations on your building thread. I personally wouldn’t mind and I enjoy reading other ppl’s experience and seeing all sorts of pictures, but that’s me. I would understand if anyone feels different. I can just delete the post or at least the pictures.

The Sawari!!! How could I forget that one? I know why… Because I didn’t (or haven’t so far for these 2 builds) gather enough courage to tackle the tiny beast. I would make one myself, and yes, drilling a hole and making it rectangular and as good as possible is really overwhelming, as, like you said, is done very much at the end of the build.

Yeah, I looked up Albany NY, and was surprised it was 2.5 hours away from PVD. But 30 - 40 minutes would be a breeze! That’s great!

1 Like

Wow, that is an awesome repair job! Having something like that happen would be devastating (you handled it a lot better than I would have) but from the second picture you can’t even tell it was shattered like that, it is glued completely seamlessly! At least it wasn’t structural like on the sides.

And no worries about posting and sharing here either, I am glad this build is provoking some discussion on shamisen building and experiences in general!

Actually the reason why I am going with the circular style en sawari vs the traditional rectangular azuma sawari is that I know I will most likely mess up the rectangular hole. However, there are some challenges internally with the circular version to prevent it from rotating when being adjusted. As a result, my design should in theory make it very easy to make, and in addition to simpler installation, also allows me to give it a unique look visually when viewed from the top. Hopefully I will be posting some details of the sawari design soon!

So finally, here is a look at the complete set of the custom damascus style acid-etched pattern welded steel hardware for Masamune! The set includes the rindou, zagane, and screw cap for the sawari.

Here are some additional pictures of the zagane set:

A close up of one of the large zagane, the one for the center itomaki:

And the small matching center zagane:

Finally, a look at the screw cap for the sawari:

A bit about the process. After machining, the parts were cleaned, and first masked with red nail polish to prevent etching in areas I didn’t want, like where the zagane would be glued, a bit of the inside bore of the zagane, and the threads on the screw cap.

The parts were then submerged in a warm acid bath of 4:1 water:ferric cholride mix for about 40 minutes. The mix has to be constantly stirred to prevent bubbles from forming on the surface and interfering with a clean etch pattern. The screw cap was suspended on a wire using a PEEK screw to hold it with the wire so I would get even etching all around.

After the first etch, the parts were removed and washed in windex to neutralize the acid, then rinsed and dried with clean water. The nail polish was then reapplied on the gluing edge of the zagane, and removed from the bore. this would give me a light etch inside during the second etch to give extra grip on the itomaki without wearing them out too much from the first deeper initial etch.

The second etch consisted of an incredibly strong mix of the nastiest instant coffee I could find. The parts were submerged at room temperature and etched overnight. This helps deepen the oxide color, and is much less aggressive than the hot ferric chloride etch. The next morning, the parts were removed, cleaned again, then baked at 200F in the oven for about 10 minutes to harden the oxide layers. After, I have them a very light sanding with 3000 grit sandpaper to bring out the contrast further, and applied camelia oil to protect them from rusting, leading to the pieces you see posted above!

The damascus hardware is something I wanted since almost the very beginning of this build, and has been a real challenge between material selection, machining, and getting to this stage. It has taken quite a long time, and has cost much more than I was initially expecting, but for this build it has been absolutely worth it. They aren’t shiny like traditional shamisen hardware, but they have their own distinctive character. All the pieces are made from the same bar stock, but do to the random swirling during forging, as well as how they were machined, each piece is unique, almost with their own fingerprints themselves.

3 Likes

Must I say it again?? … YES! … Man! This is amazing. This is a masterpiece in the making Michael. So glad you are all in on getting this instrument finished. I check every day for an update. I can’t wait to see how these will look against the curly maple…

1 Like

Thanks! It’s still not a perfect build, but at this point I am very happy with it. Actually just last night I fitted the sao to the dou for the very first time in order to do some final alignment checks for positioning the sawari. Really excited to see it all coming together as a complete shamisen now!

Got a bit more good news - just found out this morning that the final pieces for the custom sawari shipped today, which is almost 2 weeks earlier than expected, and should be arriving by next Tuesday! I will be working on the rest of the internal pieces this week, and if all goes well I should have the sawari fitted and glued in by the end of next week, which will allow me to finalize the lengthwise curve and begin the final sanding and finishing process. I will probably share some cad renders beforehand to give an idea of what it will look like.

After this, I’ve got some final minor logistics includes the itomaki, kamigoma, and a couple of other extra decorative pieces. I have been bouncing around a few ideas for itomaki, and I may just settle on my first idea, though there is risk to it since it will also be a bit costly, and they will be rather heavy (hopefully not too heavy!) But if I go that route they will definitely be a one-of-a-kind itomaki set! Eventually I will also be making my own matching bachi and koma as well. String height looked fine when I fitted the sao and ran strings across to test, but I think I will actually play around with some slightly shorter koma than the standard 8mm, as I prefer the action to be a bit lower.

Now that I will be getting the final pieces for the custom sawari in next week and will be completing that part of the build, I figured I would start sharing some of the aspects of this unconventional sawari design! Of course like every other part of this build, I wanted even the sawari to have a unique design that has not been used yet in shamisen, and be one of the distinctive features of the Masamune shamisen build.

Originally going into the selection of the sawari, I knew that I would mess up installing the traditional azuma sawari, I just don’t think I could get those edges as straight and as clean as I would want. The en sawari makes installation easier, but I also like the aesthetics of the azuma sawari. Since I would also be using my own damascus screw cap, and due to the tenjin being thicker than average, I would need to design my own regardless. So, I figured why not combine elements from both the azuma sawari and en sawari and add a bit of a unique touch as well! Here is a CAD model of the final assembly:

Here is a cross-sectional view of the internal mechanism. The mechanism works the same as traditional, however there are some modifications to the inner cage and block pieces to make construction much simpler, as well as fit the geometry of the design. While the outside is circular like the en sawari, the inner block that raises and lowers is square.

Masamune Sawari Final Assembly Cross-Sectional View

The traditional elevator mechanism has been modified for simpler construction. Both the inner cage and the elevator are identical, cut from square brass tubing which telescopically fits inside the square bore in the housing. The square brass tubing can be purchased from McMaster-Carr, and because the tubing is telescopic, each size fits into the next successive size perfectly, which guarantees a perfect fit between the elevator mechanism and the housing bore. Since the pieces are just cut from tubing, no soldering or brazing is required, making it much easier to build. Cutting the tubing, filing the edges flush, and bending the top flap down is all that is required.

Masamune Sawari - Inner Cage CAD

In addition, both the inner cage and elevator are identical and installed vertically mirrored to each other, with the inner cage soldered to the sawari base as traditional, and the elevator flipped upside-down, with a square block glued to the bottom, and a longer block glued at the top that interacts with the string. A single spring is placed inside between the bent tops of each piece.

A unique aspect of this design comes from the double-layered laminated housing, which consists of a 3/8" circular outer shell, and the square bore made from the prior mentioned square brass tubing. Each of the sides of the square inner tubing are laminated with thin pieces of ebony, and the whole assembly is turned down on a lathe and glued into the circular outer housing bore. This allows me to have simple installation like the en sawari, but prevents rotation of the inner piece when adjusted, while allowing me to achieve a similar aesthetic of the azuma sawari, using a square piece instead of a rectangle.

Coupled with the ebony square block in the center, when viewed from the top after installation, it creates the pattern shown below, alternating between the brass and ebony layers, creating an inset square inside the circular housing, giving the sawari a bit more interesting look.

And here is an idea of what it will look like after it is installed in the tenjin when viewed from the top:

The design could very easily be modified just using a square section to create a square sawari (which may be easier to carve out than a rectangle for the azuma sawari style), and due to the tubing used, makes construction of the mechanism overall simpler to build and fit perfectly inside the housing. More pictures of the real thing to come soon!

3 Likes