Congratulations on the sawari Michael! Love the mechanism. Good luck in the next step 
1 Like
Thanks Stefanie! I spent hours last night, probably from 9pm to almost 2am finishing up the rest. Lengthwise and widthwise curves are done, sawari tani is done, and everything has been final sanded! Tonight will mark the start of the finishing process, which will take me about 2.5 weeks, and then it will be another month to cure before the final gloss buff. After that will be gluing in the zagane and kamigoma. I’ve been moving faster than I could post the past few days, but I’ll share some of the steps leading up to finishing to show how things look!
1 Like
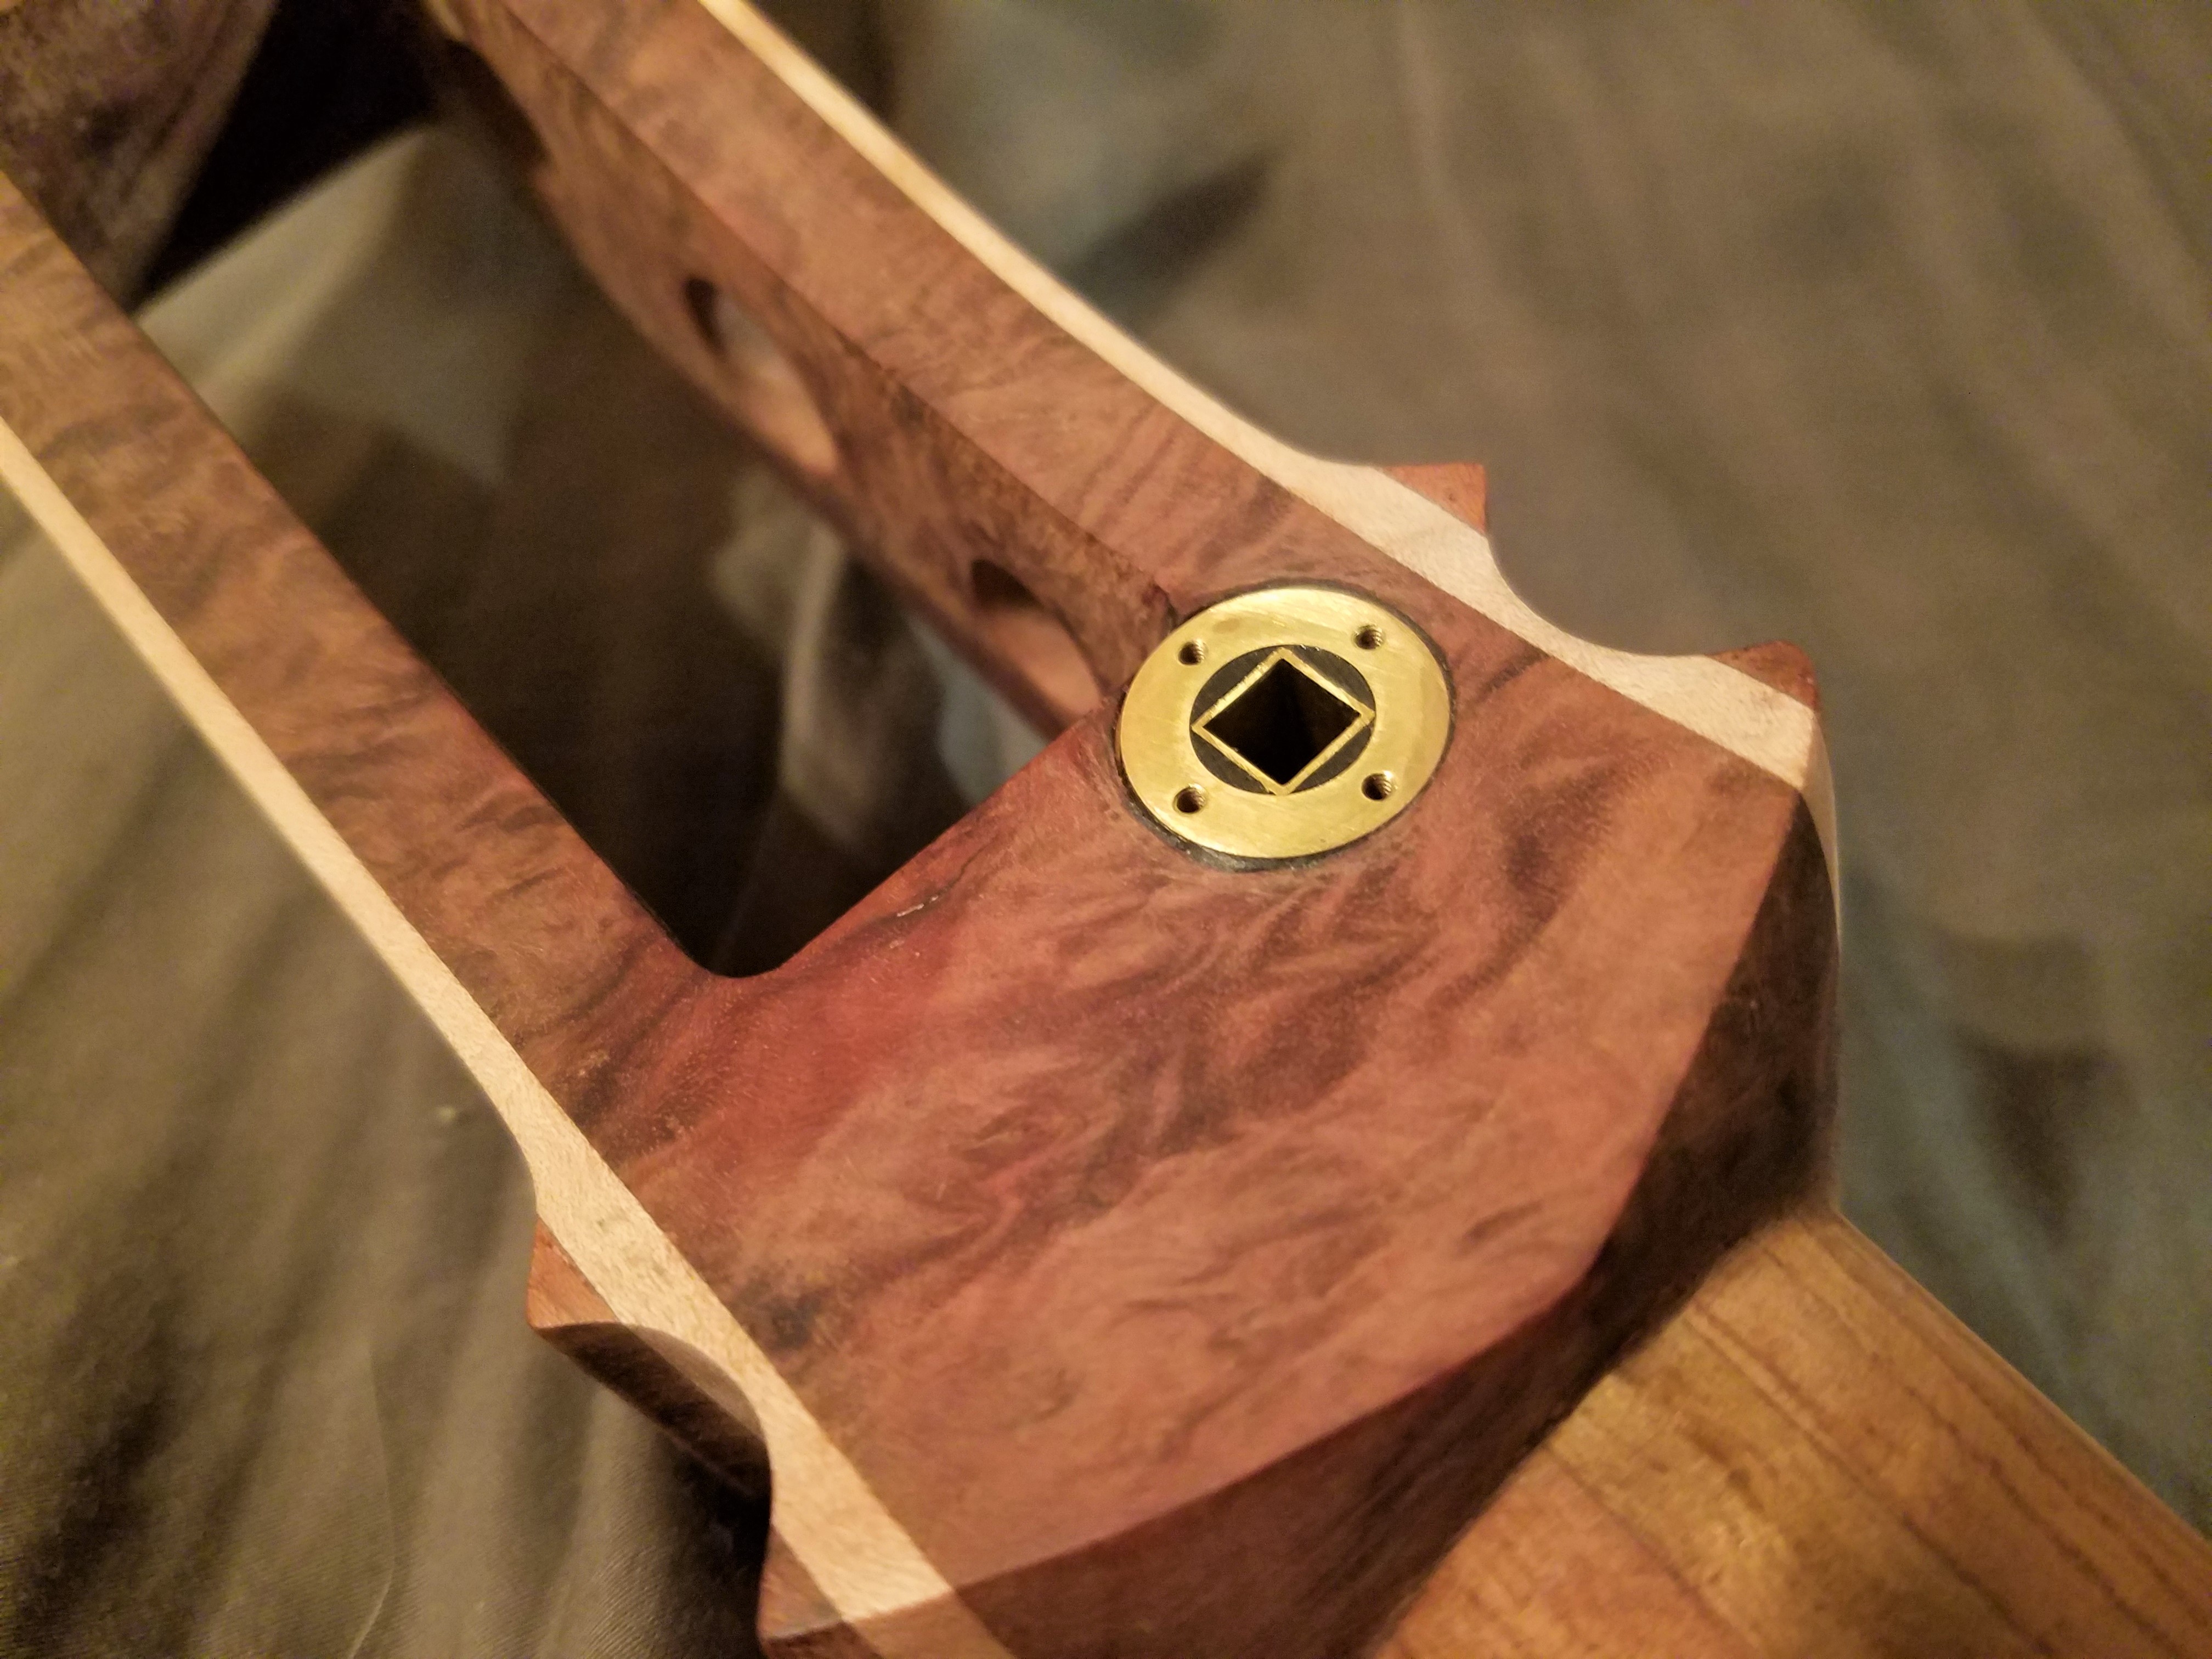
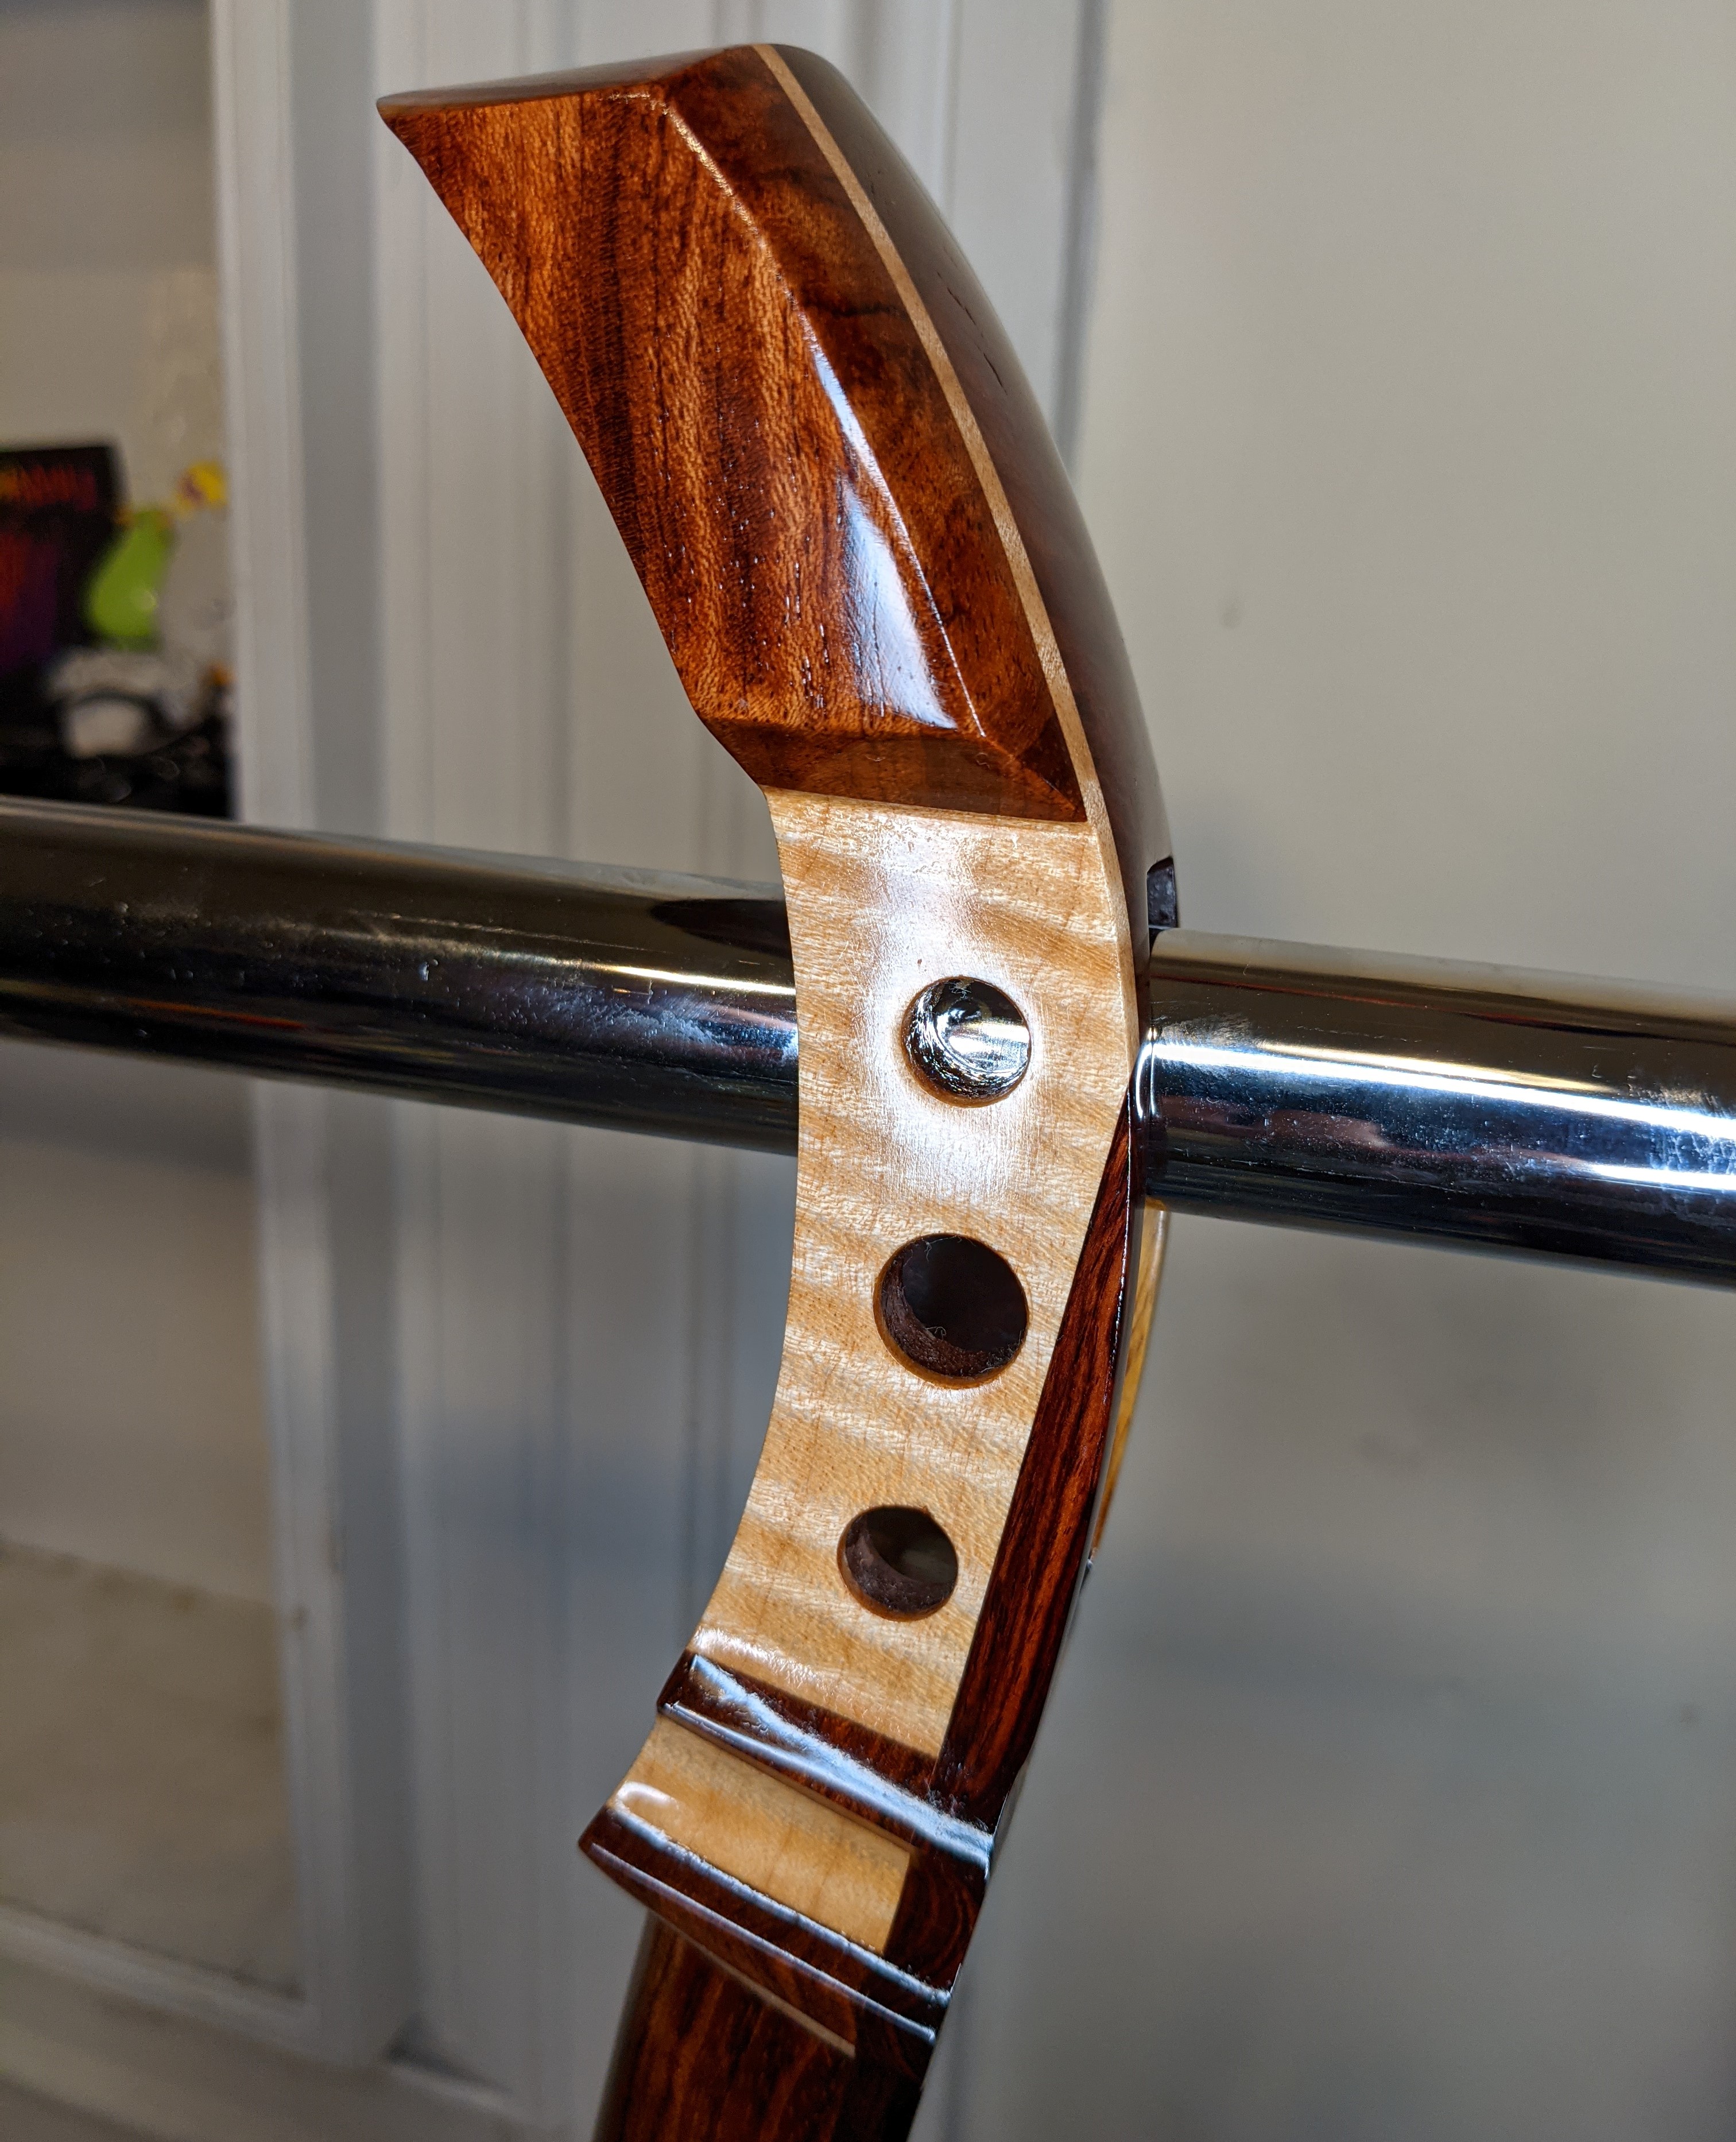
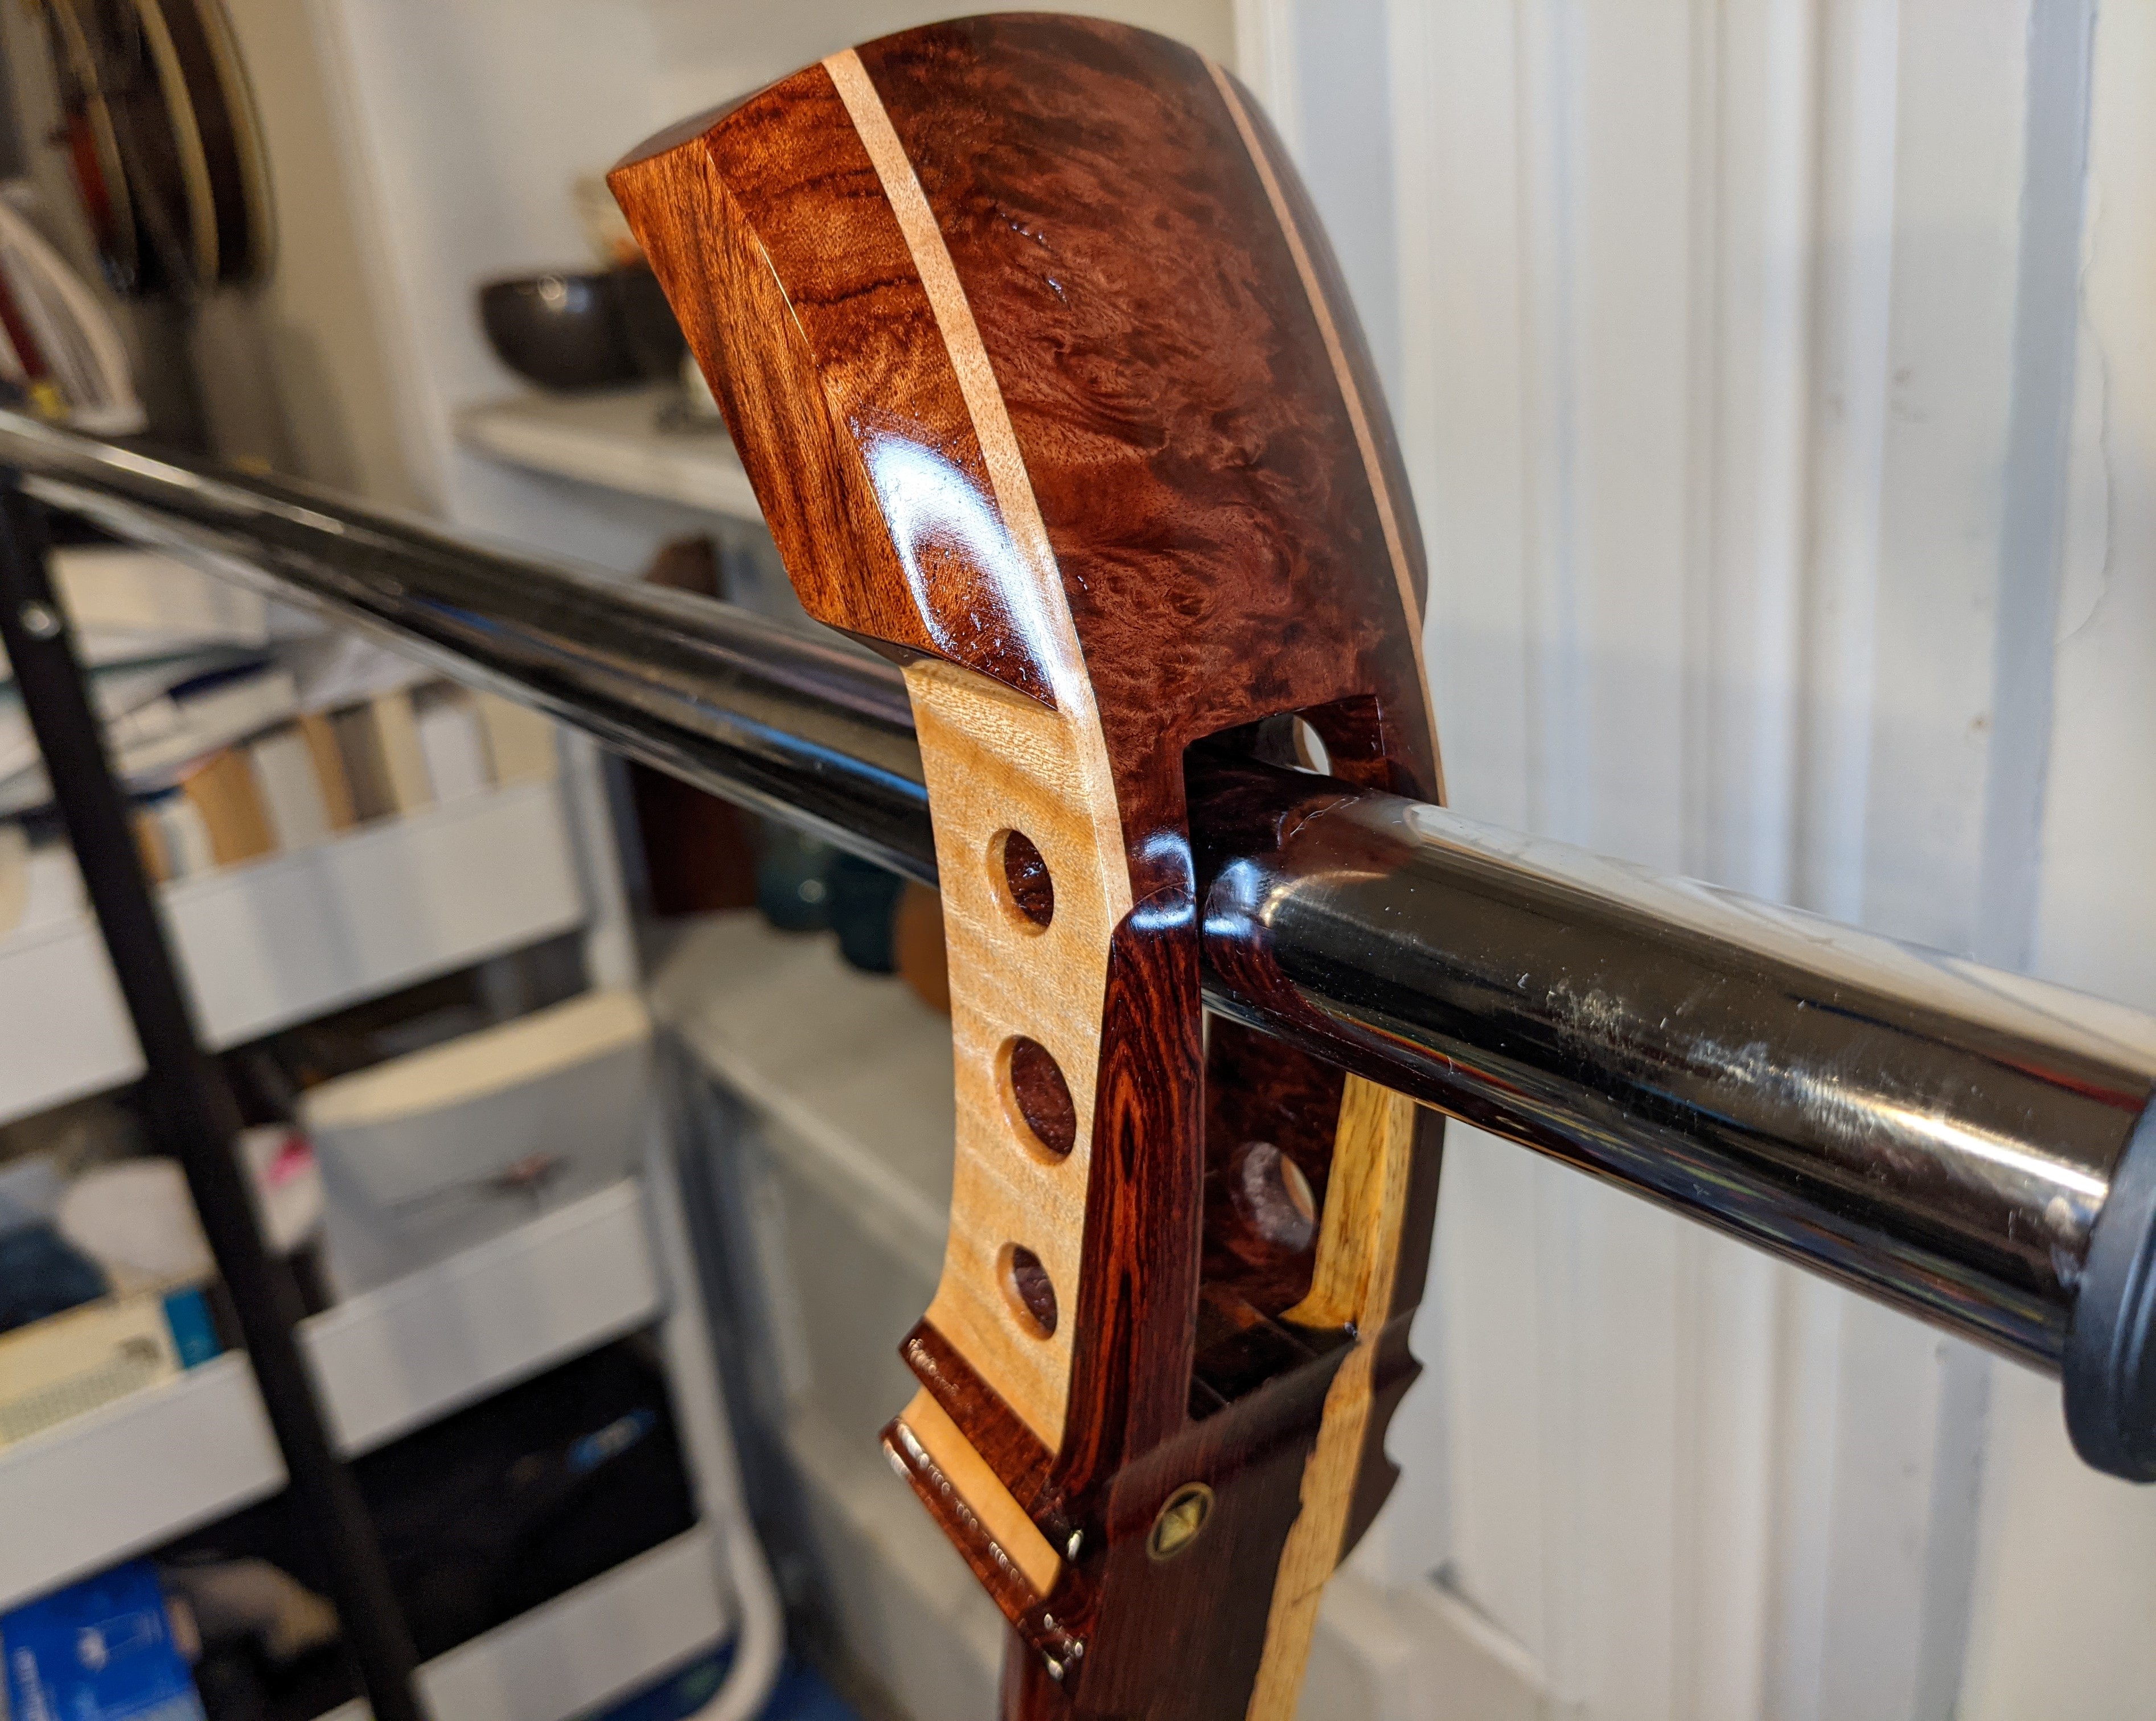
While I am already way farther than this at this point, here are some pictures of drilling out the hole for the sawari. It took about 2 hours to get it completed on both the top and bottom, but it was definitely worth taking the time to do it right. The hole ended up dead center and straight through at the proper angle. Like the zagane holes, I also drilled this slightly undersized, and did the final fit carefully sanding it out for a tight fit. The sawari OD is 3/8", and I used a size “U” bit for drilling the final hole enlargement.

For the bottom side, I used a forstner bit just slightly larger than the base, and drilled it down to the depth of the sawari outer housing flange. This part was the one I was worried about, as any deviation in drilling the main hole would have meant runout into the itomaki area. It was super close, but careful drilling and brand new sharp bits along with constant fixturing and adjustments did the trick! Like the itomaki holes, very thin CA glue was used to semi-stabilize the wood around the hole to reduce tearout, as well as going very lightly for drilling.

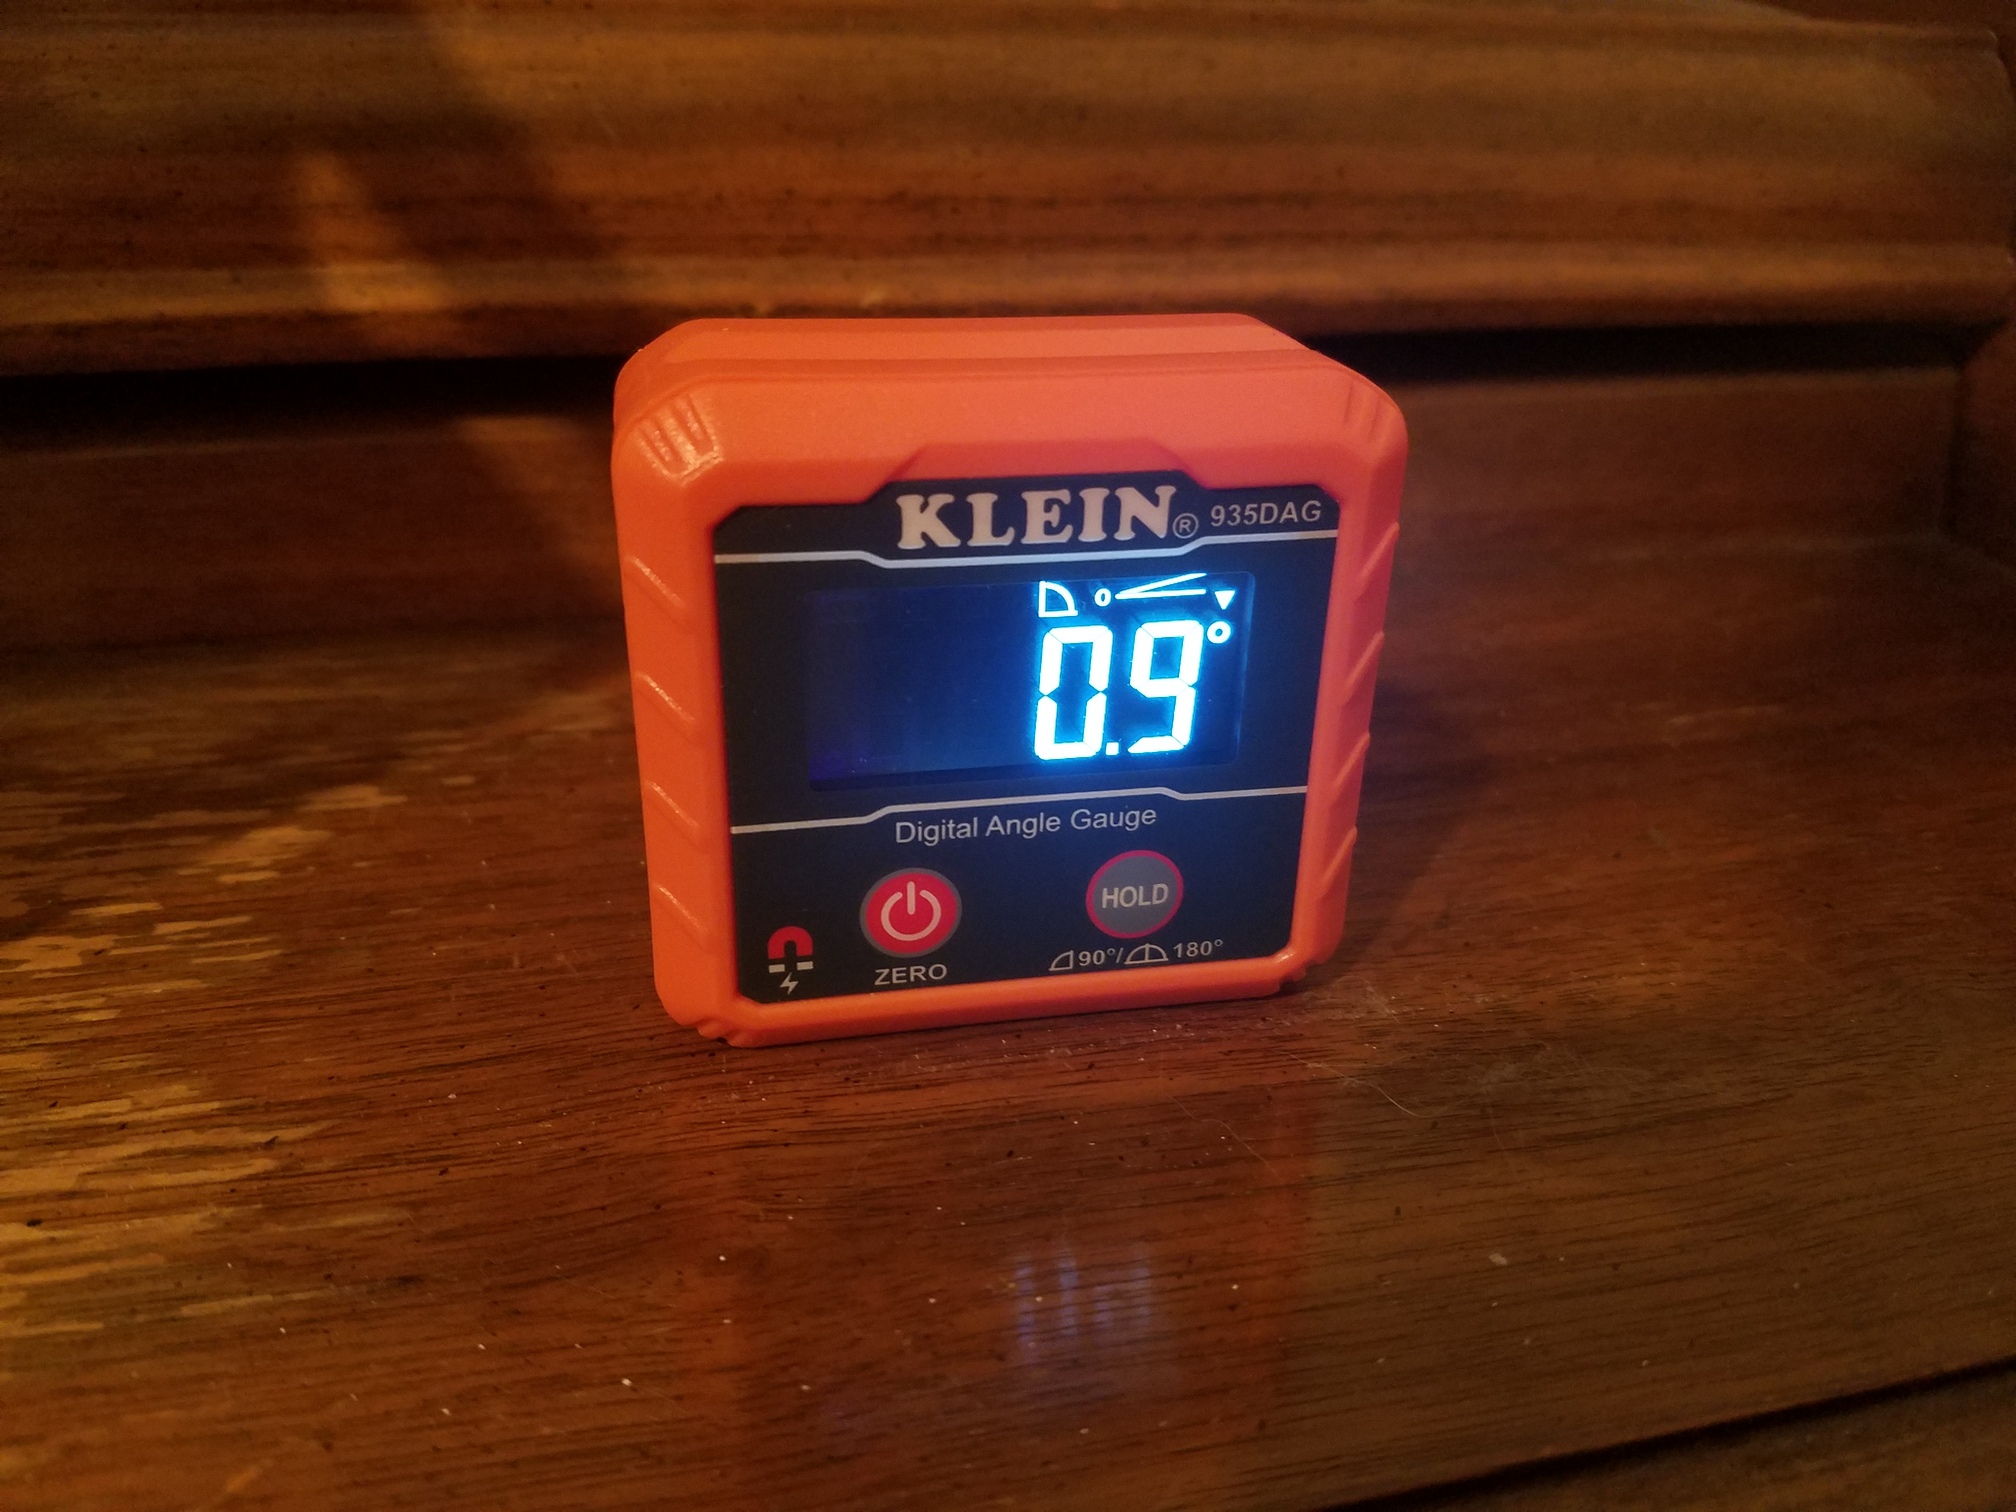
One thing I would definitely recommend, having used it for both the itomaki holes and the sawari hole now, is this digital angle gauge. It was like $30 on Amazon, but has proved itself invaluable in this process for angle alignment, and has been very accurate. Of course nothing replaces proper fixturing, careful and slow work, and sharp bits, but this gauge has been super helpful and indispensable for setting the angles needed for these holes and well worth the investment.
3 Likes
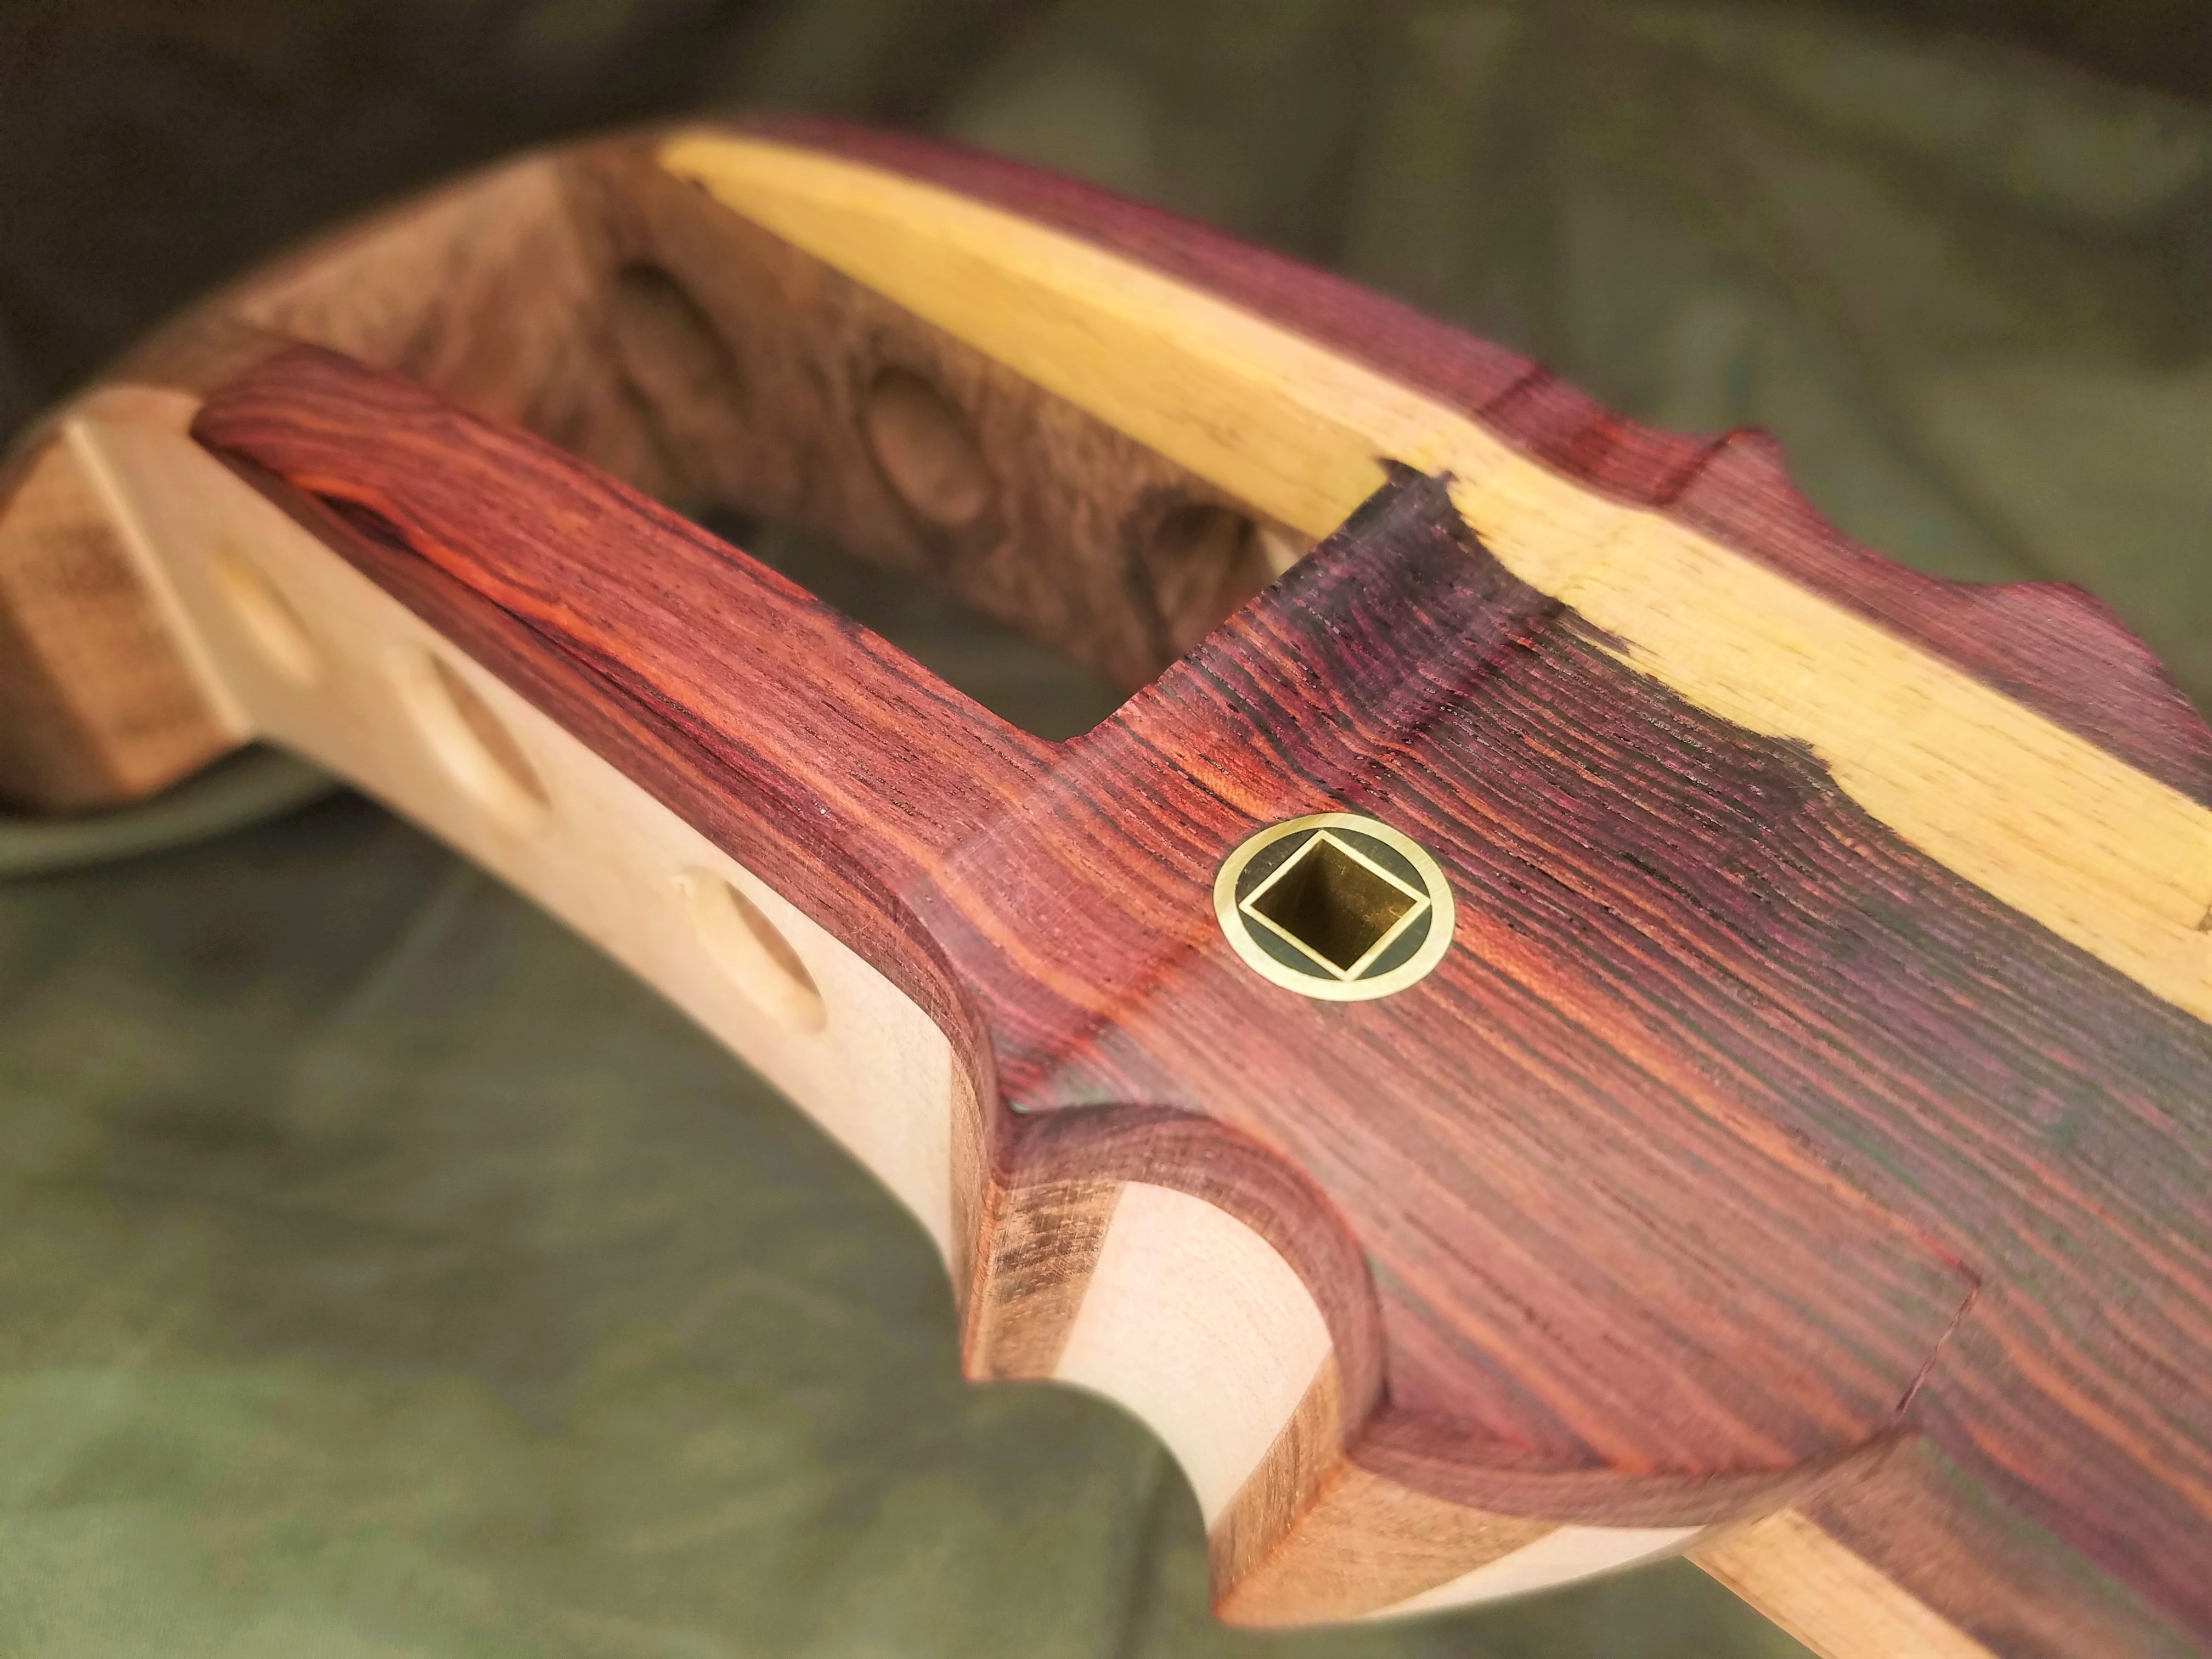
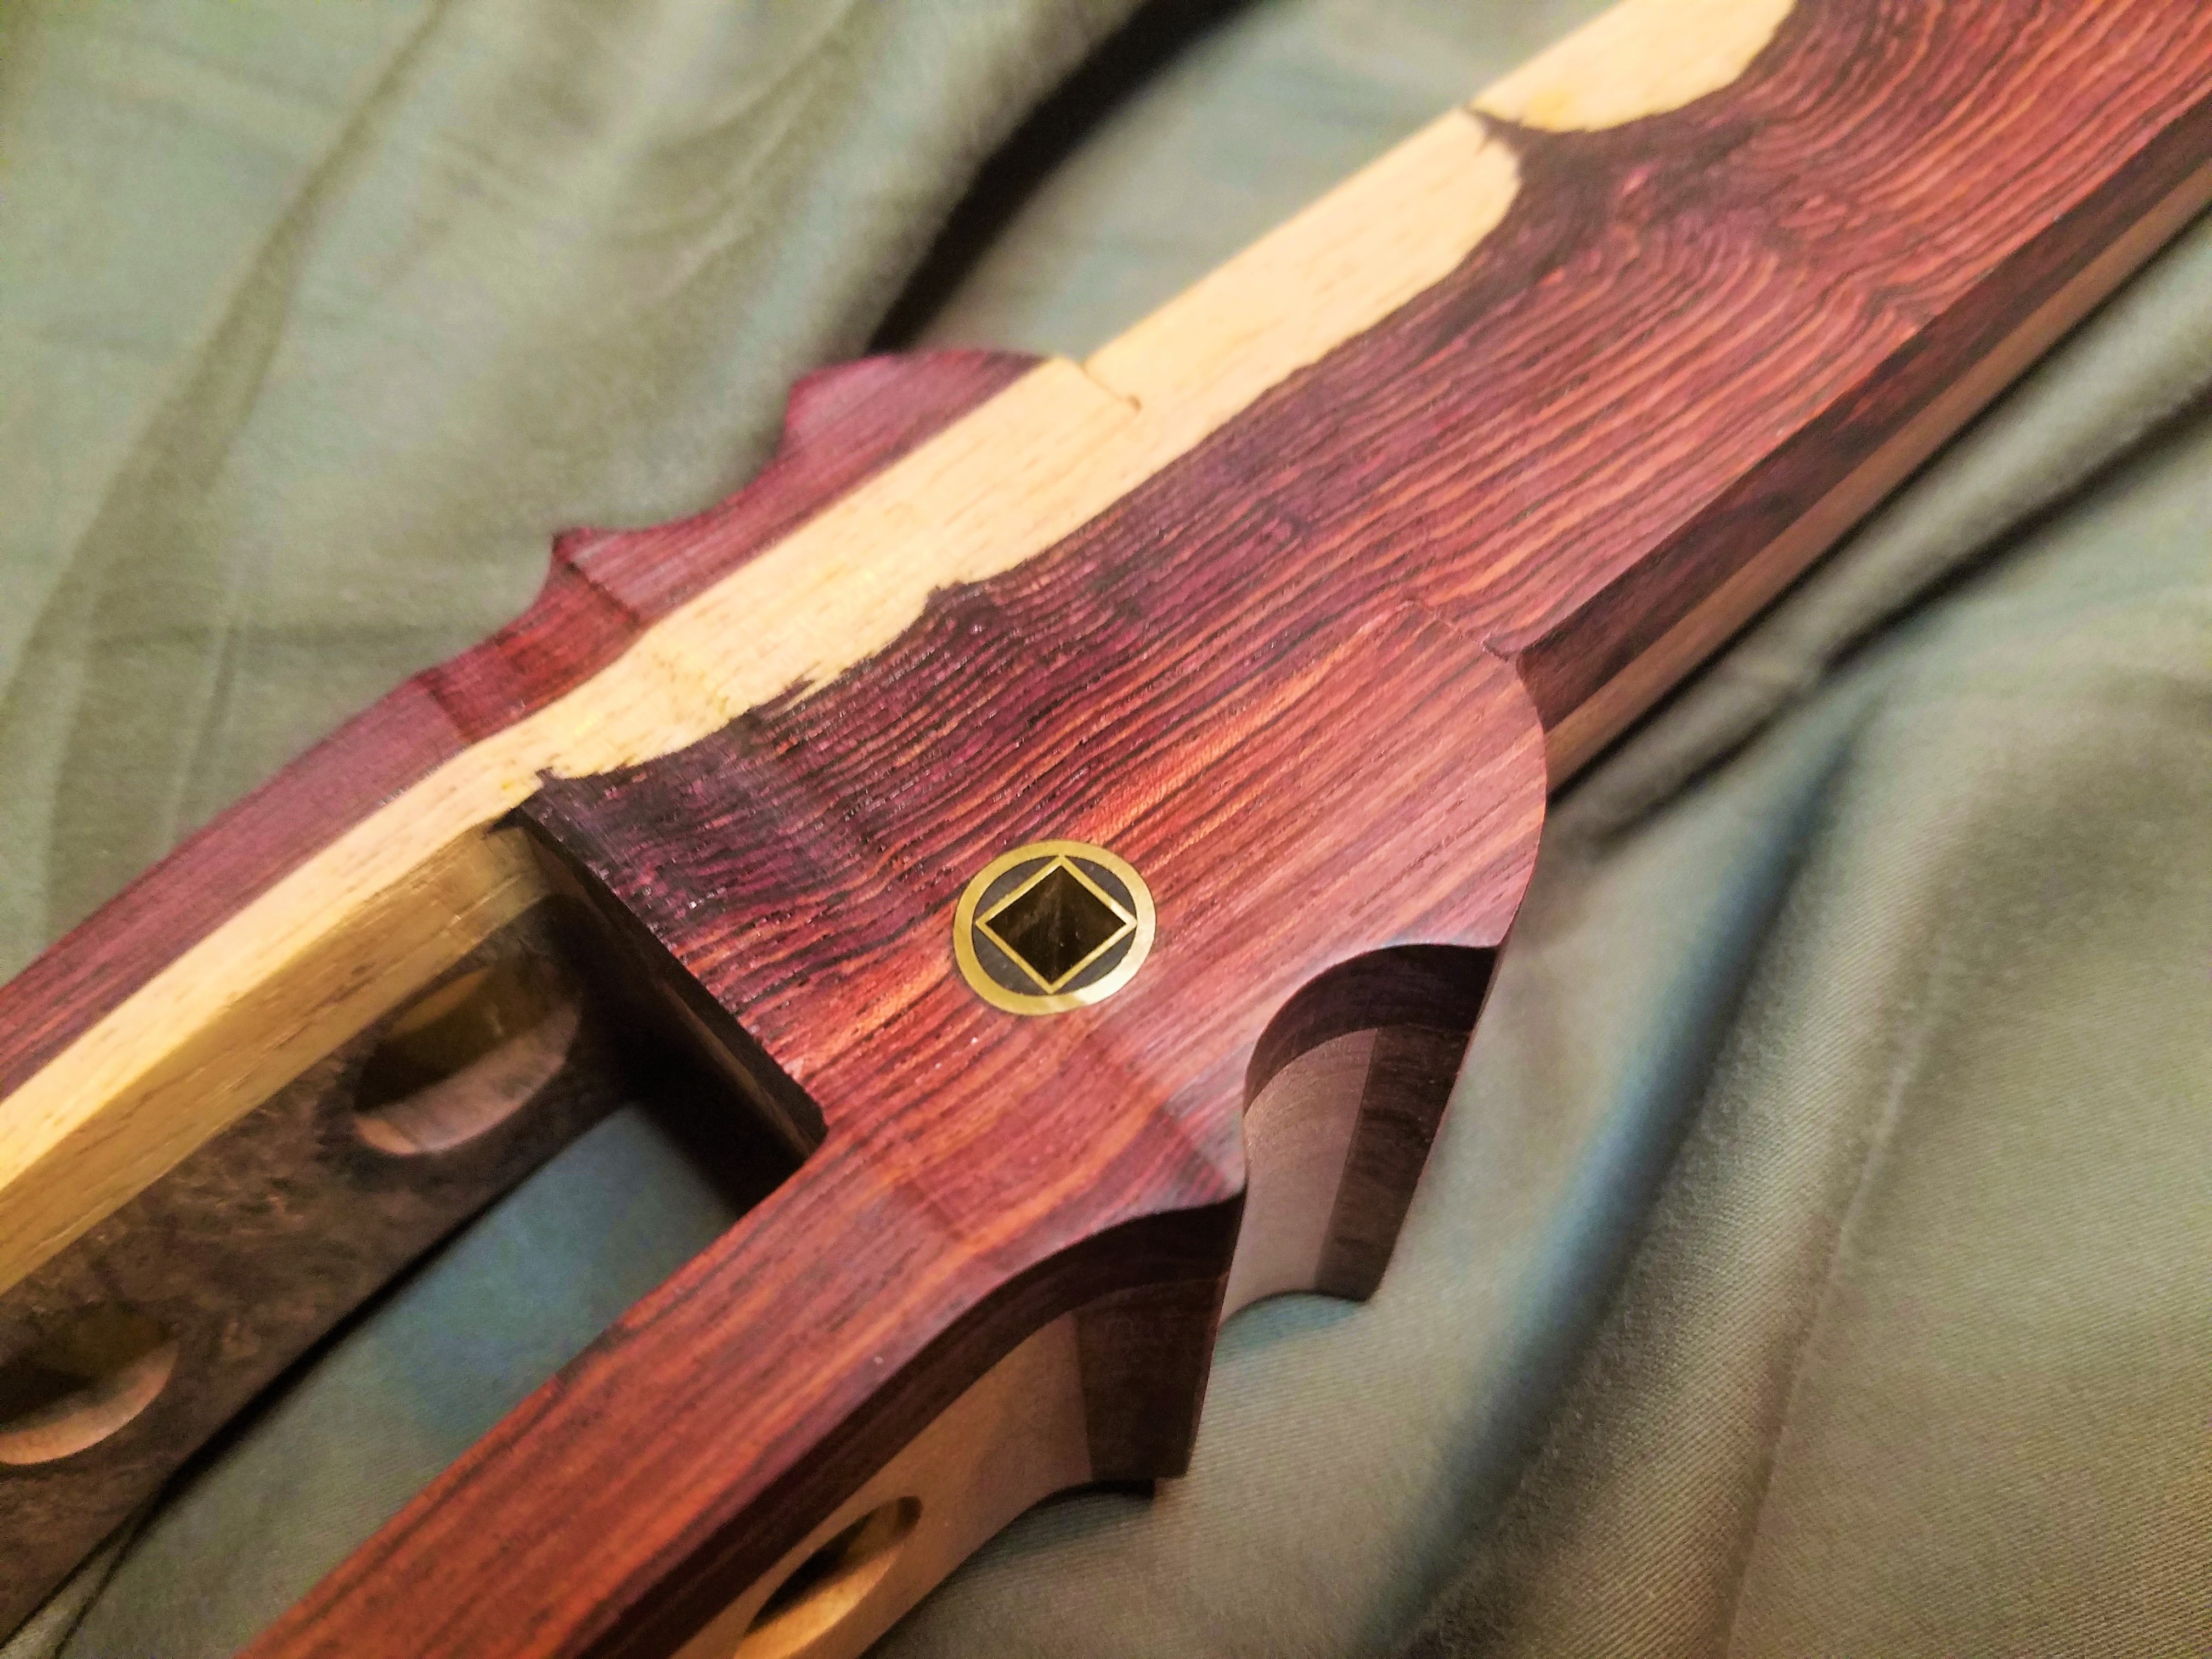
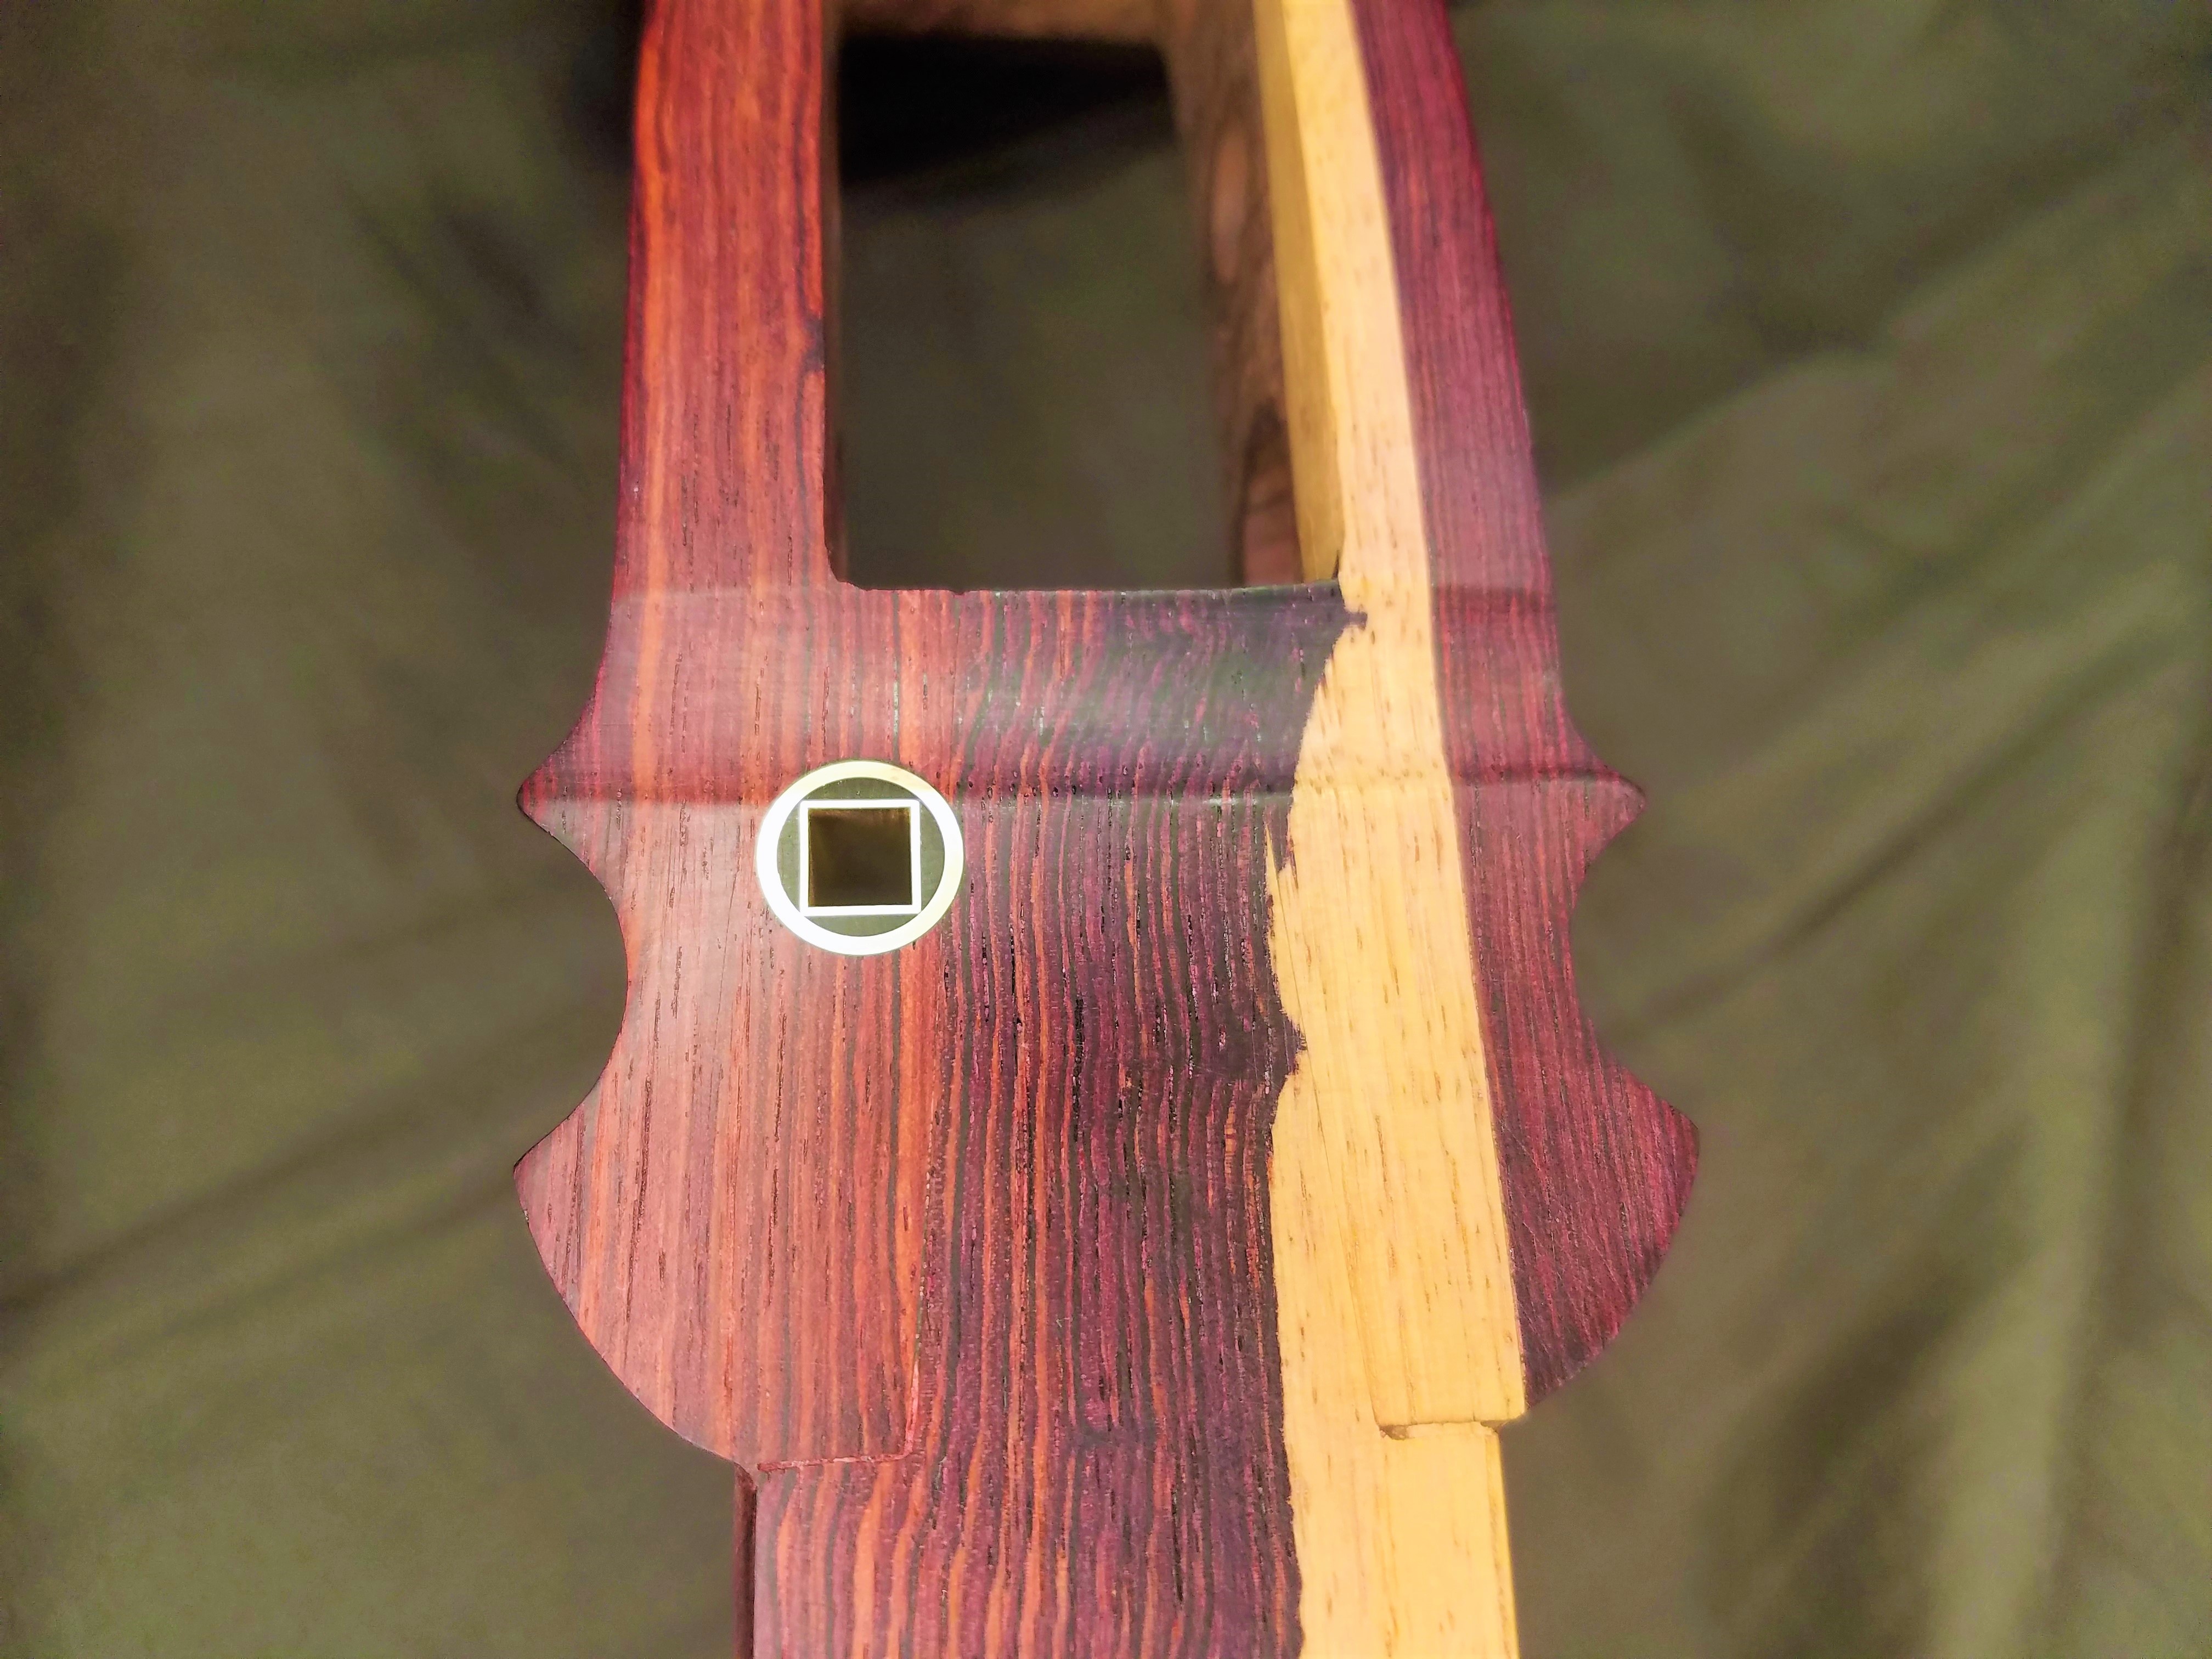
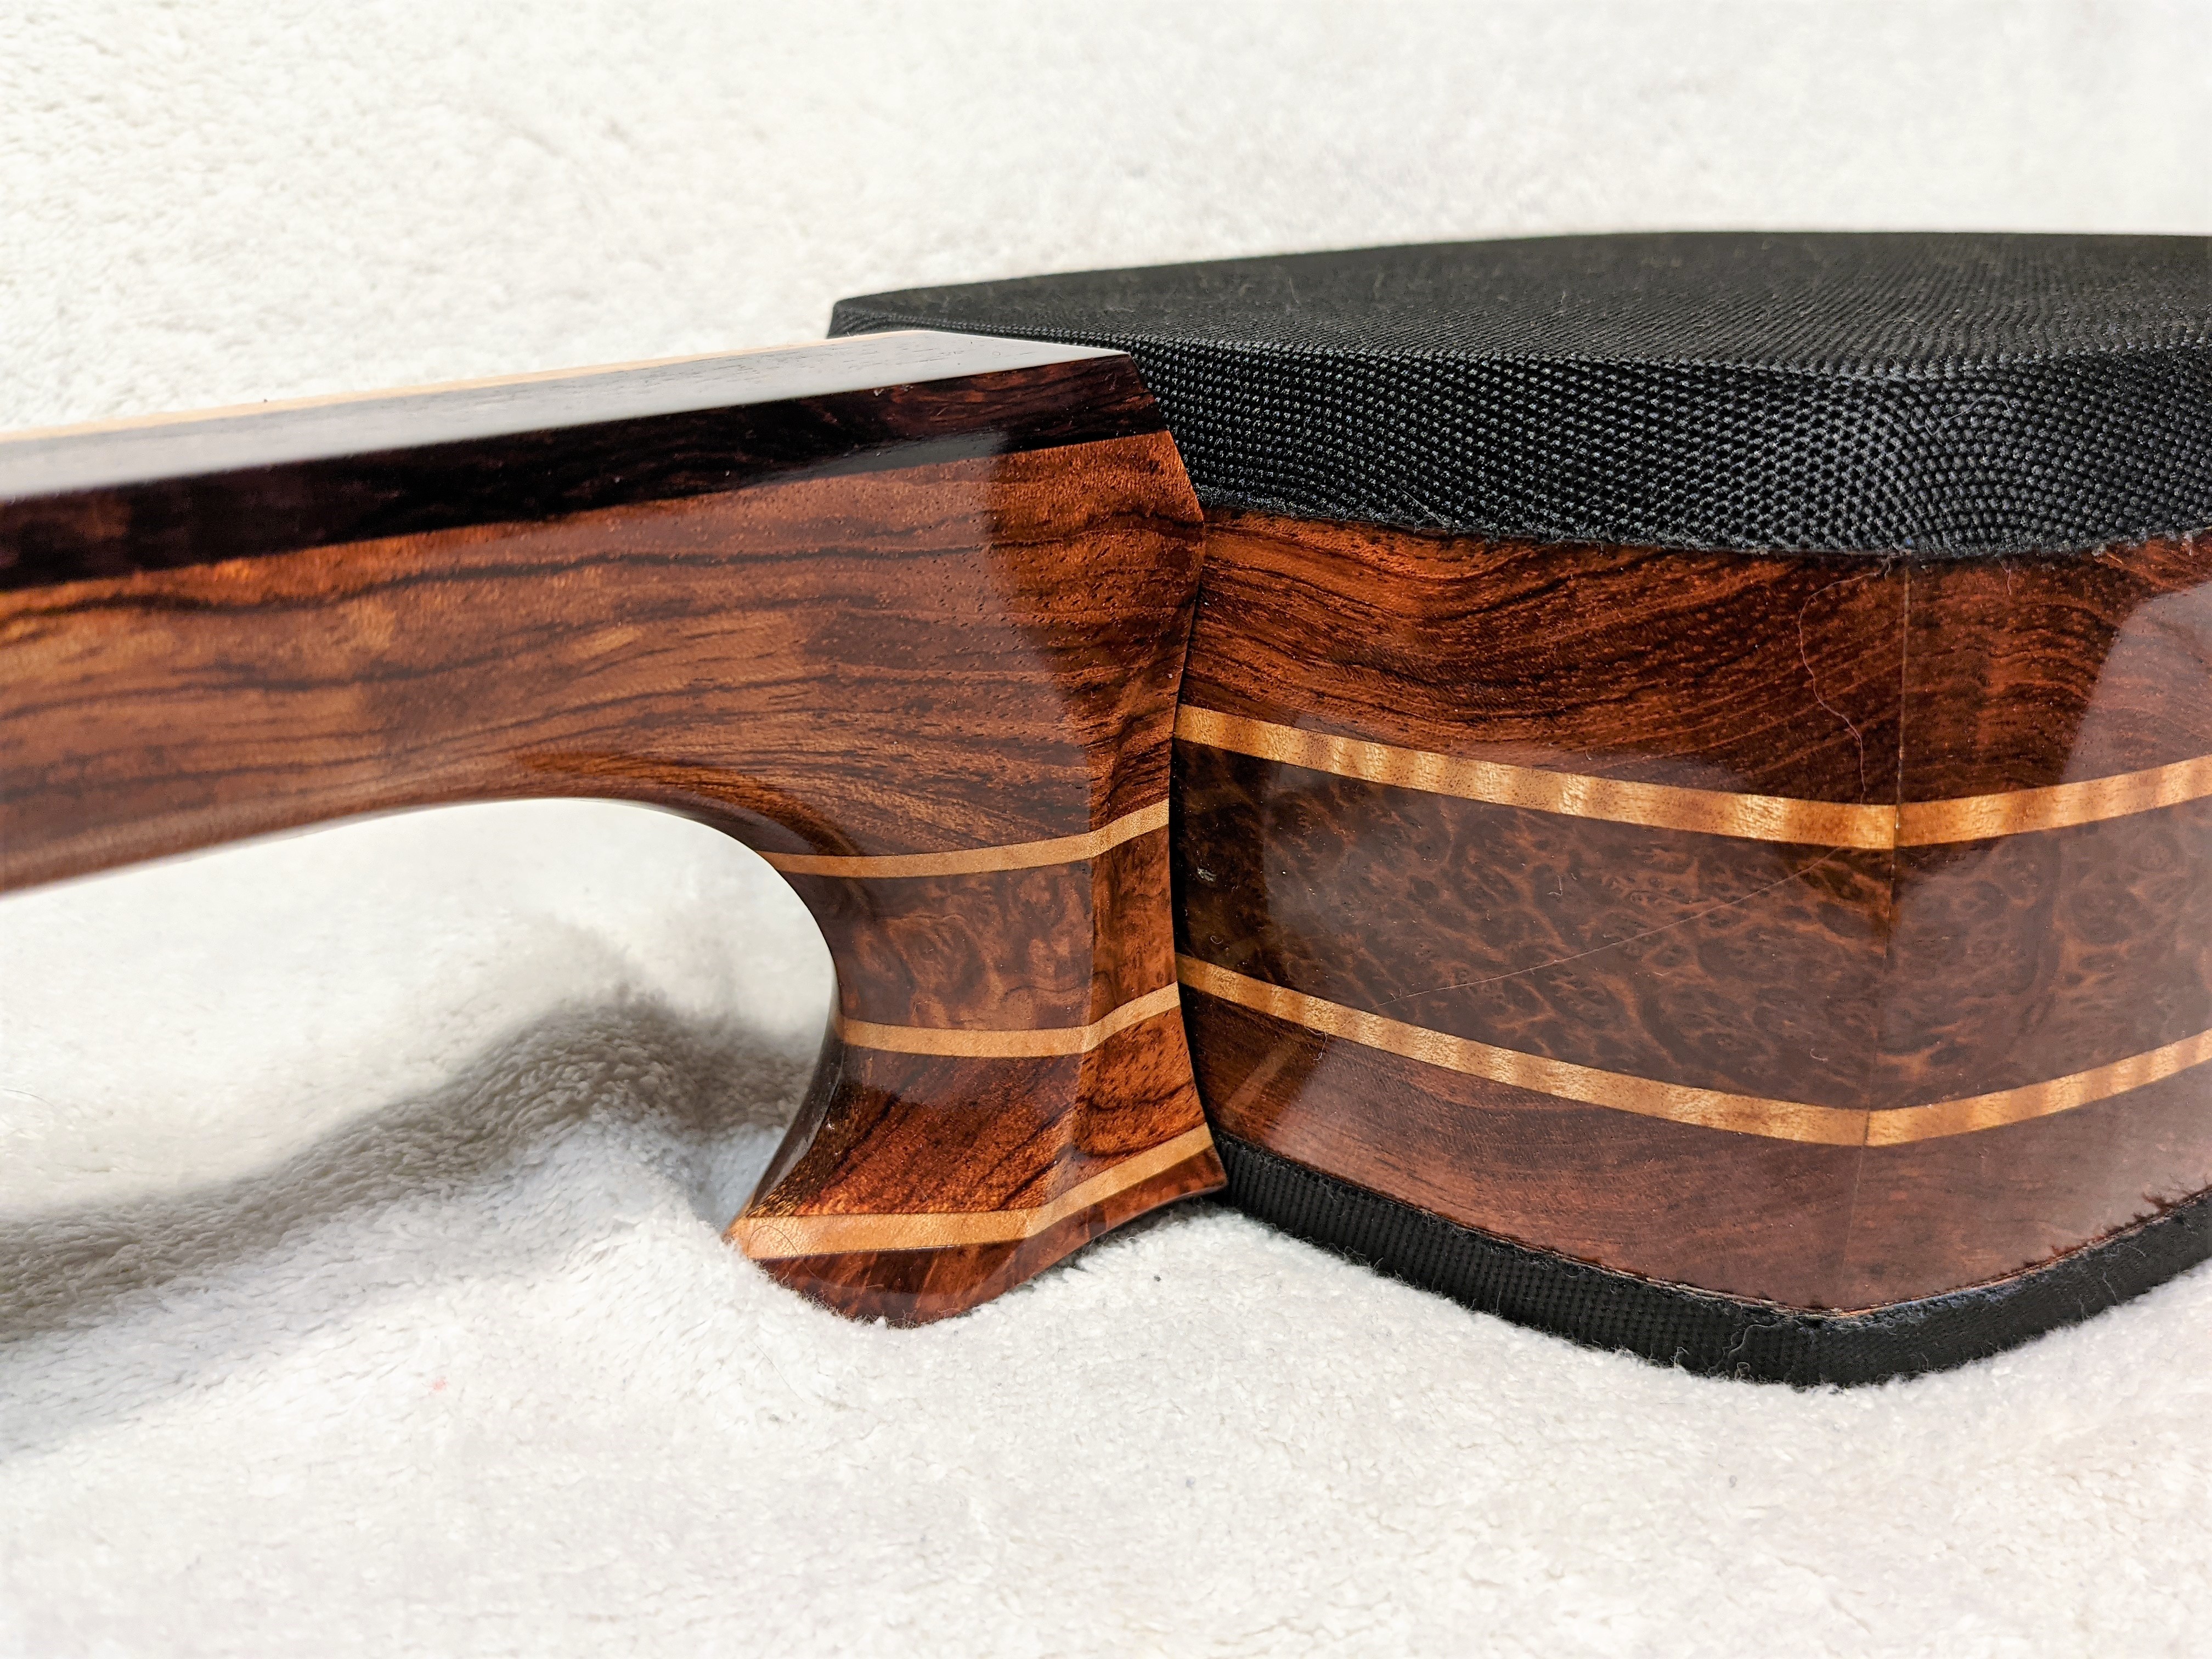
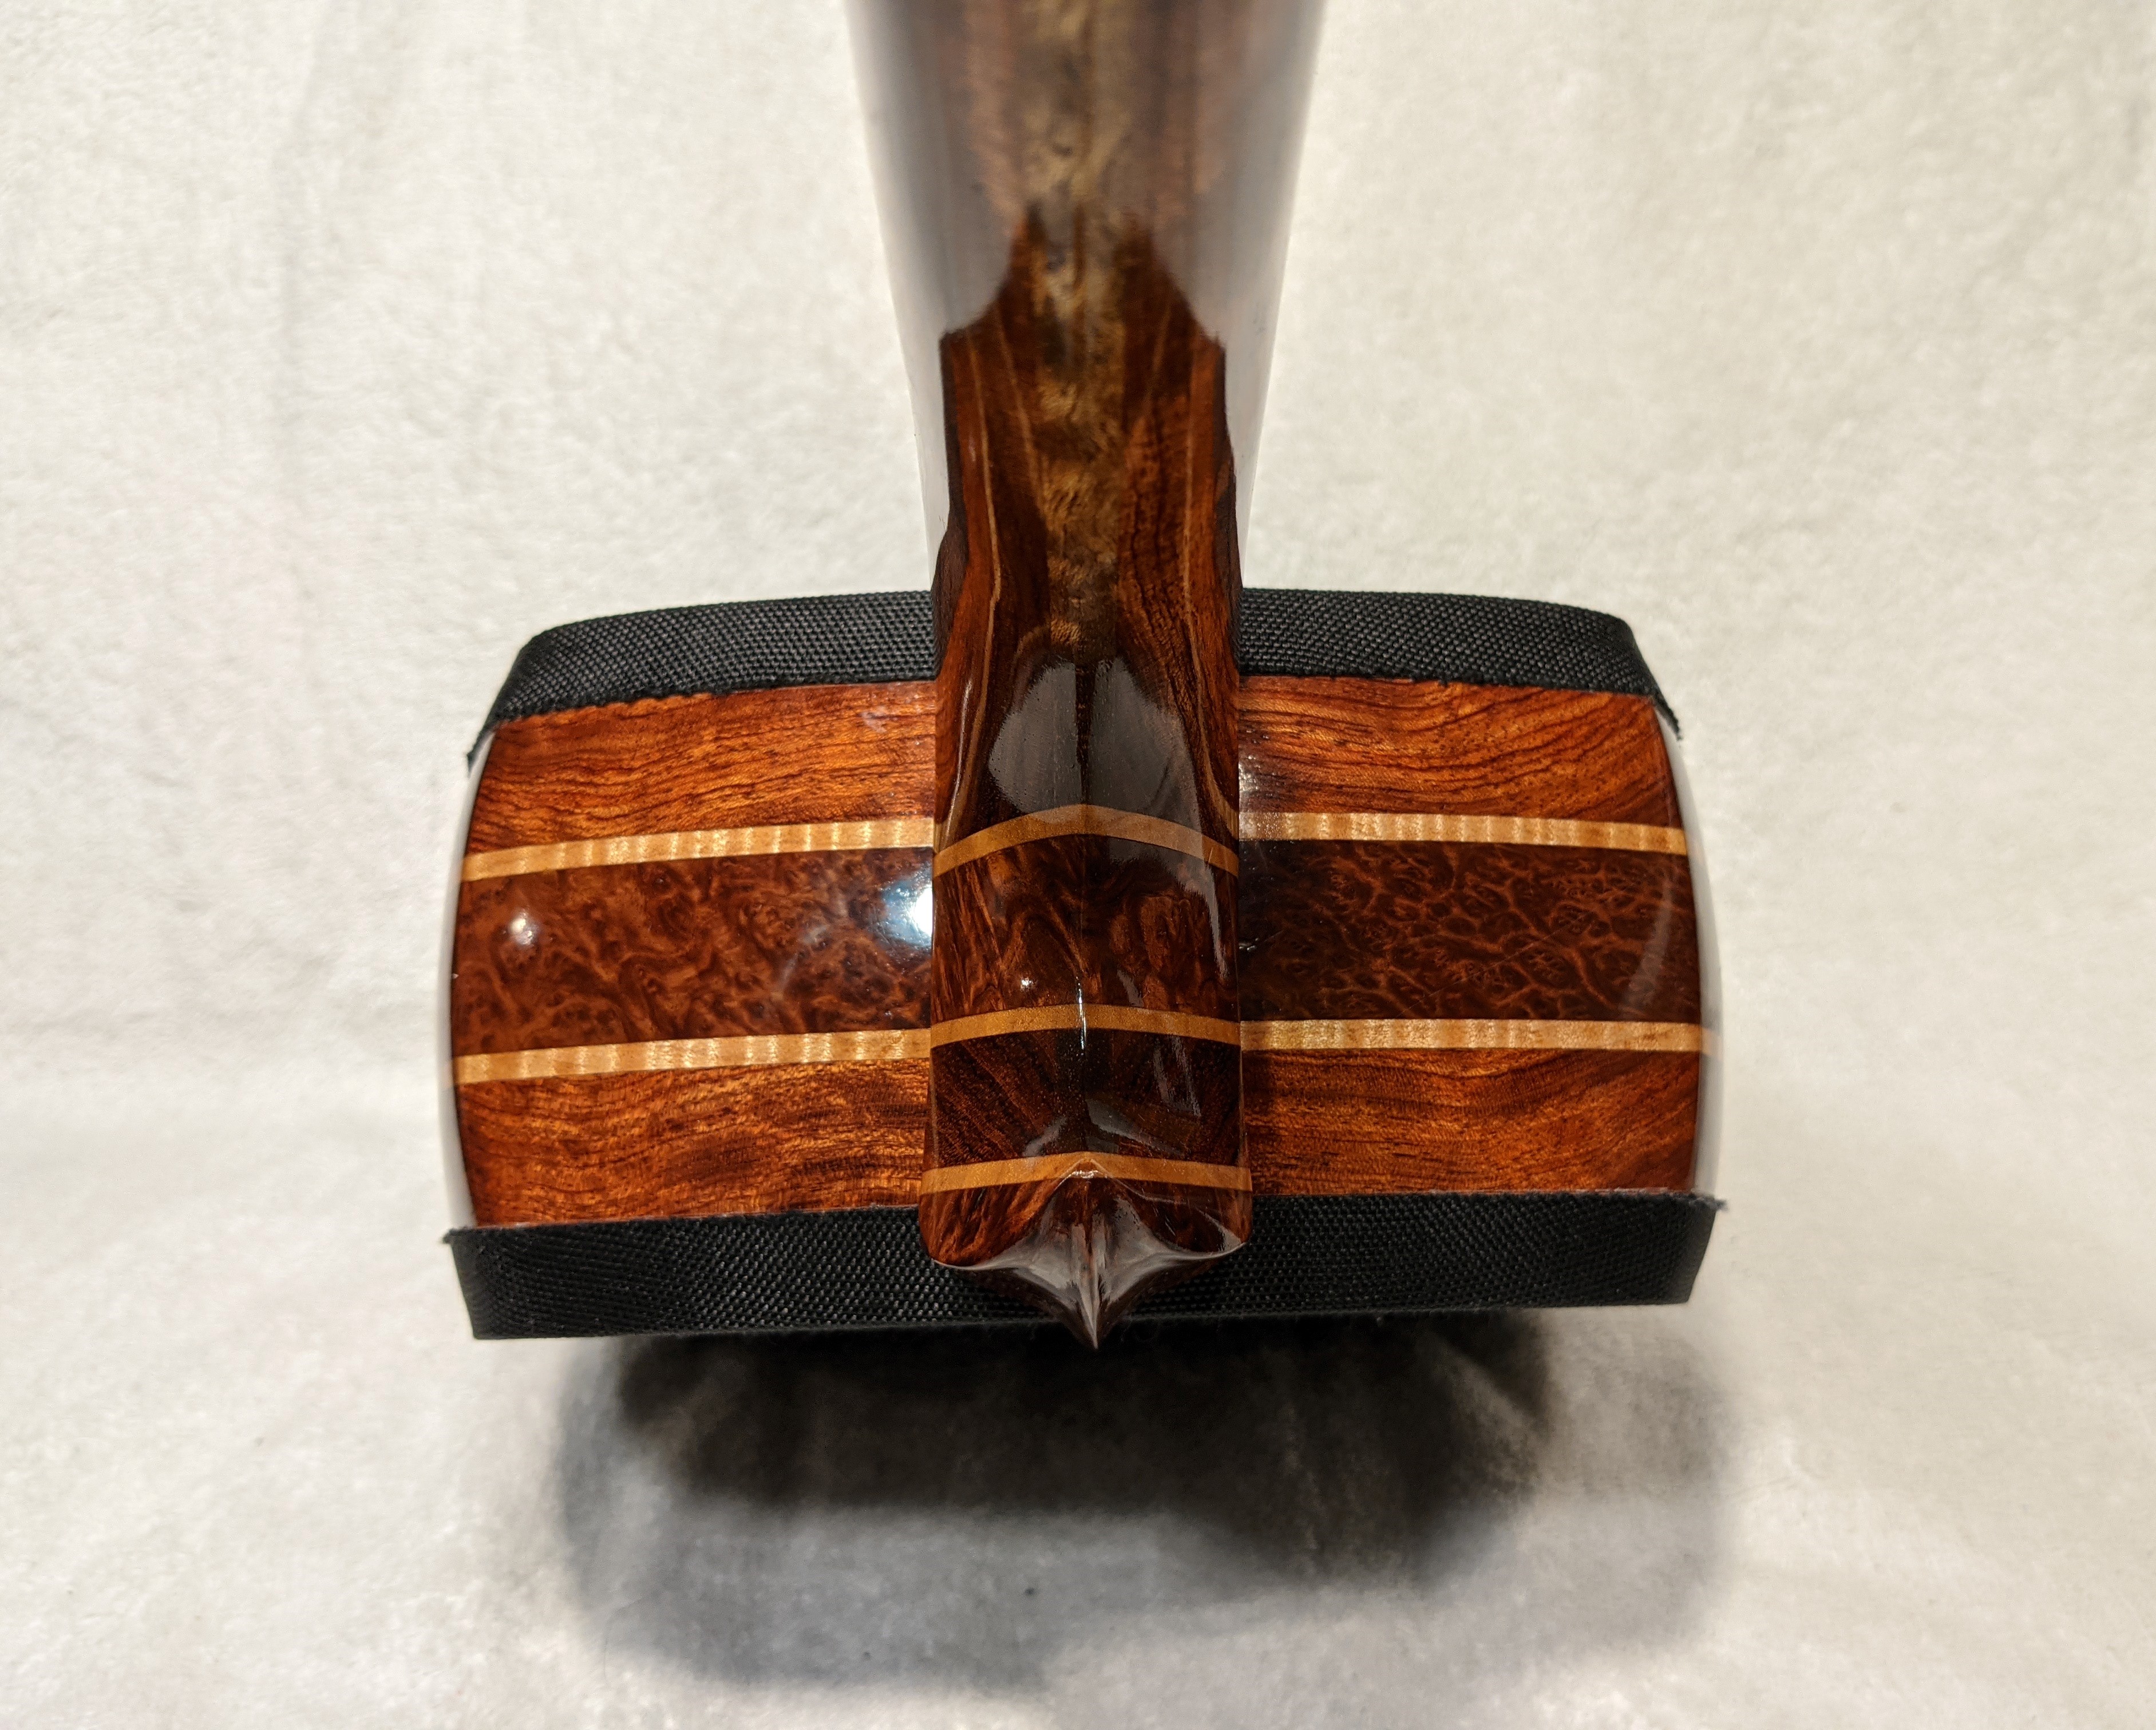
Following up from my previous post, here is a look at the sawari housing installed, glued in, and polished flush to the tenjin surface with the sawari tani filed. The housing is fit seamlessly with the installation hole, and I am really glad I went with the circular style sawari on this. Because the brass housing is thicker and overall larger than standard, the sawari really stands out on the neck, and especially against the darker purple color of the camatillo and the gabon ebony accents, light really catches off it and makes it a quite noticeable feature on the sao. I honestly think this little detail is one of my favorite parts of the build.
As of last night, I completed the final sanding and applied the first seal coat of Tru Oil to the sao, so the finishing phase has begun! Because it has been so hot and humid recently, curing might take longer than when I did the dou during the winter, but I’m finally there. It’s been such a long journey, but getting to the finishing of the sao, it feels like it’s at the finish line. Although I still have to make the itomaki and install the rest of the metal hardware, the major part of the build is essentially complete. There will still be many more posts to come though as I wrap this up, as I still have a few more interesting things in store for the shamisen! I expect I will be fully complete and jamming on it sometime in August!
4 Likes
Congratulations on the Sawari Michael… I absolutely love it! Everything is so calculated and intentional. I love how the top line of the square in the Sawari goes along with the bottom line of the little canoe that goes from side to side on the Tenjin (lol! I can’t remember the name of this detail). It is, IMO, along with the Nakago, a part that is easy to underestimate skill-wise. Must be even trickier to get well when you add the Sawari. I also love the thickness of the housing on the Sawari. I agree, hard to beat this little feature on the build. Man, I don’t know how you can keep raising the bar higher on this build with each step. I’m really looking forward to seeing how the whole Sao will look finished!! Cheers!
1 Like
Thanks, I really appreciate it! Sorry for the late reply, I have been away visiting family the past week and have way less free time than I thought. I did bring the sao and finishing materials with me to make some progress, but it has been really slow.
A ton of planning was definitely needed to get details like the sawari alignment right. This particular aspect needed a lot of careful alignment, but I also had flexibility in sanding out the sawari tani to match that straight edge.
In regards to progress, I just finished all the initial sealing, pore filling, and fine wet sanding, so I can finally start building up the actual finish. The surface is already glassy smooth, which is crucial for building up the high gloss final polish I am aiming for like on the dou. I’ve got to say though, what a transformation already! The oil darkens all the woods, reducing the contrast a bit and giving a much more sophisticated feel to the colors, and really brings out the figure. Under natural sunlight the figure really comes alive with rich tones and iridescence. I’ll see if I can post some previews!
Although there are still very small dings and flaws here and there, stepping back and seeing it like this all those worries about imperfections just disappears, and I’m even surprised myself that I actually built this thing. Each step closer makes me want to play more and more!
1 Like
Hey! Oops… I keep forgetting to reply although I keep checking for updates basically every day! I really enjoy your messages and replies. I am very intrigued to see the next batch of pics. I hope to get to see a full photo album of your build some day. That will be a delight!
I am curious to know a bit about your process on sealing and pore filling. I decided to pore fill my 2nd dou after seeing how porous the first one came out (both made of Padauk). I filled with epoxy, just one coat so not absolutely filled but still pretty good. I then put about 5 coats of Camellia oil and it is taking FOREVER to cure. Must be the high humidity?
I could not relate more with this and I love how you put it into words:
“Although there are still very small dings and flaws here and there, stepping back and seeing it like this all those worries about imperfections just disappears, and I’m even surprised myself that I actually built this thing”…
Hope all is well Michael! Looking forward to the day we meet. My builds are taking quite the needed break. My second one (technically first) is waiting for dou to cure, then will work on getting the Sao to sit as flush as possible on Dou (about 0.5 mm to go) and retouch/resand/refinish a few parts here and there. Then to finish, I have to somehow “skin” both of them (I have an interesting idea for a jig including a bike wheel) and make all the protective covers, the 2 Koma and one more wooden Neo (one is almost done). I should also try to remove the camellia oil from all the itomaki I made and get them smoother before finishing them. I got carried away and rushed the final sanding. ugh
2 Likes
Hey! It’s been a while since my last update, the finishing process is honestly pretty grueling, and during one of the steps I messed up the finish to a point where I didn’t like how it was turning out, so I went back and redid some parts. It set me back a couple of weeks, but I’d rather take the time and do it right.
Pore sealing is arguably the most time consuming and demanding part of the whole process, and is my least favorite part. But everything is about surface preparation.
Before sealing, I dry sand the wood to 600 grit. For my process, I have found that vigorously burnishing the wood with a paper towel between grits helps make the overall feel smoother. Not only to you knock away dust, but it helps compress the fibers and results in a smoother, harder feel. After this initial sanding and burnishing, I apply several seal coats to the wood with my finishing oil (in this case, Tru Oil, which is by far my favorite finish yet and one I highly, highly recommend.) I apply these coats pretty liberally. In the case of the sao, the wood was super thirsty, and absorbed a ton of oil in the beginning. I ended up wiping on two thicker coats, then a third touch up coat after. This allows oil to absorb into the wood, harden, seal the surface, and provide a very base layer to build off of. Next, is pore sealing.
For pore sealing, there are a number of ways to do it, but I have generally preferred the method often used in French polishing. After the first seal coats, you wet sand the wood with your finish to create a slurry of wood dust and finish that fills and seals the pores. Note that the finish must be a hardening finish (shellac, varnish, etc) I begin with wet sanding with the oil at 400 grit, and work in small sections at a time. I apply a generous amount of oil, and do lots of small, circular motions in a section. When the slurry starts to have some grab to it, I wipe it off across the grain. This helps fill in pores better. After, I inspect against the light, and repeat. Over, and over, and over again until I am satisfied, working my way through each section. During this step, you have to make sure to wipe off the excess without over-wiping and opening up the pores again. Especially if you have very open, porous wood it is very demanding - I have to ice and stretch my shoulder after each session because of all the strain it puts on me. I let this dry for 24 hours, then repeat again with finer and finer grits.
During pore sealing, in my experience I would recommend to do as much sealing as possible on the lowest grit (400 in my case). The use 600 and 1000 to do the final touch ups while continuing to smooth the surface, and higher grits for smoothing.
Now, here is where the learning curve comes in, and takes some practice, adjusting your process with each project you do. For the dou, I did the dry sanding to 400, 2 seal coats, and wet pore sealing with 400, 600, and 1000. After, I started building up the body. 3 very thin layers padded on with a pad similar to that used in French polishing (24 hours drying time between layers), then going back with 1500 grit first and wet sanding. I did the in-between sanding first with mineral spirits, which I found actually opened up the pores again. This forced me to go back and do pore filling. It was far from perfect, but building up layers and moving up to 2000 then 3000 grit I was able to build up a nice enough gloss before final polishing. Well, I didn’t learn my lesson, and repeated this again with the sao. The first time through, the pores were almost all filled, and I was building a beautiful finish. After this level sanding with mineral spirits, it looked awful. So I decided to go back and wet sand pore-seal with the oil for the entire sao again starting at 1000 grit. I repeated wet sanding with the oil with 1500, 2000, and 3000 grit, allowing 24 hours between sessions, and wiping/burnishing each layer.
Now that I got through all the wet sanding, I have begun building the actual finish again. Padding on super thin layers, doing a very careful level sanding with 3000 grit and oil as needed. For the final layer I will do a glaze coat like I did with the dou, a thin 50:50 layer of Tru Oil and mineral spirits. The sao will then need to cure for a month before final gloss buffing. It’s a horribly long process, and I wouldn’t recommend it for every instrument, but it’s definitely worth it on the occasional special build.
For camelia oil, I think you have to take into consideration that it is not a drying/hardening oil or varnish. The wood has to be sanded very well, and further burnished to compress the fibers to give it as hard of a surface as possible. I also wouldn’t leave a thick amount on the surface, it will probably never dry. Wiping on, then wiping it dry would probably work better. What I would recommend is possibly trying something similar to what I have done. After dry sanding and pore sealing, I would wet sand with the camelia oil progressively up, maybe from 400 to 3000 grit. Each layer I would wipe away any excess, and really rub it down and burnish with a cloth or towel. After the final wet sanding, I would do similar to what Kyle has done and do a final surface burnish with the oil and a smooth, hard stone. You can then further wipe camelia oil on and burnish with a cloth after as needed.
One reason why I recommend Tru Oil is that it is a very good hardening varnish, that adds extra protection while bringing out the color of the wood. Unlike other hardening oils however, Tru Oil is able to be brought to a very high gloss, and gives you the flexibility to have anywhere from a satin to ultra-gloss finish depending on your taste. It is also incredibly forgiving, and very easy to touch up and maintain as needed. And you do not have to follow the steps I outlined above either, it can be applied as easily as just wiping on a couple of layers with a rag.
Definitely look forward to meeting up and seeing how your builds come out! There is definitely a big temptation to rush through sanding and finishing, and I am definitely guilty of it myself, but sometimes rising through will just force you to go back steps to fix it up. Finishing is a patience game, but it also means you are almost there!
2 Likes
I decided to summarize my finishing process for anyone interested in trying this themselves. Note that there is no one right way to do it, and even between the dou and sao I changed up my process. It requires practice like anything else, but fortunately finishes like Tru Oil are very forgiving. Also note that things like wood, pores, and grain can all affect how it goes. Finishing the sao is significantly more work than the dou due to all the extra curves and features. Particularly in my case with many different woods, each wood behaved slightly different during polishing. I actually found that finishing the purple heartwood of the camatillo fingerboard was by far the most challenging - the wood is not only very porous, but also quite oily, and did not evenly absorb/soak up the finish. I suspect that the high oil content of the wood itself made finishing a challenge, and often felt like the finish was not building properly compared to the other woods. Bubinga on the other hand finishes exquisitely.
DOU
1. Dry sand from 60 to 400 grit.
2. Seal coat 1. Dry 24 hours.
3. Seal coat 2. Dry 24 hours.
4. Wet sand pore filling with 400 grit. Dry 24 hours.
5. Wet sand pore filling with 600 grit. Dry 24 hours.
6. Wet sand pore filling with 1000 grit. Dry 24 hours.
7. Thin body layering. Dry 24 hours. Repeat 3x.
8. Wet level sand with 1500 grit. Dry 24 hours.
9. Thin body layering. Dry 24 hours. Repeat 3x.
10. Wet level sand with 2000 grit. Dry 24 hours.
11. Thin body layering. Dry 24 hours. Repeat 3x.
12. Wet level sand with 3000 grit. Dry 24 hours.
13. Final glaze coat with 50:50 Tru Oil and mineral spirits. Let cure for 1 month minimum.
14. Hand polish with Meguiars #2 Fine Cut Cleaner
15. Hand polish with Meguiars #9 Swirl Remover
16. Hand polish with Meguiars #7 Show Car Glaze
SAO
1. Dry sand from 60 to 600 grit.
2. Seal coat 1. Dry 24 hours.
3. Seal coat 2. Dry 24 hours.
4. Seal coat 3. Dry 24 hours.
5. Wet sand pore filling with 400 grit. Dry 24 hours.
6. Wet sand pore filling with 600 grit. Dry 24 hours.
7. Wet sand pore filling with 1000 grit. Dry 24 hours.
8. Wet sand pore filling with 1500 grit. Dry 24 hours.
9. Wet sand surface smoothing with 2000 grit. Dry 24 hours.
10. Wet sand surface smoothing with 3000 grit. Dry 24 hours.
11. Thin body layering. Dry 24 hours. Repeat as needed
12. Wet level sand with 3000 grit if needed. Dry 24 hours.
13. Repeat steps 11 and 12 as many times as desired.
14. Final glaze coat with 50:50 Tru Oil and mineral spirits. Let cure for 1 month minimum.
15. Hand polish with Meguiars #2 Fine Cut Cleaner
16. Hand polish with Meguiars #9 Swirl Remover
17. Hand polish with Meguiars #7 Show Car Glaze
3 Likes
Bit of a quick update. I am still in the process of working on the finish, which is taking way longer than I expected. The high heat and humidity recently has really slowed down the curing process for each layer considerably, even with the very thin layers being applied. On the dou, I could do two layers per day easily, but now I am lucky to get one layer every 24 hours. The back of the sao (with the bubinga and mahogany stripe) along with the saruo are finishing absolutely beautifully. The tenjin is finishing mostly fine, but the camatillo fingerboard is very, very difficult. When I started, I should have wiped down the camatillo thoroughly with acetone and immediately applied a sealing layer due to the high oil content of the wood, which is really interfering with the finishing. Even now with numerous layers on it, it is building really weird compared to the other parts, and has been incredibly frustrating.
I also made a horrible mistake of turning on our old floor fan and trying to blow air across the sao while it dried the other night. About 30 seconds in, and it looked like a carpet with all the dust and cat hair that stuck to the surface. I managed to brush it off, and apply a new layer the next day, but it’s about time that I need to do a level sanding of the whole thing before building up again. 3-4 layers on, level sand back, and keep repeating until I am happy. Finishing is one of those things though that you never are fully happy with, but I think a couple of more sessions will be good enough. I am really, really itching to start playing again! So much so that I have gotten my first shamisen back into useable condition. Despite it being a rather lousy instrument itself, it allows me to start practicing again while I finish up Masamune.
The sao is also way, way slower than the dou just because it is so much more complex in shape. Originally, I was alternating between finishing the top and the back, but I got it set up now on a portable clothing hanger to finish the whole thing at once. This has cut down the time, but I still have a ways to go.
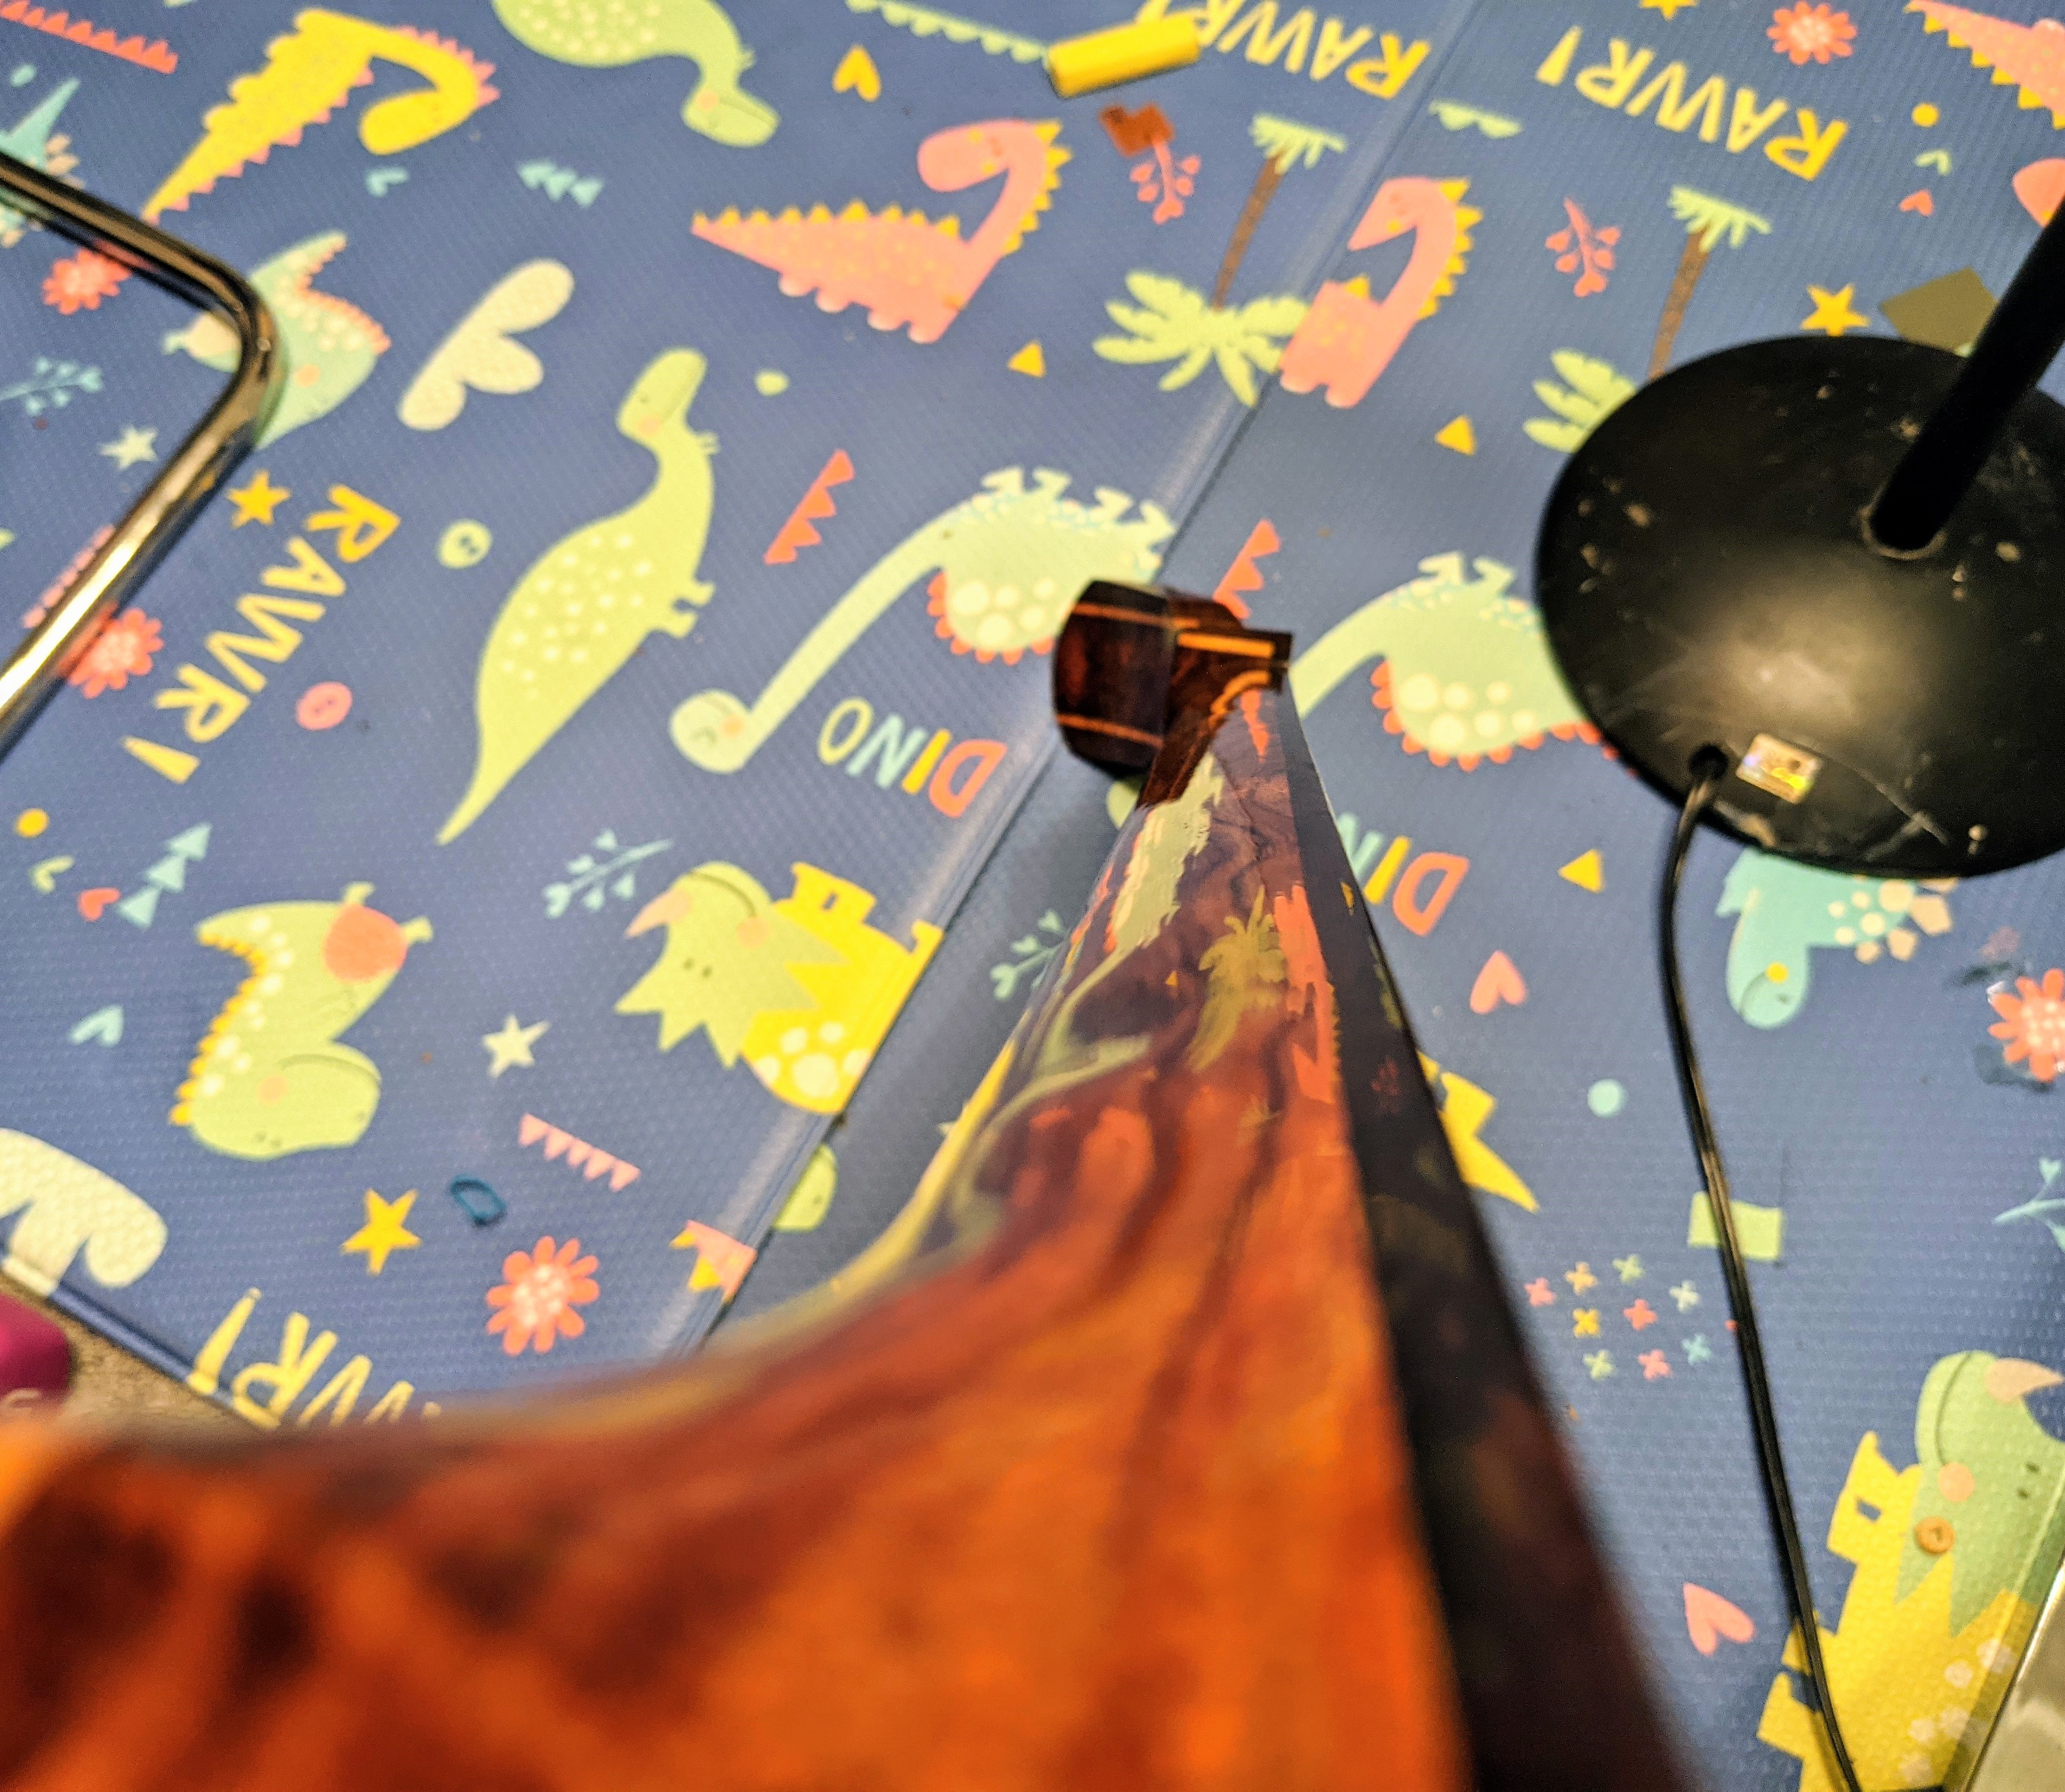
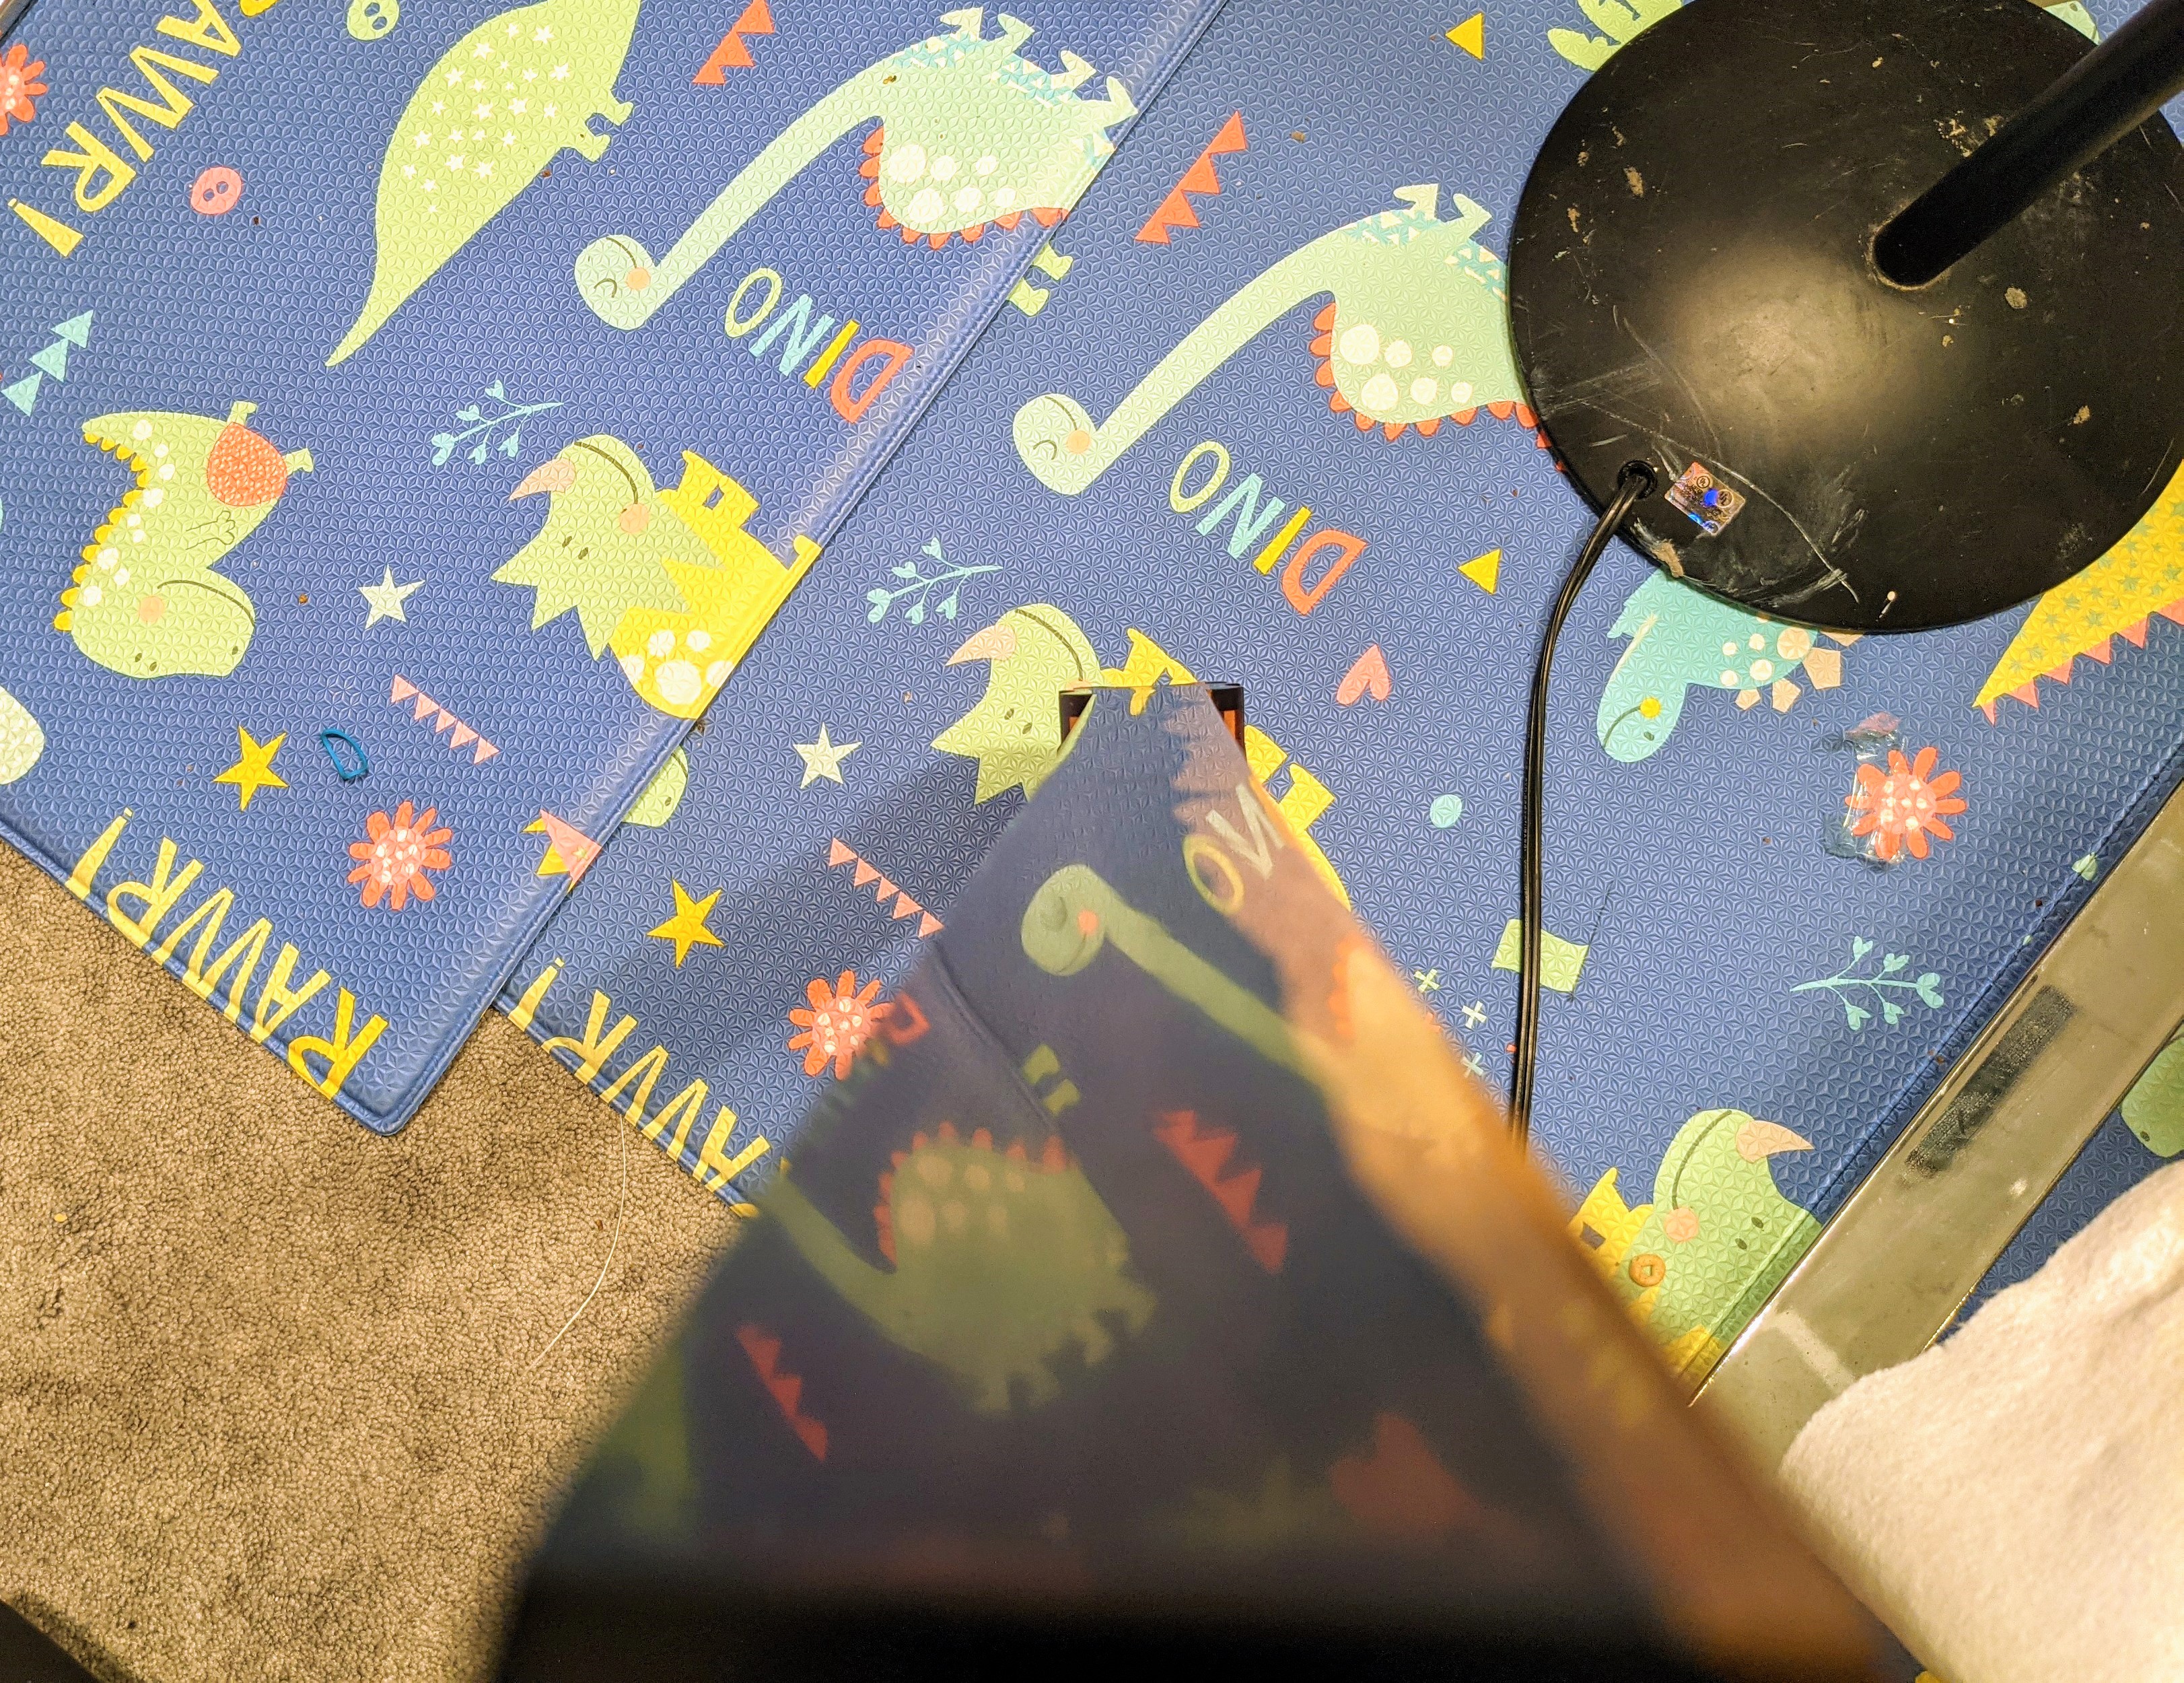
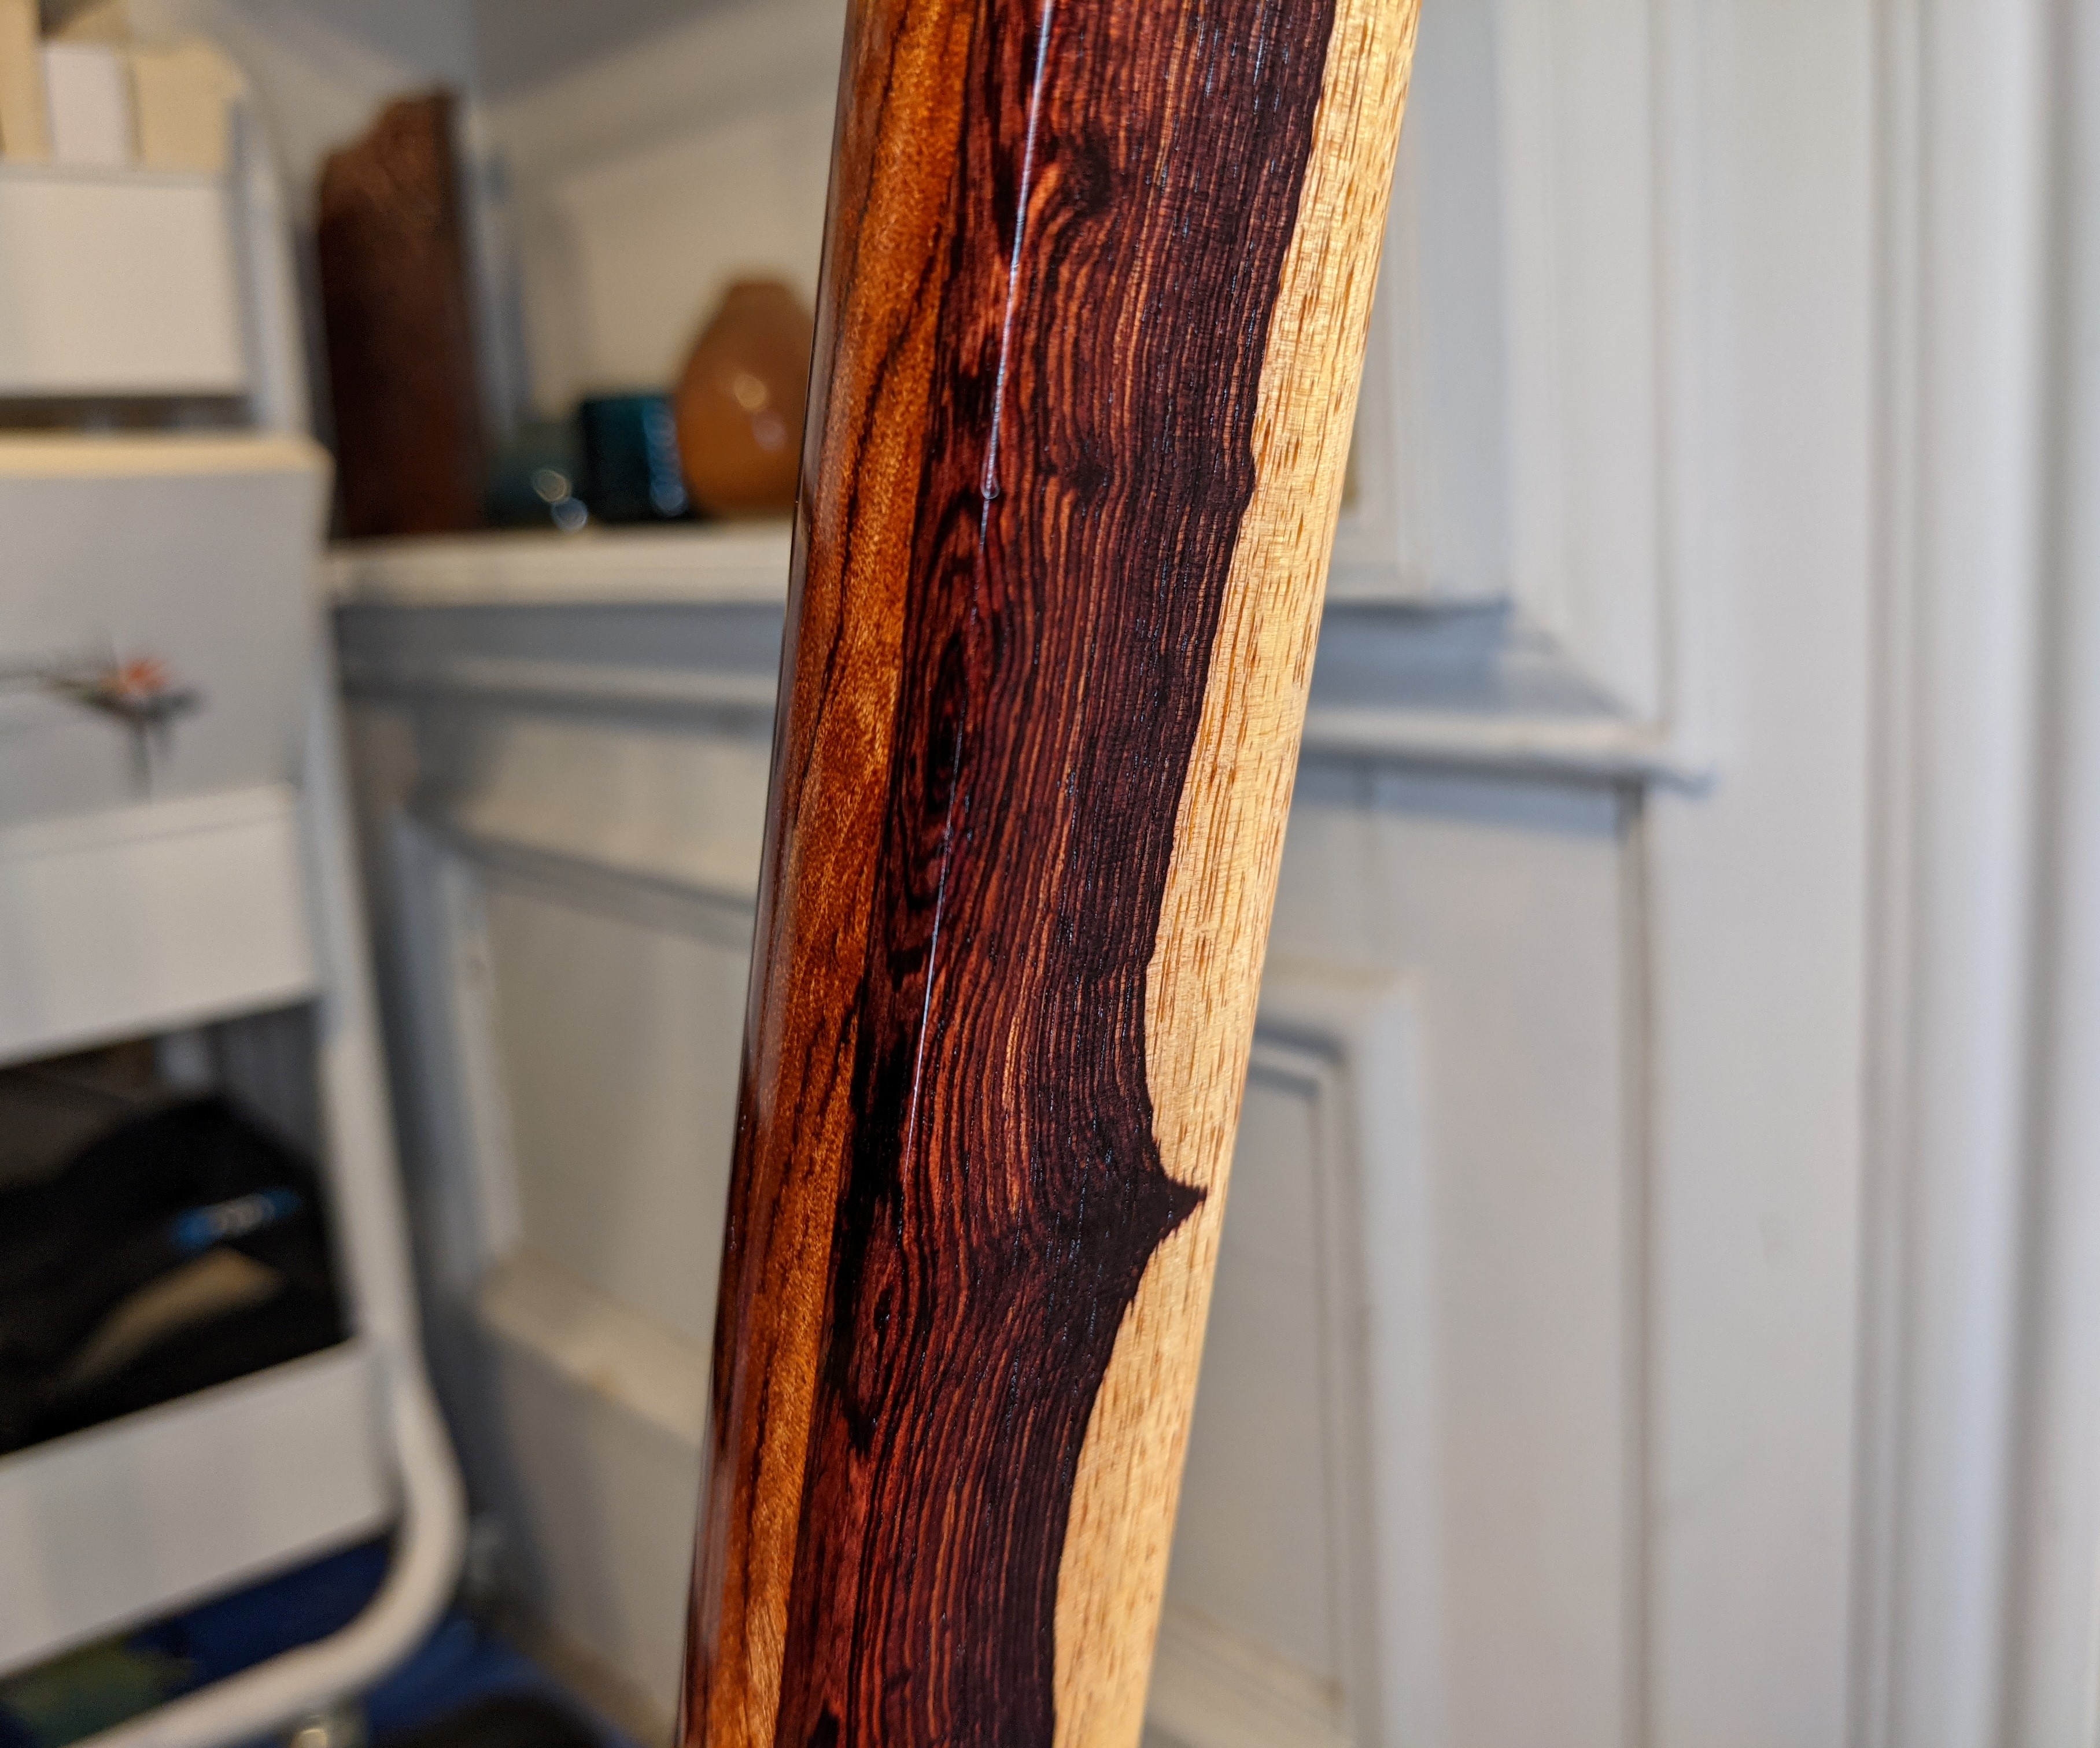
Here are a couple of pictures as reference of the level of surface preparation I have done prior to actually starting the finishing process. I am already well past this stage, and will post additional photos later, though it is really hard to take good pictures to show off the color and polish. Here we can see the sao after dry sanding, applying the seal coats, and wet sanding to 3000 grit. Straight on, its not very special.


From a glancing angle however, you can see just how smooth the initial surface is before even starting to build up the actual finish layers. The surface at this point after wet sanding to 3000 grit is like glass.
4 Likes
Michael this is just gorgeous. I am in awe of your craftsmanship and woodworking skills. I’m not sure if I’m more impatient to see the finished photos or to hear this beauty played.
1 Like
Thanks Brian, I really appreciate it! The impatience is really getting to me too, I feel like I’m going to go nuts waiting for this thing to be done. I haven’t been involved in shamisen for years, but just this past year that spark has been reignited into a blaze, and I really want to start playing again, and not only just dabble around with it, but genuinely build up proper skill. I’ve never owned a legit tsugaru shamisen, or even heard one in real life, so being so close with this build is really burning at me. I still cannot say it is a flawless build by any stretch, but I can’t wait to finally see it all together, and even more, start unlocking its voice!
2 Likes
Well, another massive setback in the finishing process. Unfortunately, this was probably for the best. The purple Camatillo fingerboard just wasn’t taking and building a uniform finish, no matter what I tried. I finally decided to wipe it down with acetone to clear out as much of the natural oils and dyes as possible. The paper towels looked like they were dipped in deep purple wine after! I wiped it all the way back to practically the bare wood. The purple dyes bled very heavily into the cream colored sapwood, which also had to be carefully wiped down with acetone to remove the purple. The thing with wiping woods like this back with acetone is that you will always wipe off color, no matter how many times you do it. The important part is to wipe it enough to remove the surface oils and quickly put on a seal coat, which is what I did after.
The first seal coat looks significantly more uniform now, so I think it worked, but I’m going to wait until I start building up the finish again to verify. It’s still definitely not perfect like how the bubinga is finishing, but it’s the best I can do at this point. I should have wiped the surface down right after dry sanding and applied the seal coat immediately after, but I never thought this wood would be this insane to finish. For anyone who decides to also use very oily rosewoods, take note - this initial surface prep could be the difference between success and failure with the finish.
At this point, this will push back the finishing process further yet again. I have to essentially start over on building up the finish on the fingerboard, since the acetone removed the finish I built up prior. I’m looking at September now to maybe having a chance to start play this thing. It’s incredibly frustrating to be so close and yet nowhere near being able to play this shamisen yet. While my old one will work for practice, the sound quality and feel makes it difficult to want to practice. Finishing has really become a test of mental endurance now.
1 Like
I think things are back on track again. Just applied the next layer after last night’s level sanding, and this time I am actually happy about how it came out. Been trying a few different cotton fabrics for the pad material and found one that I feel works well and is giving me good results. They are all 100% cotton, and are older, used fabrics that have gone through the wash several times, but they still behave a bit differently. Thickness and thread count also probably contributes as well.
The new layer also seems to have built onto the camatillo fingerboard. Still feels different than when padding on finish compared to the rest of the sao, with a bit of extra resistance when wiping it on, but overall I think it looks much better than before. Now that I think I got it down a bit better, I should be able to just keep padding on layers and level sanding to build it up.
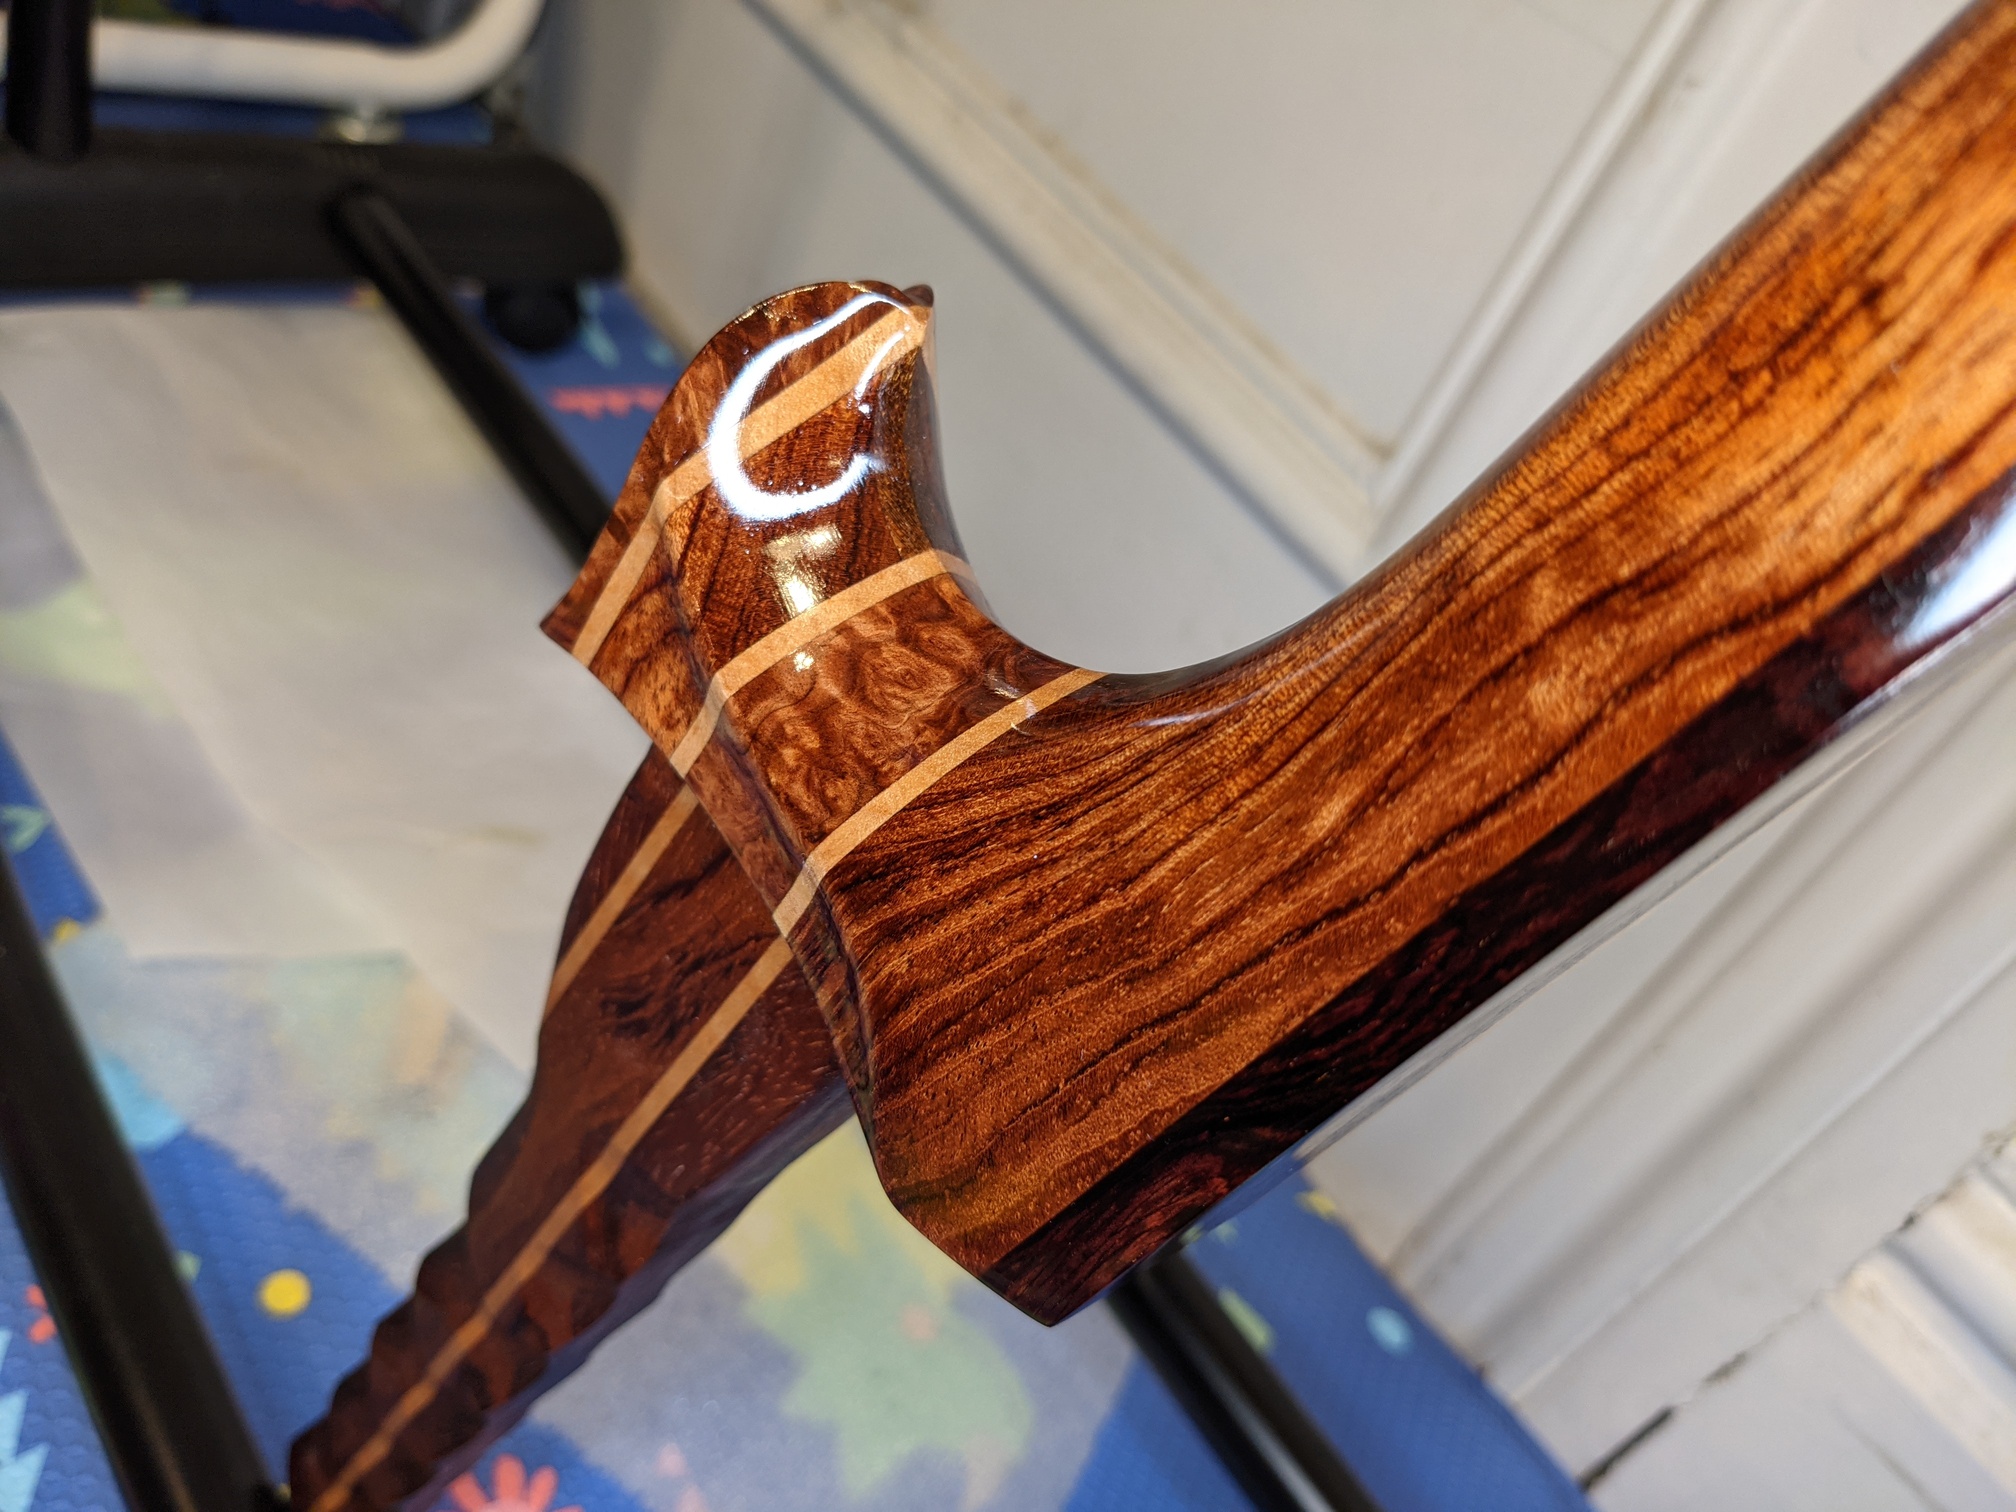
I also got around to taking some additional pictures of how it is coming out so far. It is still really difficult to capture it without proper lighting, but you can probably get the idea (I’m going to get my younger brother who does photography to take some really pro shots of this thing when its all done though!) This is a heck of a long process, to an almost obsessive level, but I think it will be worth it in the end!
6 Likes
What can I say but beautiful!
Oh my, just reading through the time it took to dry between the coatings and sanding + the weather working against you… Now that´s what I call patience! I know that I would be flipping 5min into the first coat drying (Is it dry yet? Is it dry yet?) 
1 Like
Yeah, it has been a really trying process on my patience, and I’m actually very impatient when it comes to my own personal projects. It is really tempting to try and rush through it. I could also have just done a very simple wiped satin finish and have been done with it already. At this point though, I’ve got no choice but to go one layer at a time. I’ve waited 5 years for this thing, might as well wait another couple of months to get it right!
1 Like
Well, I think I’ve finally come to a point where I am ok stopping at on the finish. Originally, I was going to do level sanding followed by 4 more coats, then a final level sanding and the glaze coat. I did the first level sanding the other night, and putting on the
first new coat after I’m actually happy with how it came out. It definitely just feels so much nicer than any prior layers, and while I could keep building it up, I have also learned throughout this whole process that sometimes you just gotta know when to stop. I could continue on it, but again this process isn’t something set in stone, and is always changing based on how it goes. It’s not perfect, but I think it’s at a point where I am happy with and would rather not risk messing it up again.
Now that this is set, I have to wait a month for it to fully cure and harden before I can do the final gloss hand buff, then I can install the hardware. While the sao is curing, I can start prepping for making the koma, kamigoma, and finalizing what I want to do for the itomaki. I’ll probably also start working on the design for a nice bachi to go with this shamisen as well. More updates to come as I finalize these last pieces!
5 Likes
Bit of an update on the build. It’s been almost a month now, and the finish on the sao is about cured, so I should actually be good to start installing the hardware this weekend! I also received everything for the special koma and kamigoma, so I will begin shaping them as well.
Also, last week I finally finished up the design for the itomaki. I have been playing around with sculpting the design for over a year now, and I finally have something that I really like. I am super excited about this design, and don’t think I have ever seen itomaki quite like this. Unfortunately, it’s too far too complex for me to actually carve myself, and will need some extra precision to pull off, so I have been reaching out to a number of specialty wood turning shops with CNC wood lathe capabilities to see if I could get design made. I haven’t had much luck yet, but hopefully I will find a way to get this design done. At this point, the itomaki are the bottleneck for fully completing the shamisen. If I can confirm someone who can do it, then hopefully I can share a preview of the design soon, otherwise I’ll have to figure out some alternatives.
2 Likes
It’s been a while since I’ve posted some pictures, so here is a look at what’s to come! I just finished the final polishing the other night, as well as installing the zagane and fitting the sao to the dou together for the very first time. Unfortunately, during polishing I burned through the finish in one small area on the fingerboard near the dou, but I was able to very easily touch it up with Tru Oil (once it’s applied, maintenance and touch ups are fairly straightforward.)
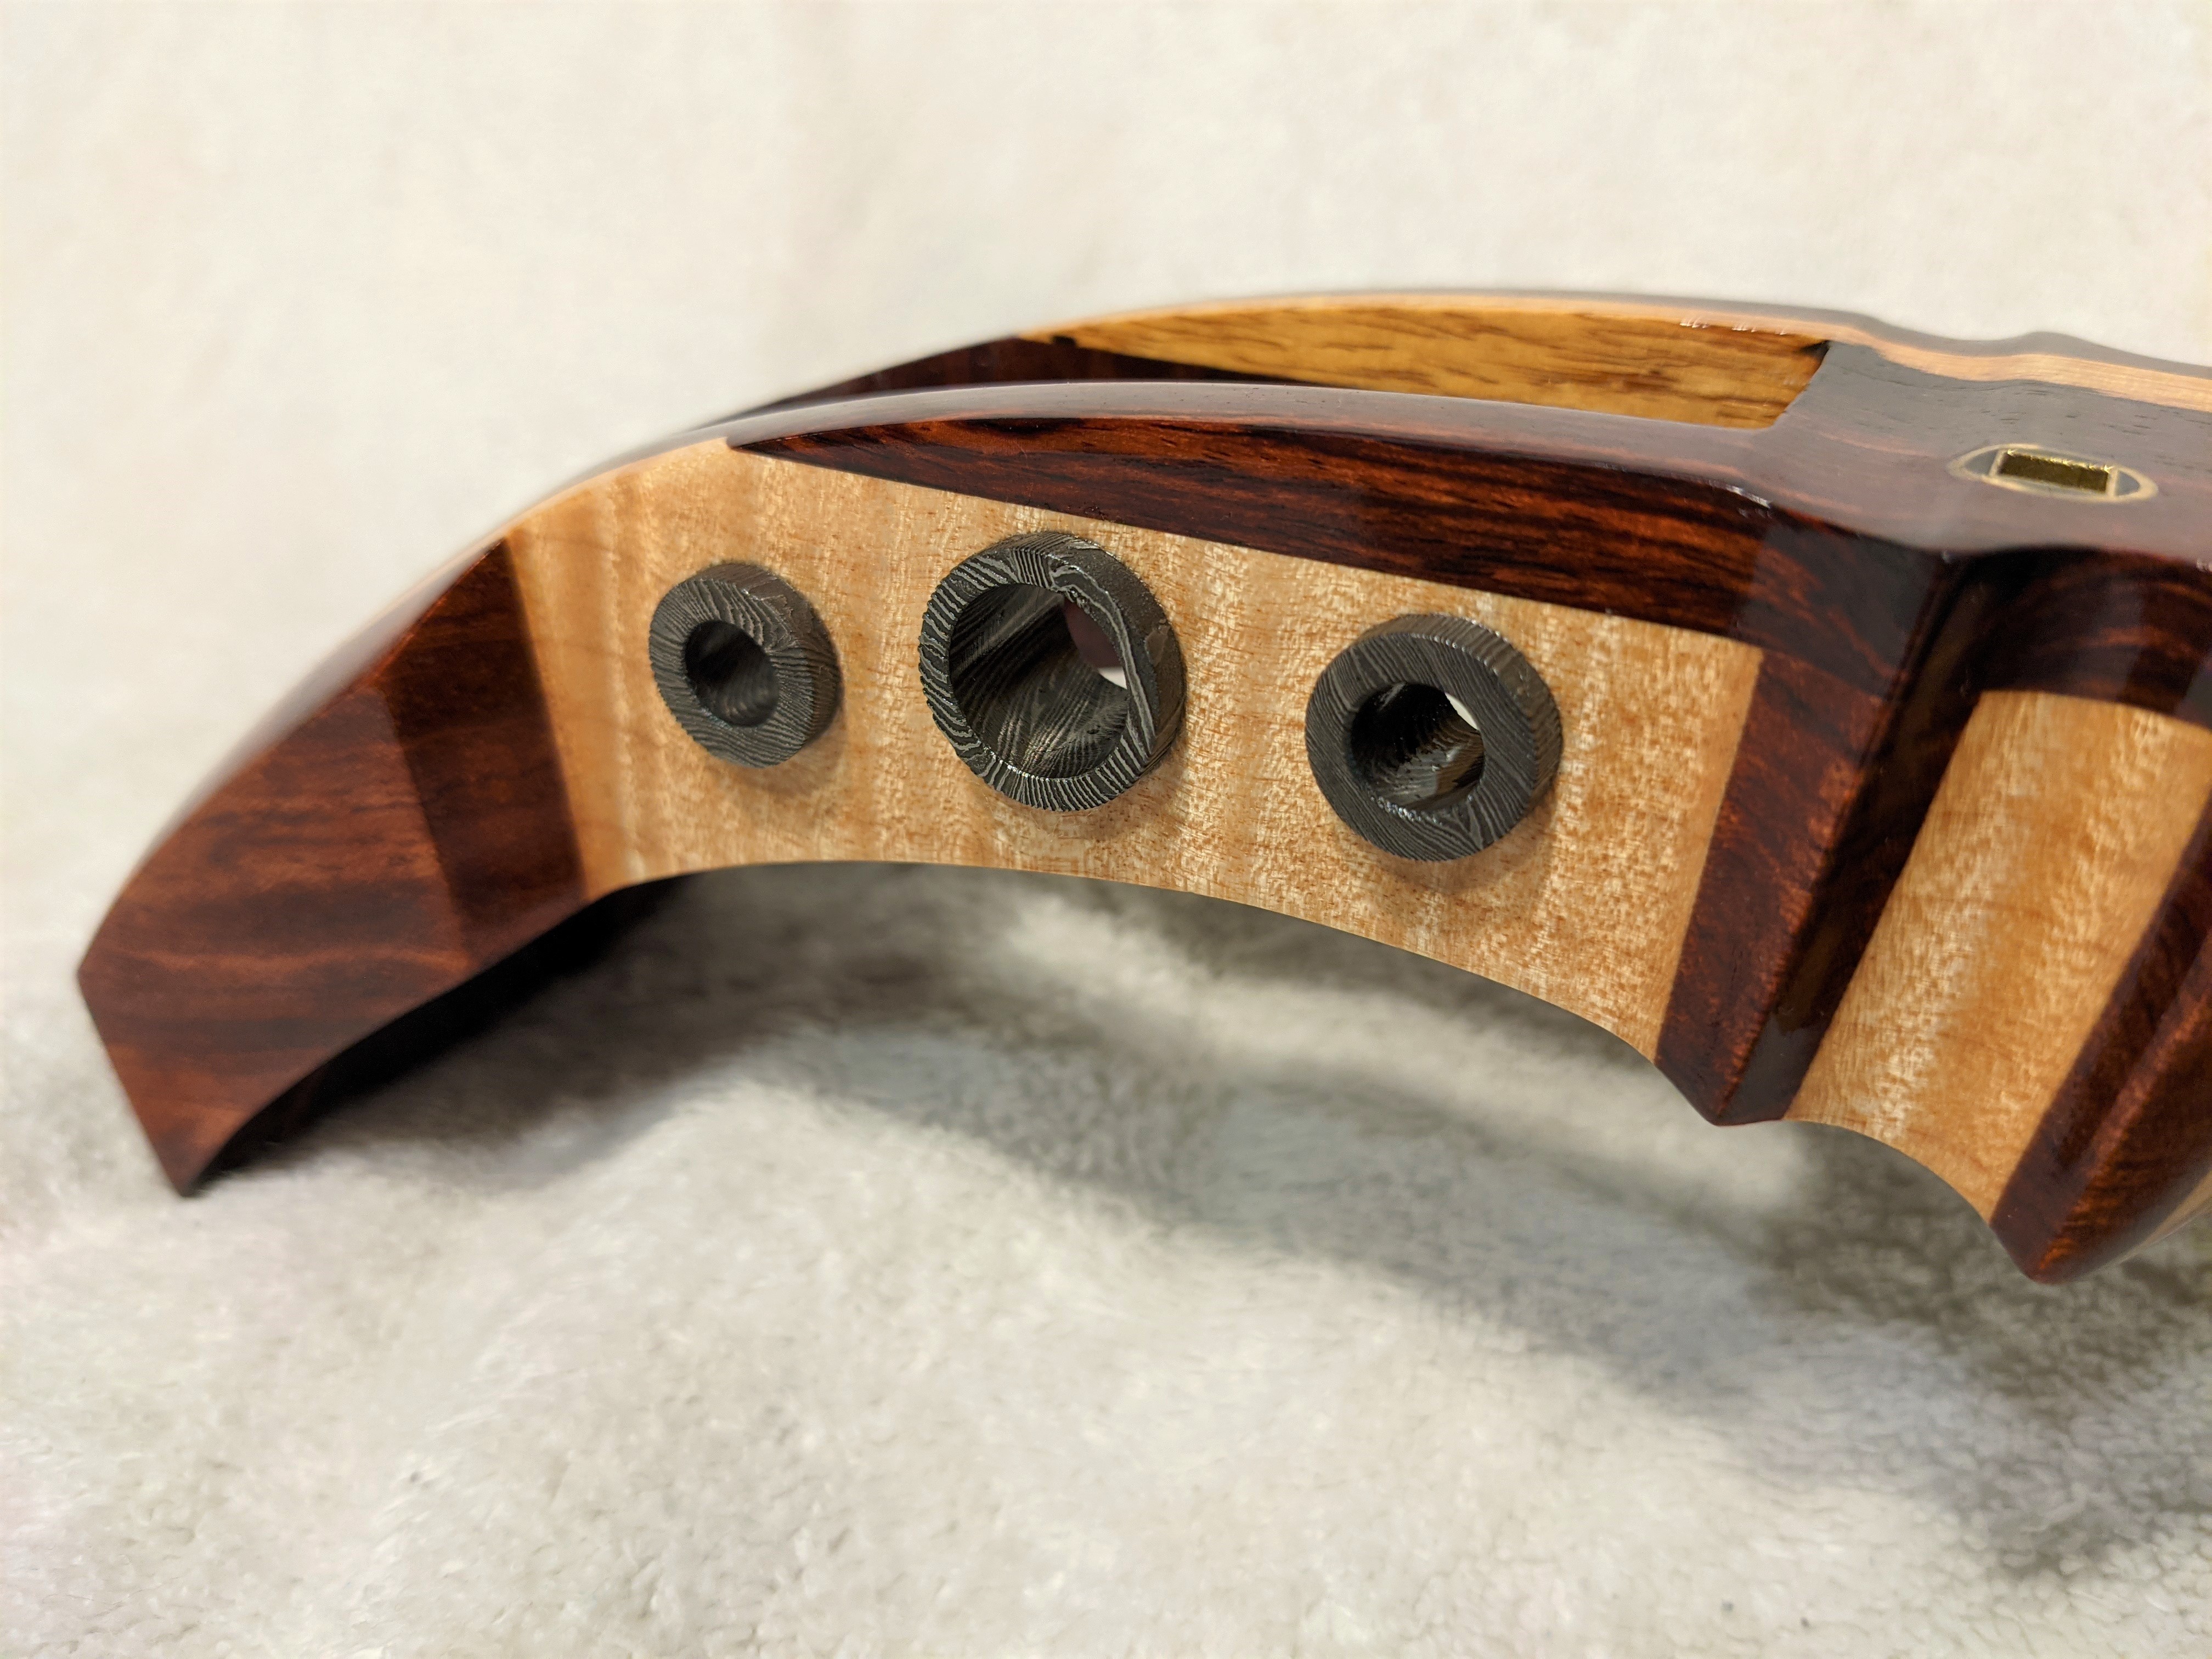
First, a look at the zagane, which have been fitted and glued in. I’ve been waiting a long time to get to this point, and can’t believe it’s finally here. Getting these designed and made from pattern welded steel have been a major challenge, but it has been absolutely worth it.

Next, look at the matching rindou through the dou:

Finally, some shots of the sao in the dou! It has been a very long and absolutely brutal process, between crafting Masamune and the finishing, but looking at it together like this for the first time as a nearly complete shamisen, I couldn’t be happier.
At this point, the last bits of the build will be shaping and gluing the kamigoma, doing some minor adjustments to the sawari elevator inner cage, and getting the itomaki made. The itomaki are still giving me issues, and are turning out to be a challenge like the hardware. Out of 5 specialty woodshops I contacted, only one has provided me with a quote and can do it so far, and it is far, far more than I would like to spend for itomaki. Turns out the spiral taper I designed is quite complex and challenging to do. I still have to figure out what I will end up doing, but Masamune is finally almost there!
5 Likes
Spent about 4 hours last night working on it, but I finally finished crafting and installing the kamigoma! Like everything else on this build, I wanted something a bit different and unique from standard shamisen, as well as adding more of a personalized touch to it. The kamigoma is made from solid 14k rose gold, crafted from a 3mm x 1mm x 30mm rectangular jewelry wire stock. I chose rose gold to match my wife’s wedding ring, which I also designed myself.
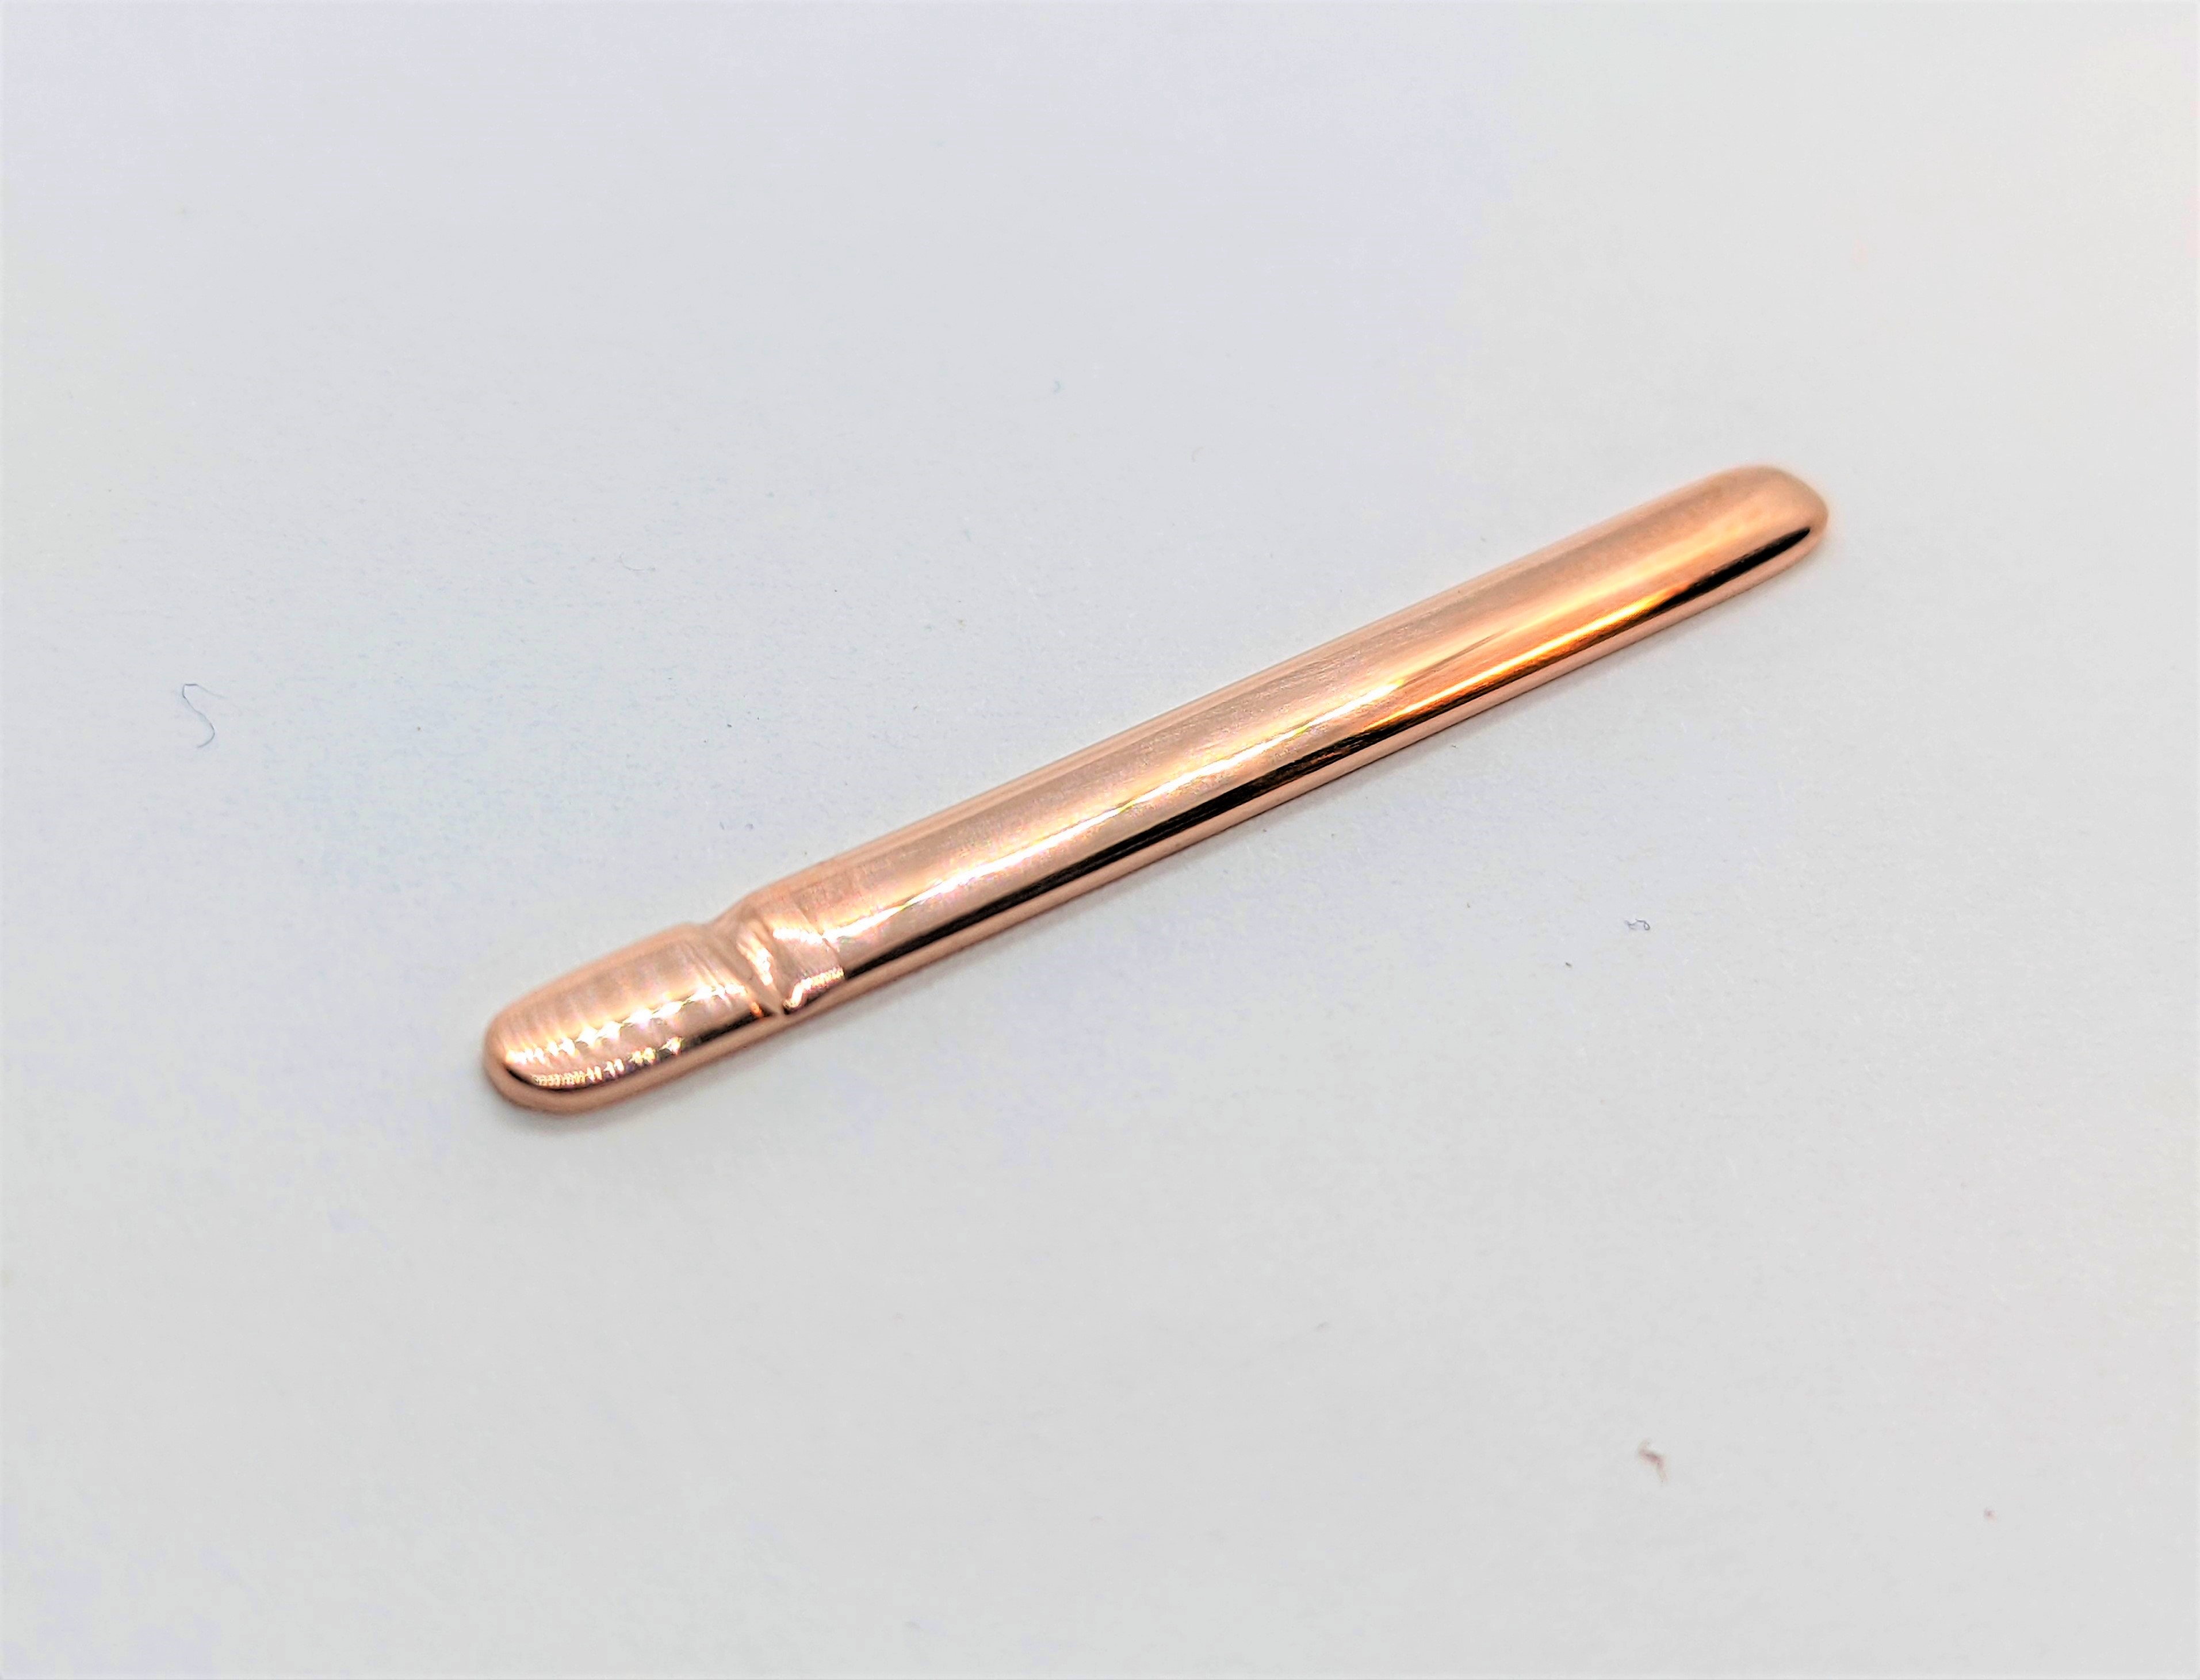
Here is a shot of the Masamune kamigoma next to a traditional one from Bachido. I made mine a bit longer for aesthetic preferences. It is also very slightly thinner, giving a bit lower action.

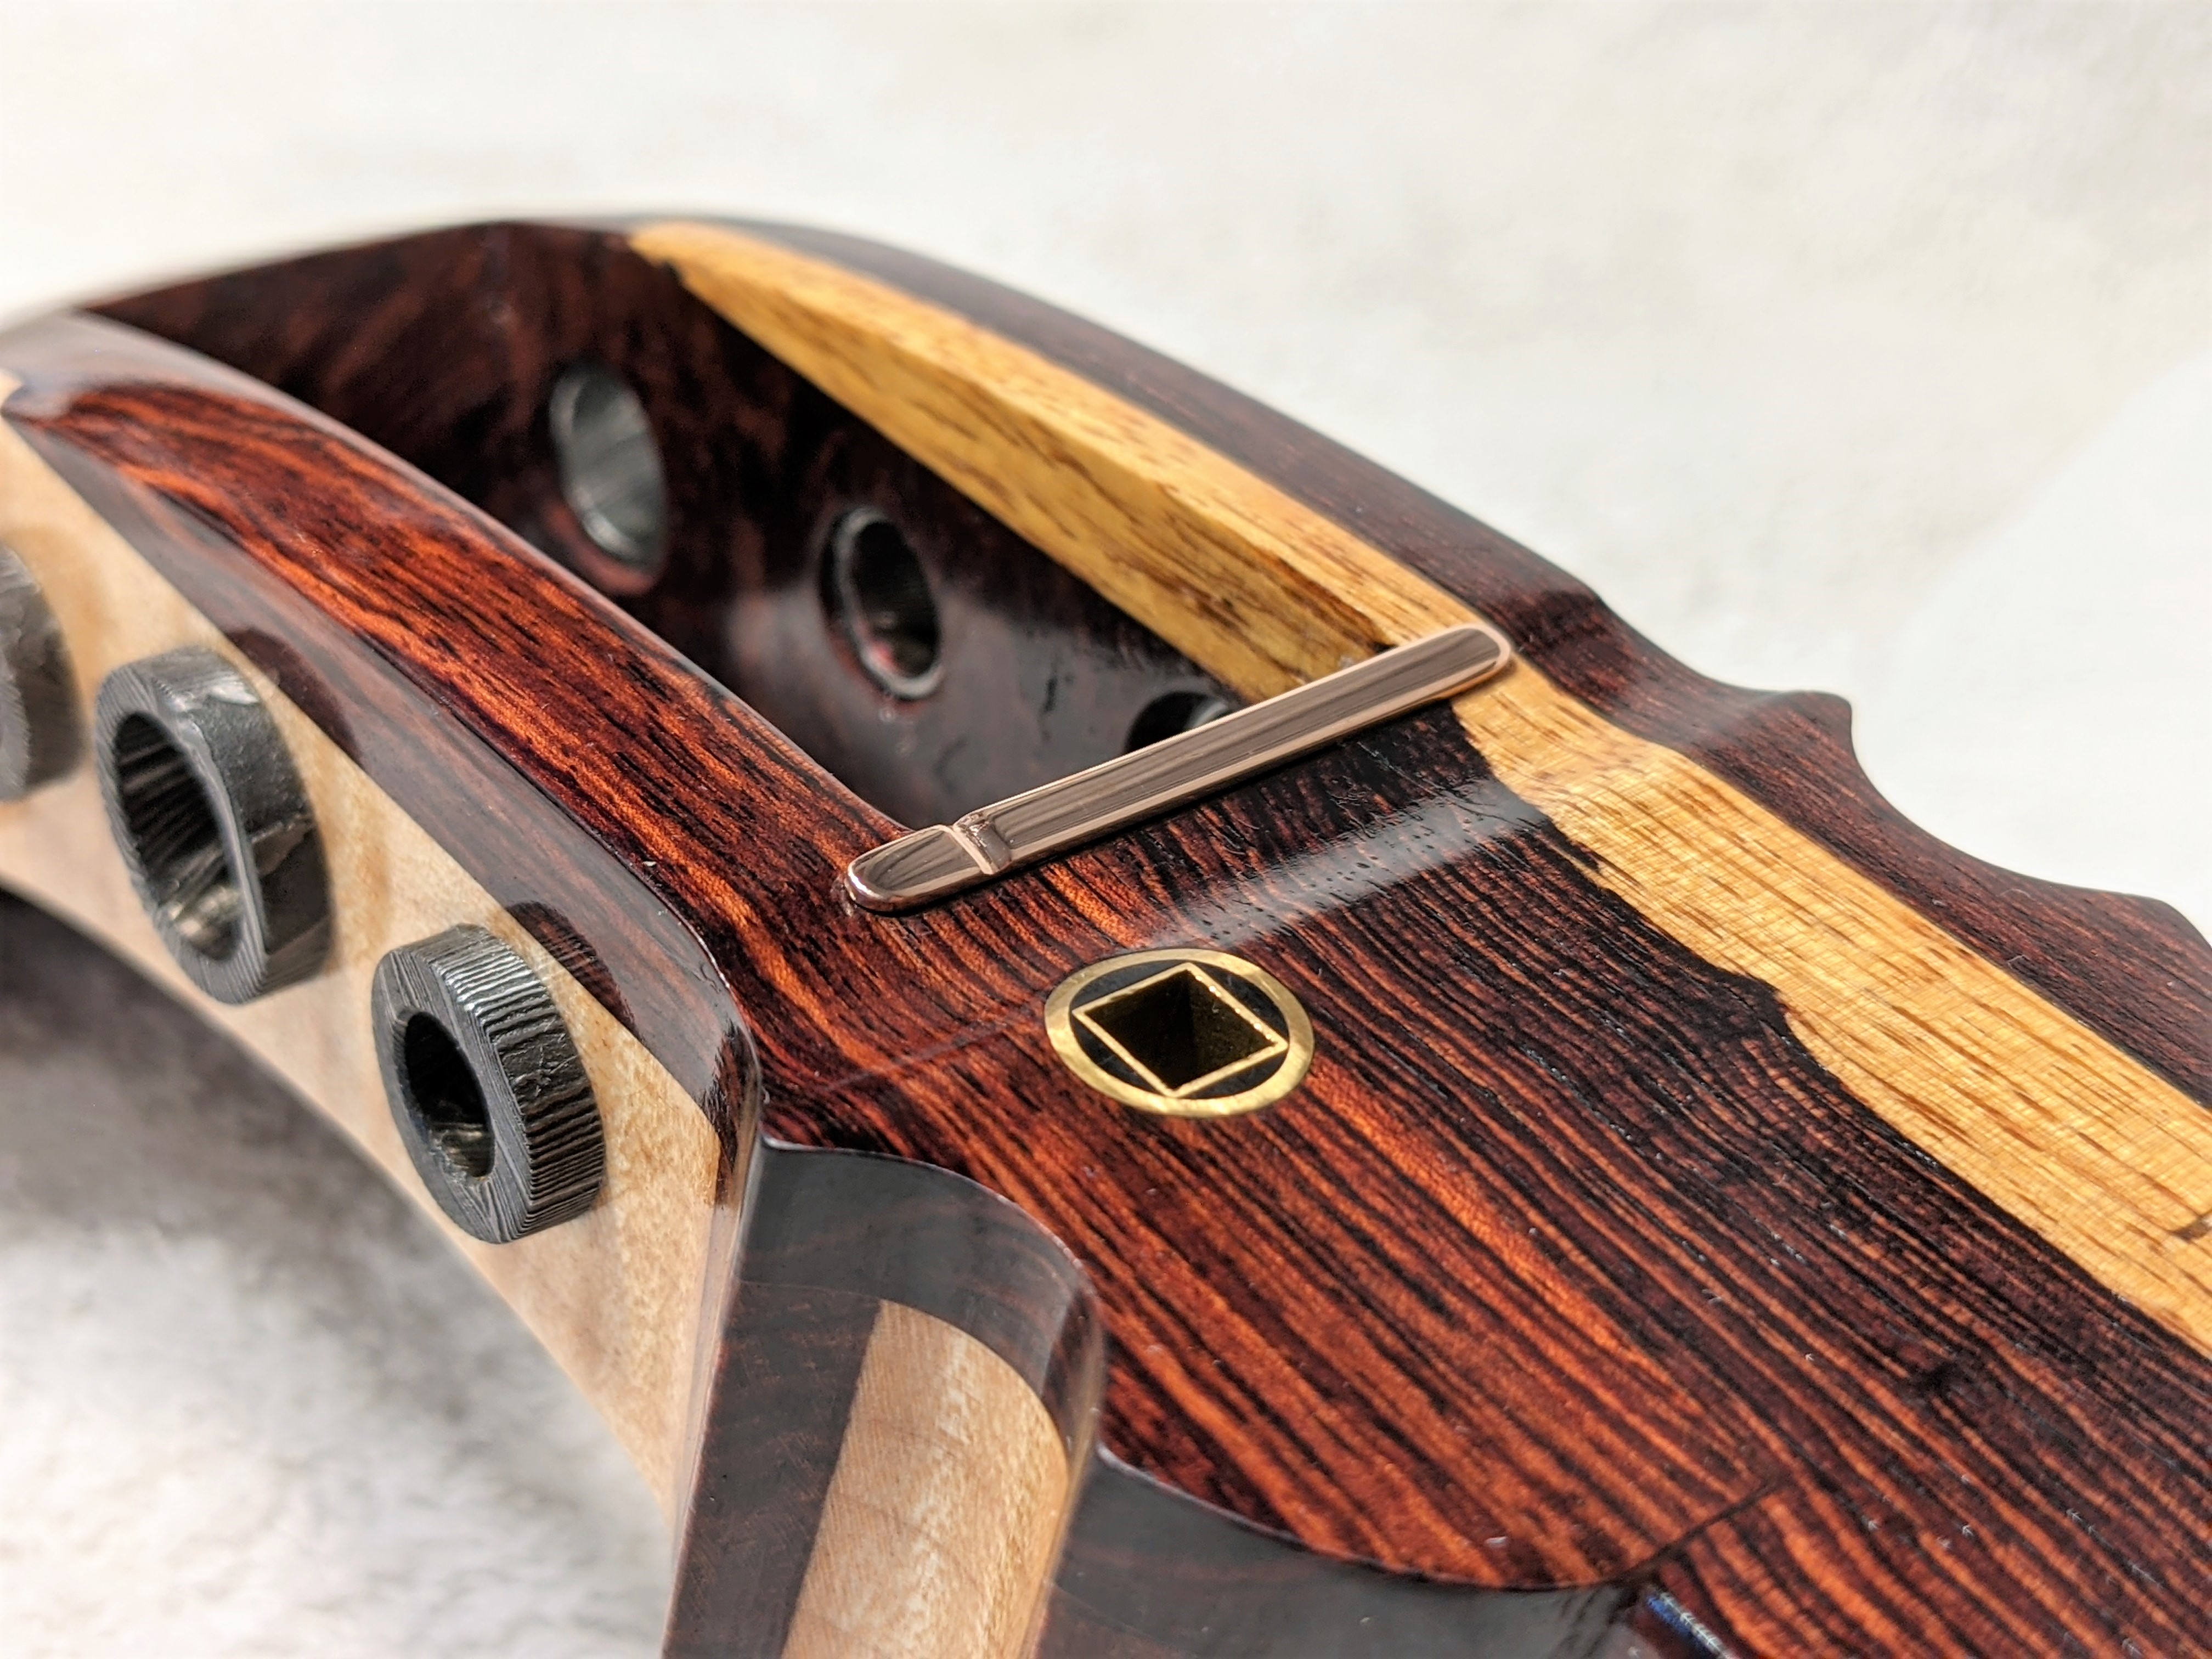
Finally, here is a shot of the kamigoma glued to the tenjin. The notch for the ichi no ito is exactly centered on the sawari. The rose gold gives a bit of a soft contrast against the deeper purple camatillo fingerboard.
The koma will also match the kamigoma theme. I will be using a piece of deep purple camatillo, with a matching rose gold saddle. I have all the materials in to make the koma, so I will probably start working on that in the next few days.
All that is left on the build is to make some final adjustments on the sawari elevator, tie the neo, and get the itomaki made. While I am working out the final details on the itomaki, I will be getting a set of itomaki 3D printed in the meantime since the real pegs will take some time, which will allow me to start playing immediately. I’ve got some 550 paracord in multiple different colors coming in over the next few days to see what will look good for the neo. I expect to at least be able to finally start playing Masamune as early as next week! I can’t wait to hear what it will sound like!
7 Likes